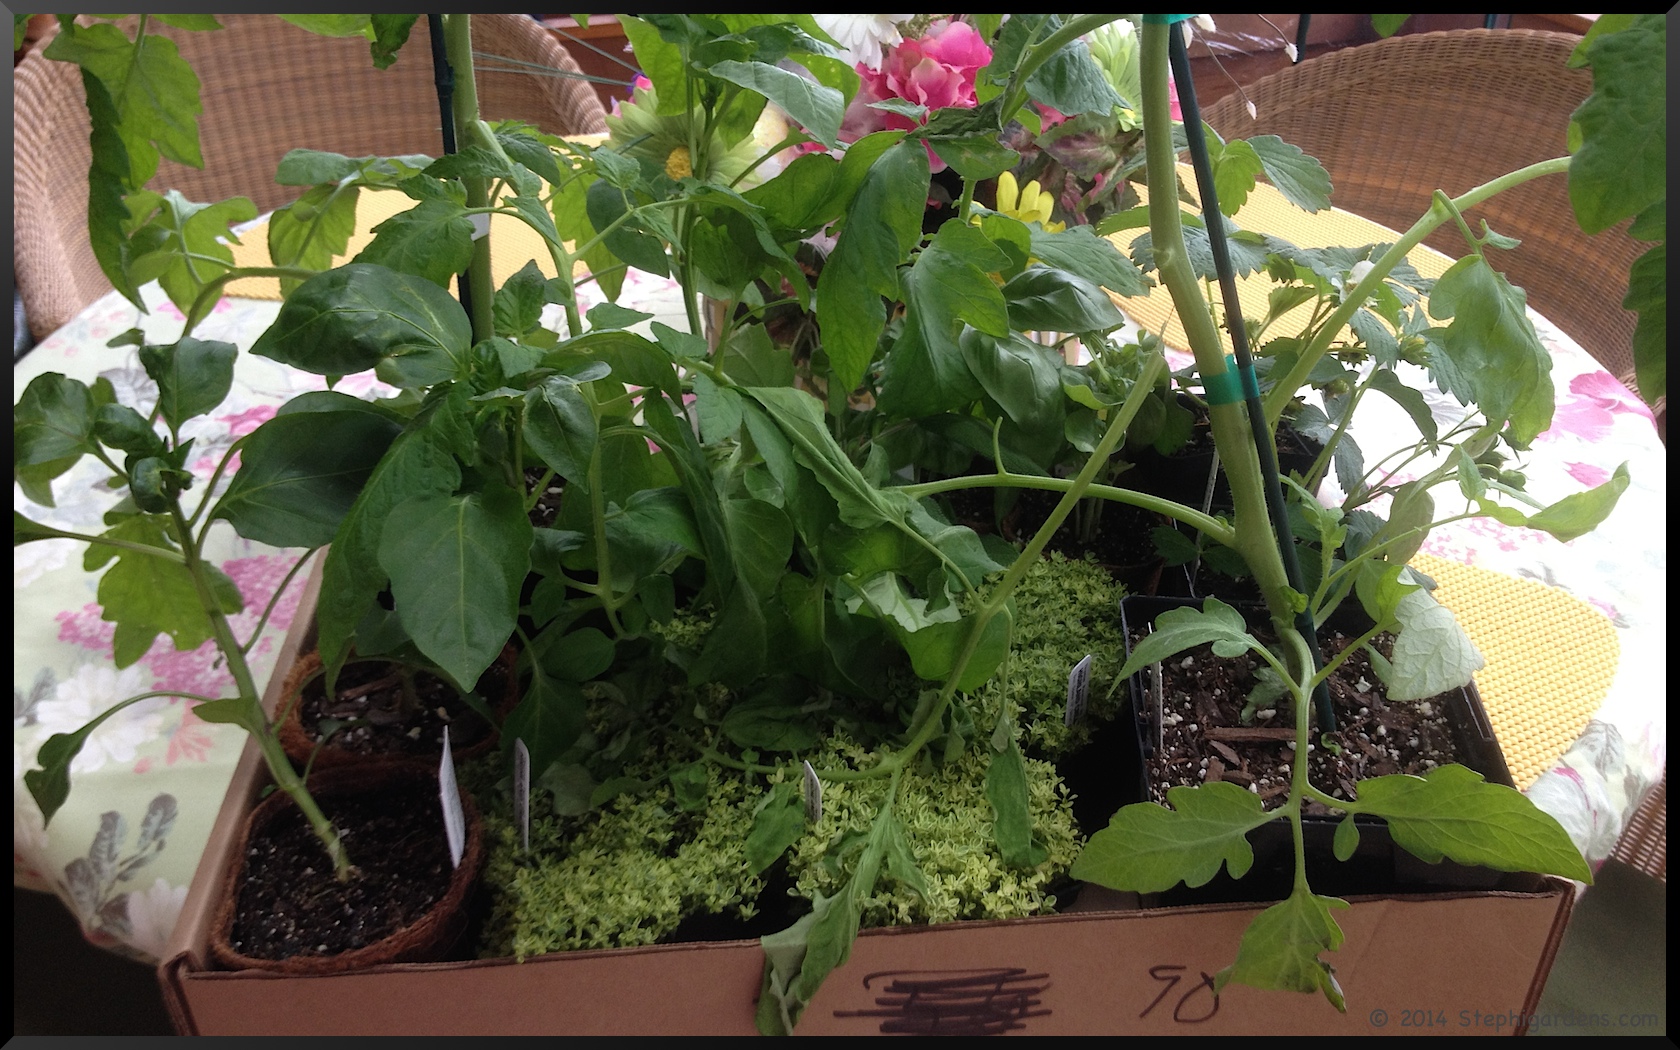
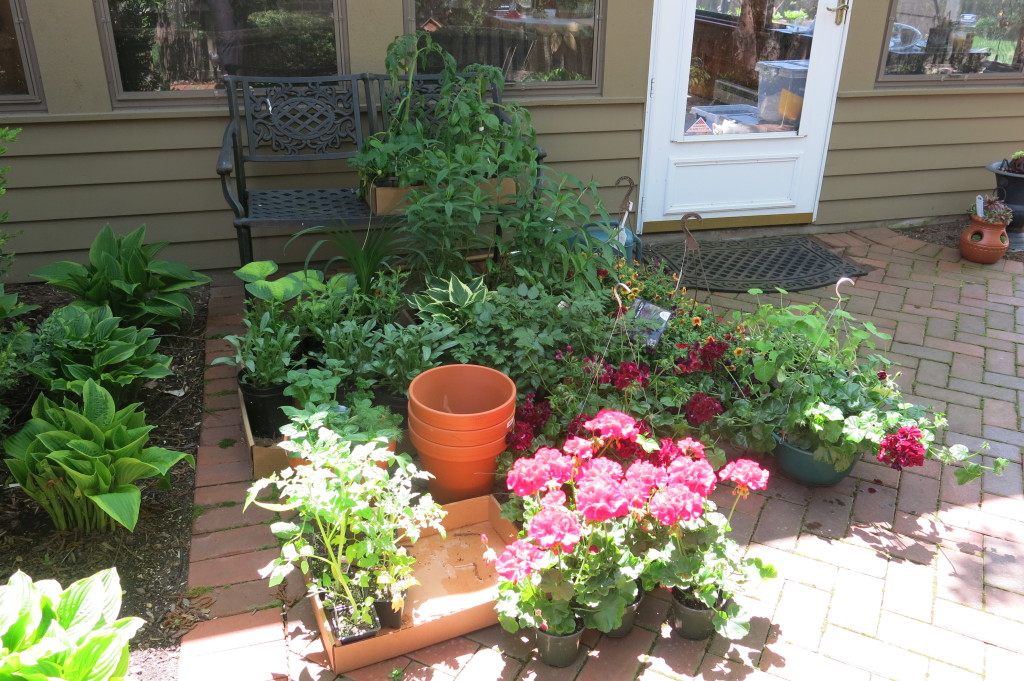
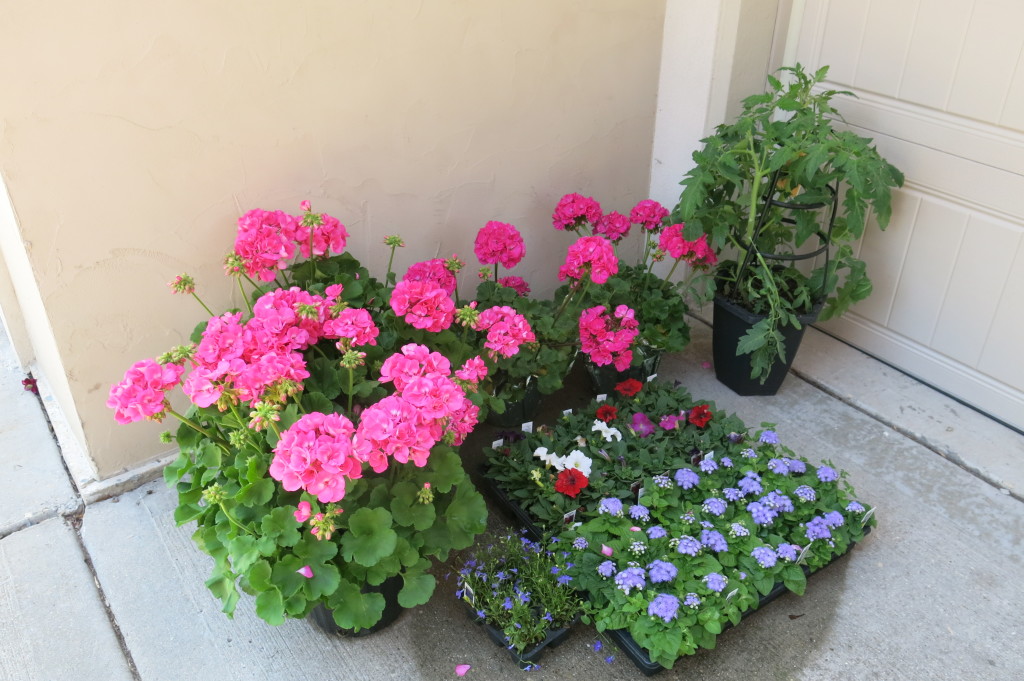
The race is on! Every year, I start to start seedlings and buy plants from various plant sales and trips to the nursery in anticipation of finally reaching that magical “last frost date” when I can finally start planting. Until then, the seedlings grow in self watering containers to reduce my ability to let them dry out (See Starting My Seedlings Indoors). The new annuals, perennials and plants for the front pots sit patiently in front of the garage, or in sheltered area on the back patio, just waiting for the weather to be good enough and me to have enough time to get all the new plants planted.
At this point the clock starts ticking, and my family starts asking, “How long are they going to sit there?” or, “Are they going to die there like last year?” Both are unfortunately valid questions. My best intentions are to get the new plants in the ground right away, but especially this time of year life usually intrudes and the seedlings can get leggy and tangled, and the new plants can be out there 3 weeks or so. In that case I admit, I have on occasion been a bit careless with the watering. I’ve learned to be careful of plants left in a sunny spot, or trays tucked under the eaves. Thus, the valid question of survival. Every year I’ve become better and this year so far so good. I am even babysitting some plants for a friend and a tomato plant that will go to my daughter’s apartment porch. So only a little extra pressure this year.
I’m hoping to get everything in this weekend, weather and track meets permitting.
I was getting coffee and picking up my bakery bread order last weekend at the local coffee shop. Next to the register was this bag of coffee grounds, just inviting me to take it home for the garden.
While we’re not huge coffee drinkers, we drink enough that there are a few handfuls of grounds headed to the the trash each week. Between that and the bag of grounds I brought home with me, I thought I should look into using grounds in the garden to see if I can help the environment and my garden at the same time. It seems that it’s not quite as simple as sprinkling it in the garden to get results. Of course there’s the anecdotes that it’s the magic potion that turns a so-so garden into a breathtaking place. But, from a more scientific point of view, that may not always be the case.
Here’s what I’ve learned:
Lab tests show that the grounds contain useful amounts of phosphorus and potassium, are a low-level source of nitrogen (about the same as grass clippings) and also contain minor amounts of calcium, magnesium, copper, and other trace minerals, carbohydrates, sugars, some vitamins, and some caffeine.
Coffee is acidic, but coffee grounds are closer to neutral so not really that useful for acid loving plants like azaleas
They are great in the compost bin, both for their nutrient value and their ability to make it “hot”. Add them as part of the “green material” not brown .
People have reported good results adding it to the soil around hostas, roses, and on their lawns. Especially when there is an underlying soil issue, like clay or damaged soil.
Use as transplant fertilizer for tomatoes, squash and leafy vegetables by placing a handful in the transplant hole. Seems to give those young transplants a nutritional boost.
Worms love coffee grounds (in moderation, of course). Use them in soil to attract worms to the garden, or in a worm composter.
Use to make a liquid feeder. Mix grounds with a bucketful of water and leave sit for a day or two to make a nice carmel colored tea to use as a liquid fertilizer.
Grounds placed around the base of plants are a slug deterrent. Seems to be an ant repellent as well.
I didn’t read anything about them being harmful to the garden in reasonable amounts, so I think this year the grounds will be sprinkled in some of the older gardens that could use a little perking up. I’m also planning to use them around my hostas as a slug repellant as they start to do their damage mid-summer. Maybe someday I’ll get a compost pile going and they’ll be a great addition, but that’s not in the cards right now though.
I was recently lucky to travel to Asheville, NC with two wonderful girlfriends that I’ve known since elementary school. We saw the sites, ate great food and relaxed. Here’s some of the things we did on this fabulous girl’s weekend to this great city.
Thursday
Once we arrived, me coming from Greenville Spartanburg Airport and my girlfriends from Charlotte, we checked into our hotel. We decided to go for clean, reasonably priced and convenient, and found the Country Inn and Suites Asheville Mall to fit the bill perfectly. We caught our breath and then headed right out, not wanting to miss a moment of fun. We planned an early dinner at Cúrate Bar de Tapas, a traditional Spanish Tapas Restaurant. Absolutely delicious, wonderful service and decor!! We just kept ordering one delicious plate after another. Highly recommended, be sure to make reservations.
From there, we headed to our first tour, a haunted Asheville trolley tour. While the tour we took is no longer available, you can check out others at Explore Asheville/Haunted Tours.
At dusk, we climbed aboard our open air trolley for a 90 minute tour of the “darker side” of Asheville. Intermixed with an overview tour of Asheville, we were entertained by legendary stories of the spooky and scary and the murder and mayhem, that is part of Asheville’s history. We were thoroughly entertained, and even a bit unnerved by the trip. You can read about many of the haunted stories of Asheville, including the stories associated with the sites below
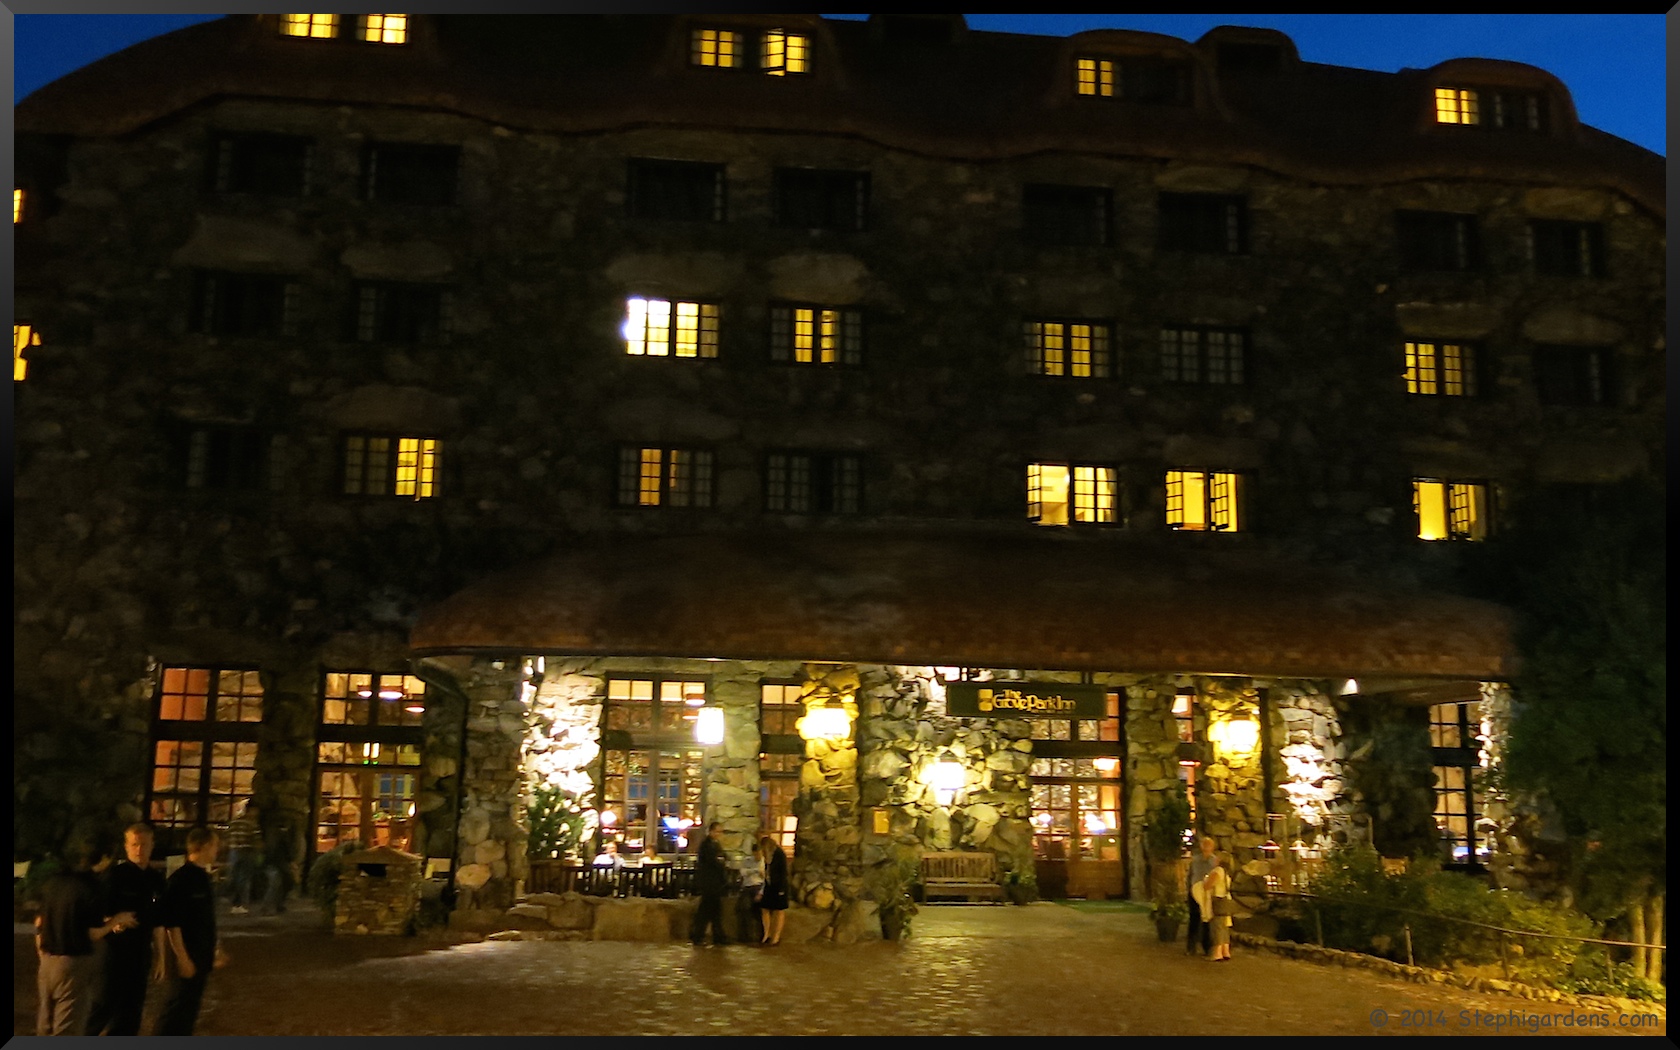
Basilica of St. LawrenceGrove Park InnHelen’s Bridge (photo from WLOS)
Friday
The next morning, we went to one of the best breakfast spot we have ever been to, the Tupelo Honey Cafe in downtown Asheville. Everyone will say it’s the place to go, but this artsy little cafe isn’t touristy at all. Truly a breakfast gem. We arrived a little after the morning rush, so there was no wait. After ordering, their famous biscuits arrived and they, of course, were fabulous. I followed up with a Tupelo Omelet with Maple Peppered Bacon. All of us were full and ready for the day.
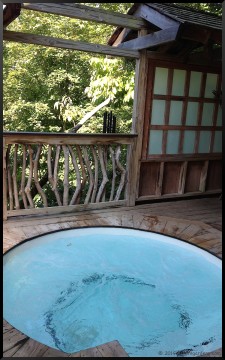
Our next stop was the Shoji Spa for some rejuvenation and relaxation. Shoji Spa is not your typical spa, but instead a secluded, peaceful hideaway offering Japanese style soaking and massage. We weren’t sure what to expect as we drove higher and higher up the mountains south of Asheville. It really wasn’t far, but you felt miles away from civilization. Once we arrived, we knew we had stumbled into something special. We had reserved a decadent sounding soak and massage package. After soaking outdoors in our own private hot tub, complete with Japanese Tea service, our muscles were perfectly relaxed to fully enjoy our massages. Be sure to check their website before making reservation. They have seasonal specials and coupons worth exploring.
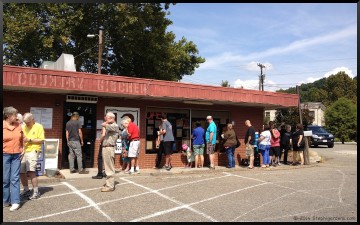
Now that we were rejuvenated and relaxed, we were off to the 12 Bones (River Store) for some famous Asheville BBQ. I was especially looking forward to this since I had been lucky enough to get some of their sauces as a gift, so I already had an inkling as to how yummy this was going to be. 12 Bones is a unique, casual lunch-only experience that usually includes waiting in a line that snakes around the building to order your food at the counter, then sitting either indoors or outside on picnic tables.
But it’s worth the wait. We each got a different BBQ dinner plate that come with 2 sides and cornbread. Since we were on vacation, we topped it off with a piece of pie. We were really hungry! Then we shopped and all went home with a few bottles of BBQ sauce.
We had a little time at this point and went into downtown Asheville to do some shopping. One of our favorites was Mast General Store. We spent quite a while poking around in the store that is a mixture of traditional clothing, outdoor clothing and gear, and an old-fashioned country store. We had fun picking out candy we remember from way back when to enjoy later. Then we headed to the French Broad Food Co-Op on Biltmore Avenue to pick up our favorite beverages and wait for the 5 pm Lazoom Purple Bus to show up.
We were curious what a Comedy City Bus tour would be, but it turned out to be both quite interesting and hysterically funny. Truly one of the most unique and funniest comedy shows we’ve ever seen. Our “tour” guide was Erline Hooch, and the comedy just went from there. She and her guests had the bus in tears from laughter. Be sure to make reservations, they frequently sell out their tour. It is also definitely fun adult humor, and they won’t even let you on if you are under 13.
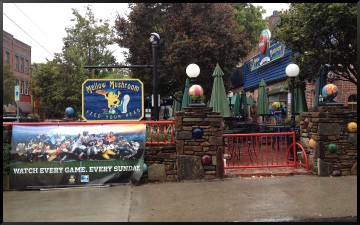
We had skipped dinner, so we stopped by the Mellow Mushroom Pizza for a late night snack. It may sound common to some, but for us northerners, it’s a treat to get to go there.
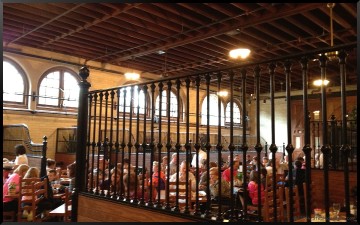
We followed their advice and bought our tickets ahead of time, both to save some money and to avoid the lines at the entrance, and got there early to beat the crowds. Unfortunately for us, the weather didn’t cooperate and is poured all day. But, we still got to enjoy the house tour, just not walking the gardens (which we didn’t miss entirely, we just viewed some of them from the car). We chose to do the self-guided tour and found the docents to be full of information whenever we had a question. Lunch was at the Biltmore Stable Cafe. It’s the original 19th–century stable turned into a wonderful café, complete with dining tables in the renovated horse stalls. Interesting place to eat, and delicious too.
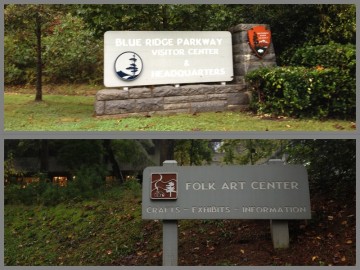
After lunch, we had just enough time to head up to the Blue Ridge Parkway and visit the Folk Arts Center at milepost 382. The Folk Art Center houses the Southern Highland Craft Guild, which sells authentic traditional and contemporary crafts of the Southern Appalachians. The center also has a bookstore, art galleries and live craft demonstrations. We all found some trinkets to bring home with us.
Heading back down the mountains to Asheville, we next headed to Historic Biltmore Village to shop and eat. We were a little late getting back, so many of the unique, locally owned shops were already closed for the evening. We did stumble upon the Tree and Vine, an independent olive oil and balsamic vinegar tasting shop. We enjoyed some tastings and found some unique combinations of flavored oils and balsamics to bring home.
Finally, after quite a discussion of all the great choices, we chose The Cantina for dinner. It serves ” Fresh Mex–all your favorite south of the border delights with a local twist”. I’d highly recommend starting with Red Sangria and the Queso Dip.
Sunday
We all had afternoon flights, so on our last day we were able to enjoy breakfast again at Tupelo Honey Cafe. Even though there was a bit of a wait this morning, it was well worth it! After breakfast, we made a quick side trip to the Thomas Wolfe Memorial Visitor Center to pick up a couple of books. Lastly, in keeping with the author theme, I visited the memorial of the tragic Highland Hospital fire that took the life of Zelda Fitzgerald. While the exact location is now a shopping and office complex, some of the hospital buildings remain and are pointed out on the tours of Asheville. Then it was off to our respective airports after a wonderful weekend in Asheville with friends. Wish we had more time to do everything on our to do and places to eat lists, but have to save something for another visit!
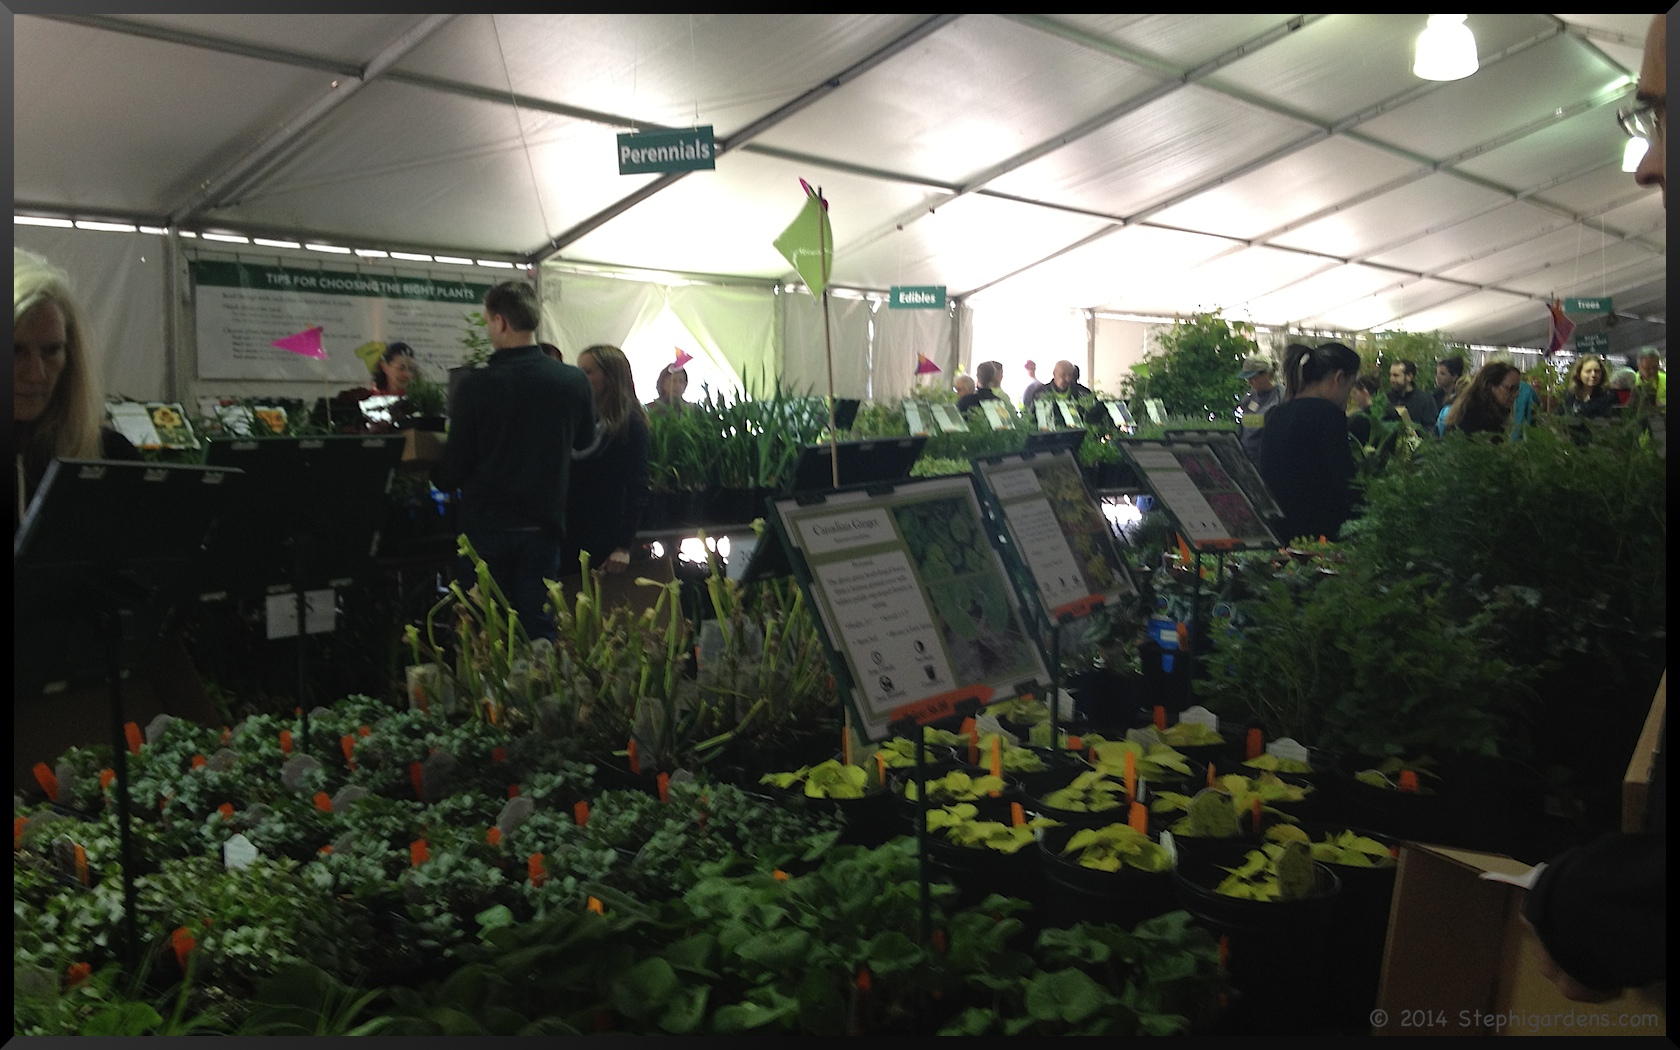
For me, the yearly Morton Arboretum Arbor Day Plant Sale is like sending a kid into a candy store. So many wonderful plants to pick from, some special ones that can be pre-ordered by members, and others that everyone can just go and select. Many of my best plants have come from there.
Back in early February, still in the throws of winter, comes the flyer detailing all the pre-purchase offerings. That’s when I wish my yard was bigger so I could buy every tree, shrub and perennial in the booklet. But, no, every year I buy less and less, since I have less and less room to plant. I guess that’s a good thing, just not as much fun 🙁
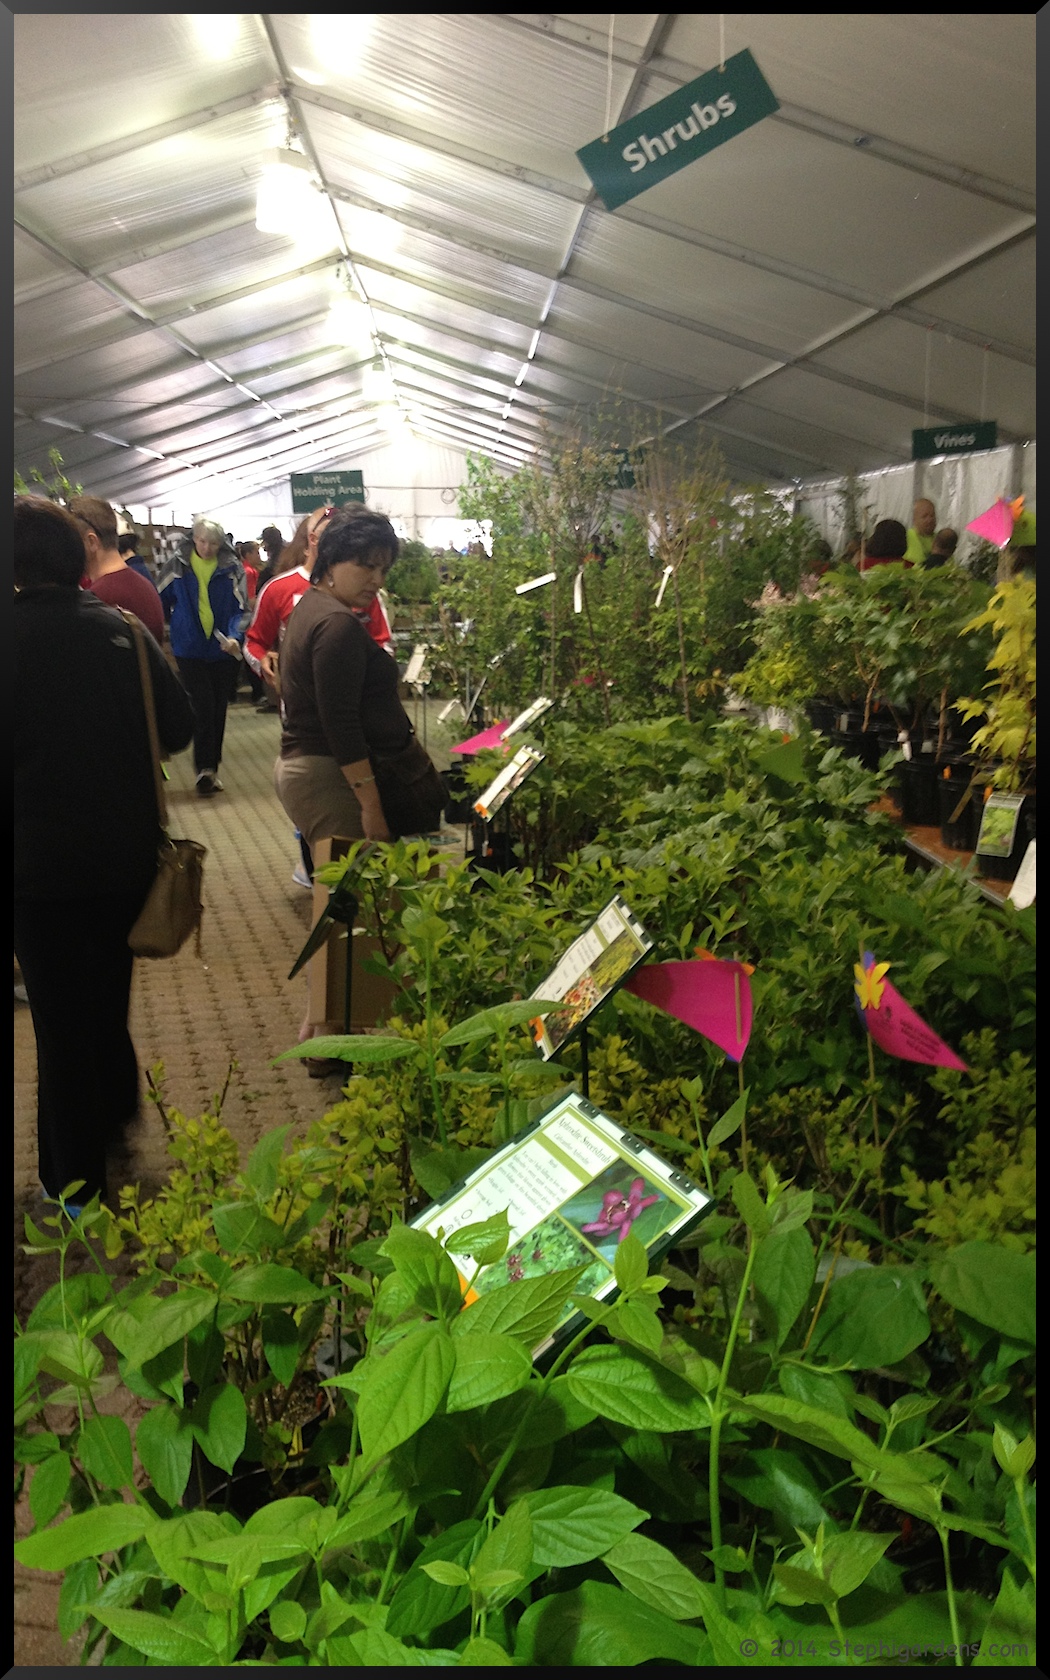
On pick up day, coinciding with Illinois’ Arbor Day (the Arboretum’s signature holiday), the Arboretum also has a huge tent full of other plants that come highly recommended that can be bought both by members and non-members.
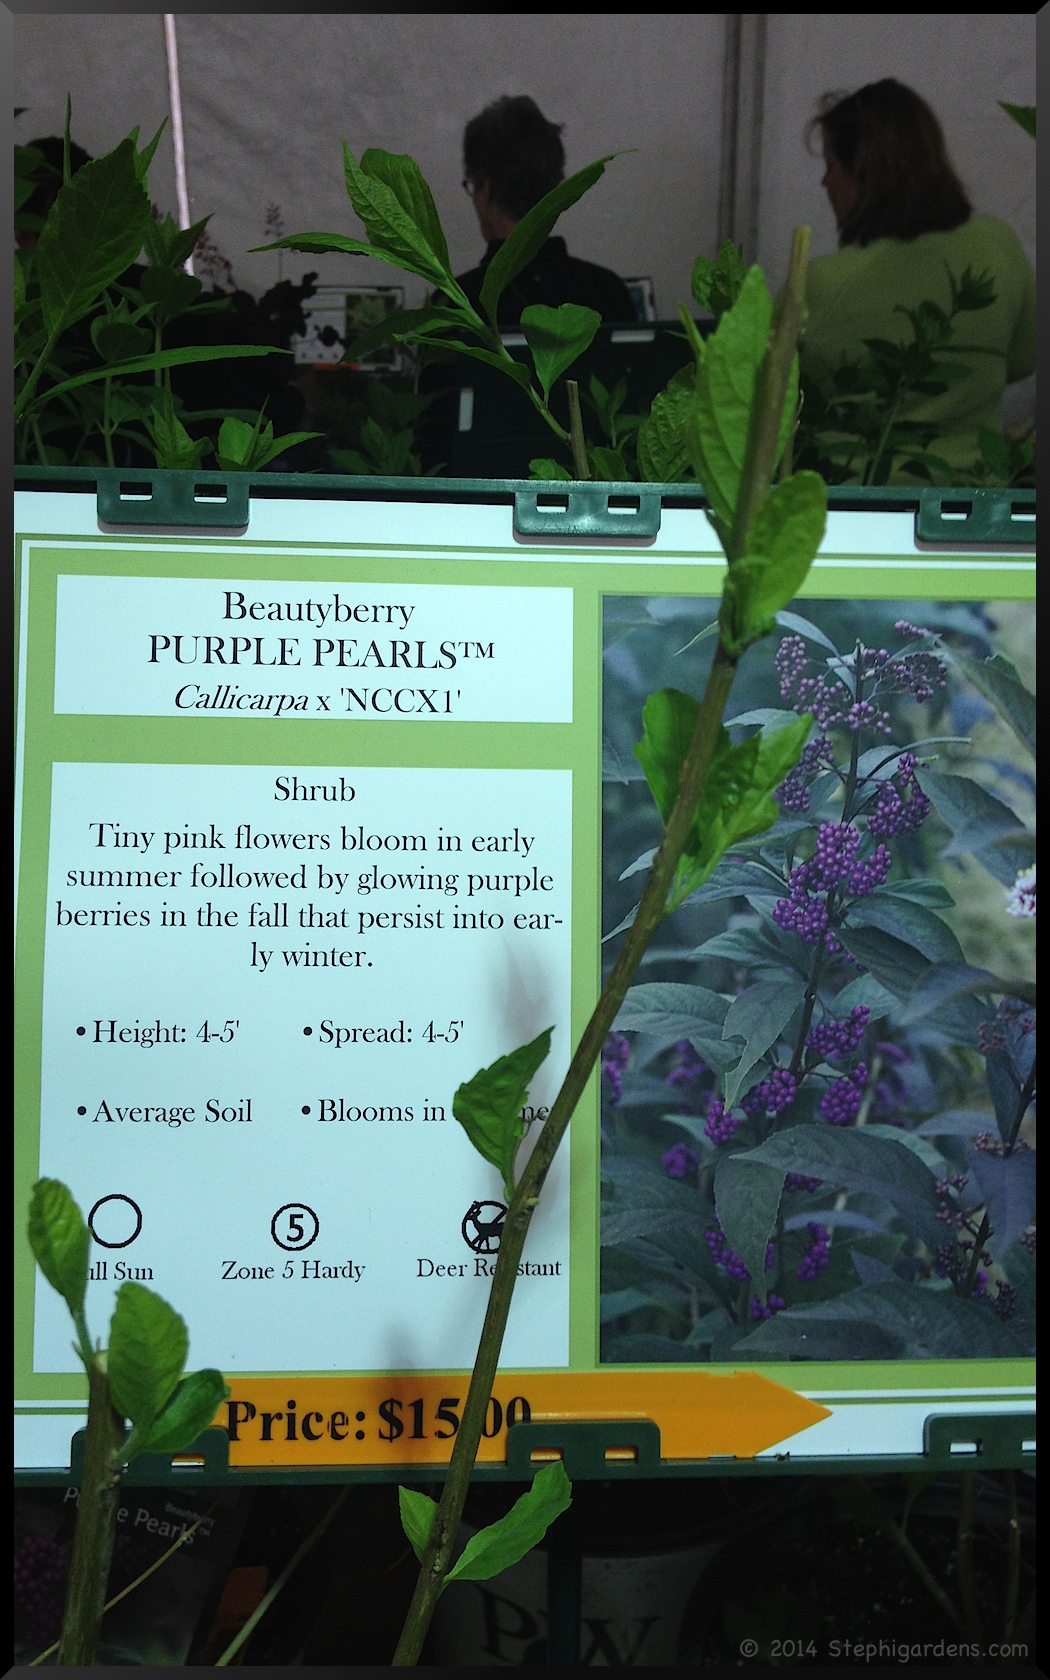
I stopped there first, since this part is first come, first served and they often run out of varieties. What is tops on my list to find: a Purple Beautyberry Bush! Ever since I saw them last year in the Arboretum parking lot (see Purple Beautyberry Bush post), I’ve been planning to look for them this spring.
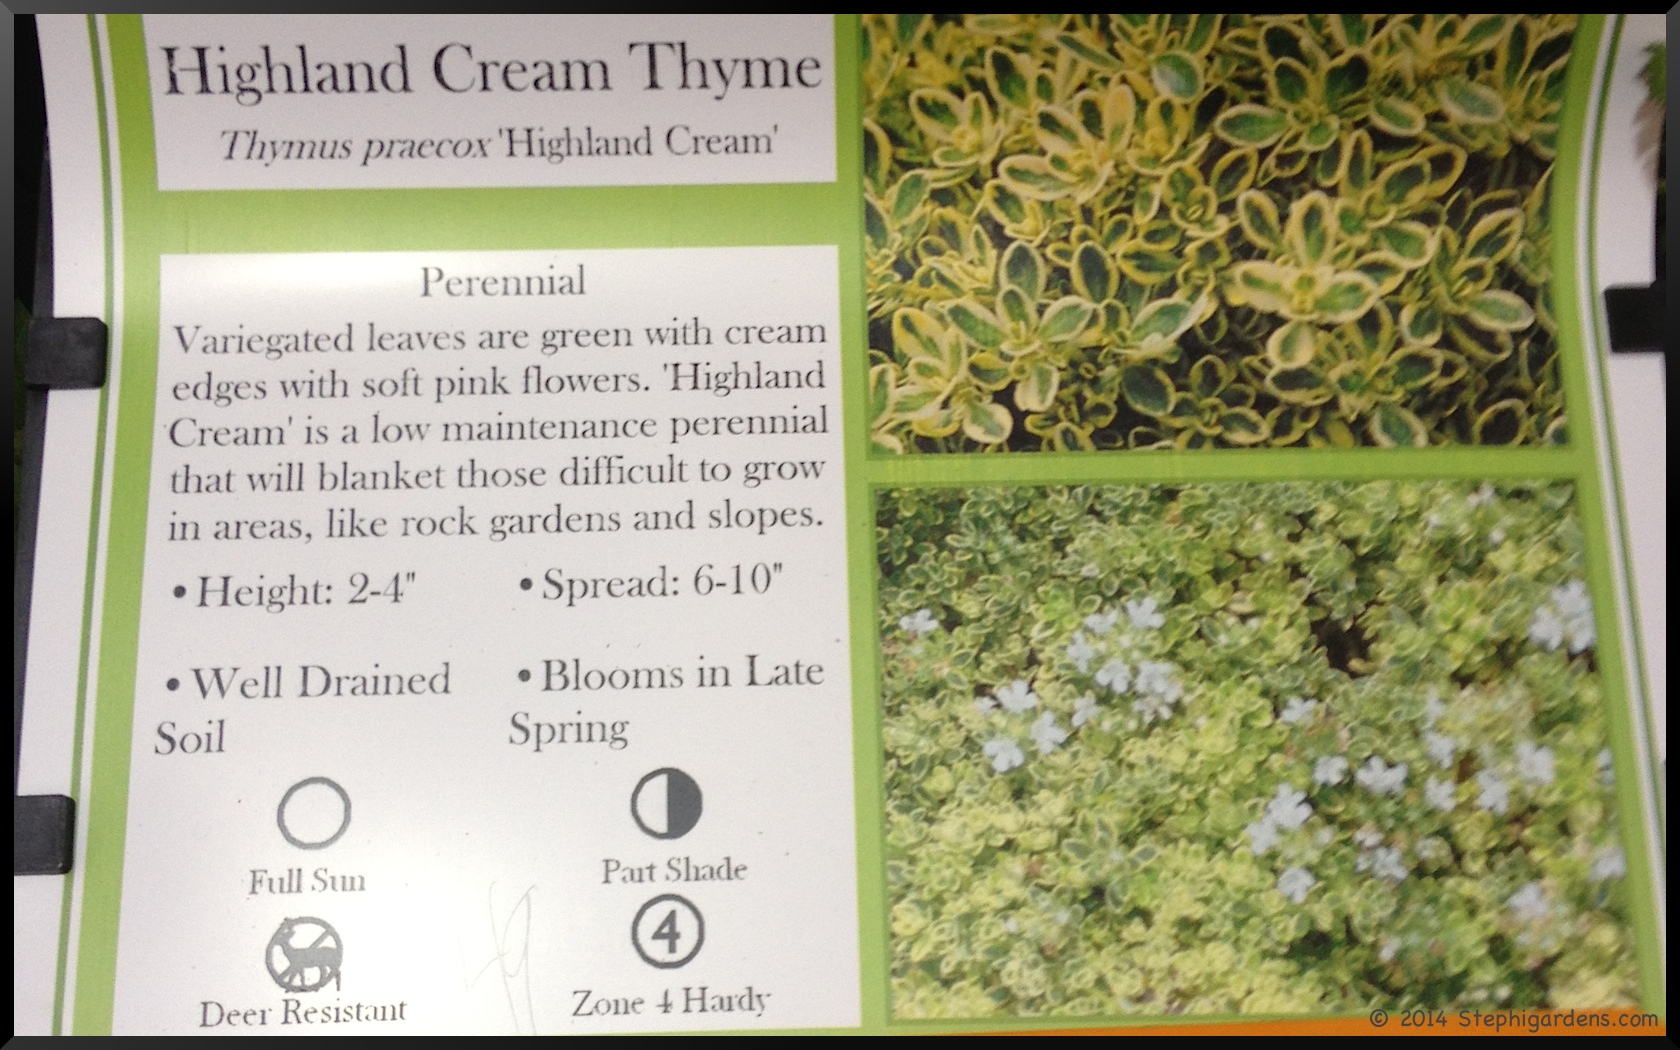
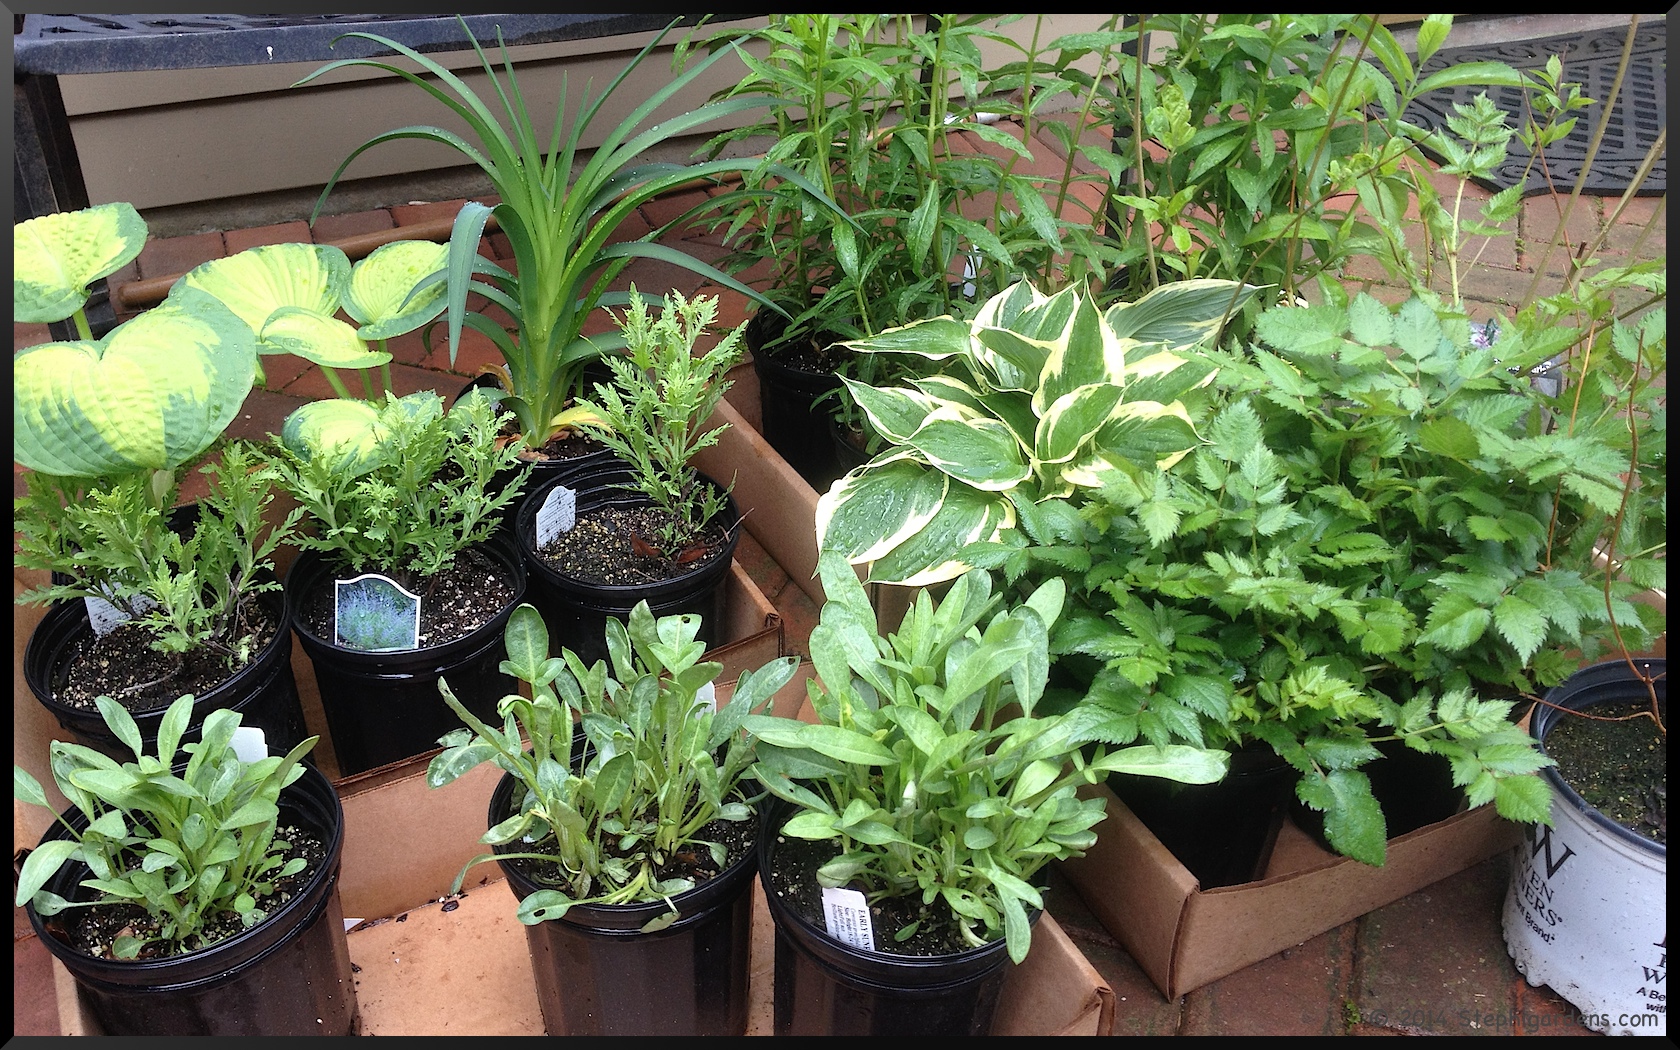
Then I shopped for a bit more, finding some interesting perennials (Little Vision in Pink Astilbe, Hosta Independence, Early Sunrise Tickseed), vegetables (tomatoes and peppers), herbs (basil, parsley, sage, mint), strawberries, and… Creeping Thyme.
If you read my recent post on the problems I was having with my Creeping Thyme, I saw these and decided to add a few plants to try and help fill in the space a little quicker as the older plants recover from their inattention. It’s not exactly the same as what is there, but I think the varieties will look good together.
Then I went over to pick up my order, which contained Peek-a-Blue Russian Sage, a Flutterby Petite Tutti Fruitti Pink Butterfly Bush, Jeana Garden Phlox, and a Primal Scream Daylily.
The shrubs I can plant right away (or at least as soon as it stops raining) and the other perennials and annuals I’ll wait for a couple of weeks. Mother’s Day weekend usually is the safe, no more freeze danger mark. Until then, the perennials will hang out outside in a shady spot and the rest I’ve moved into the screen room for a little more protection from the cold weather we’ve been having. Now I just need to remember to water them!
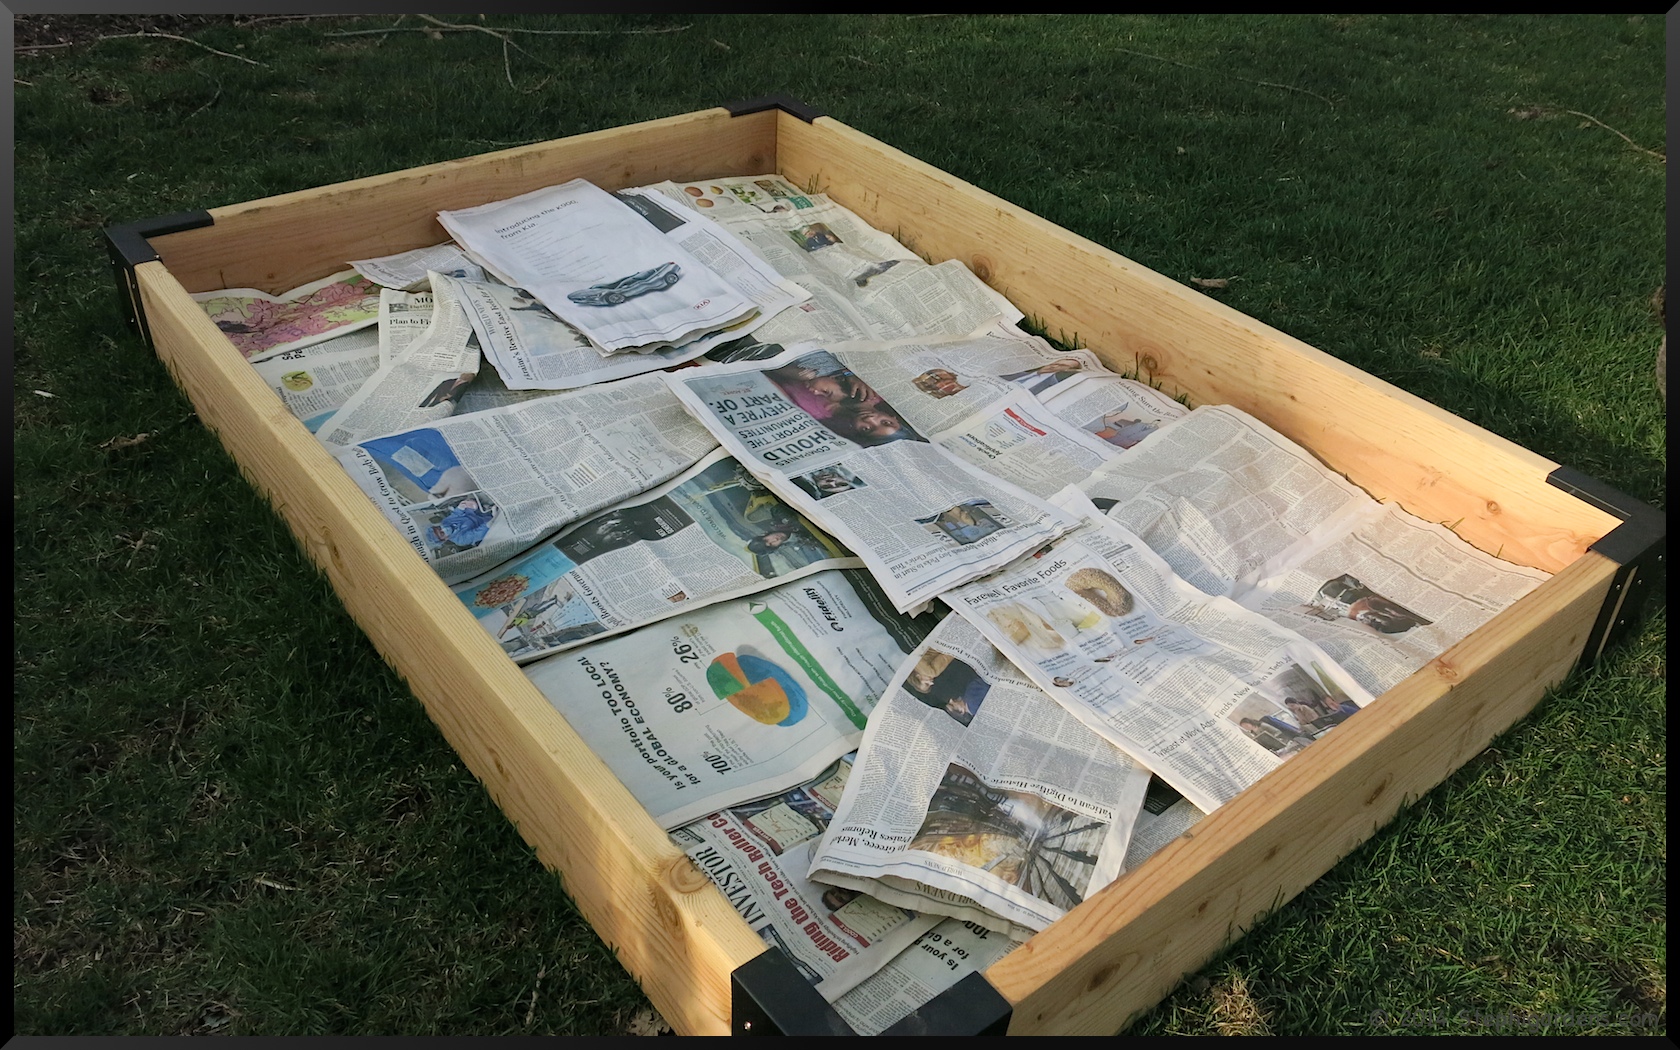
As I wrote in yesterday’s post (My New Raised Beds-Construction), our new raised beds were finished. Next up, filling them with the right mix of soil and compost. First though, we had to get the grass out and the existing soil turned over. I know our grass has quite a bit of thatch, so it would be a pretty thick barrier to the vegetable roots. After breaking it up pretty well, we covered it with newspaper to kill off whatever grass was still alive. No need to remove the paper before filling with dirt, it will just decompose.
The one downside of turning over the sod is the possibility of wire worms. Wire worms are the larvae of click beetles and they live in the soil near the roots of grass. Once disturbed by the digging, they make their way up to the new crops and wreak their havoc. I’m going to assume this is not going to happen…
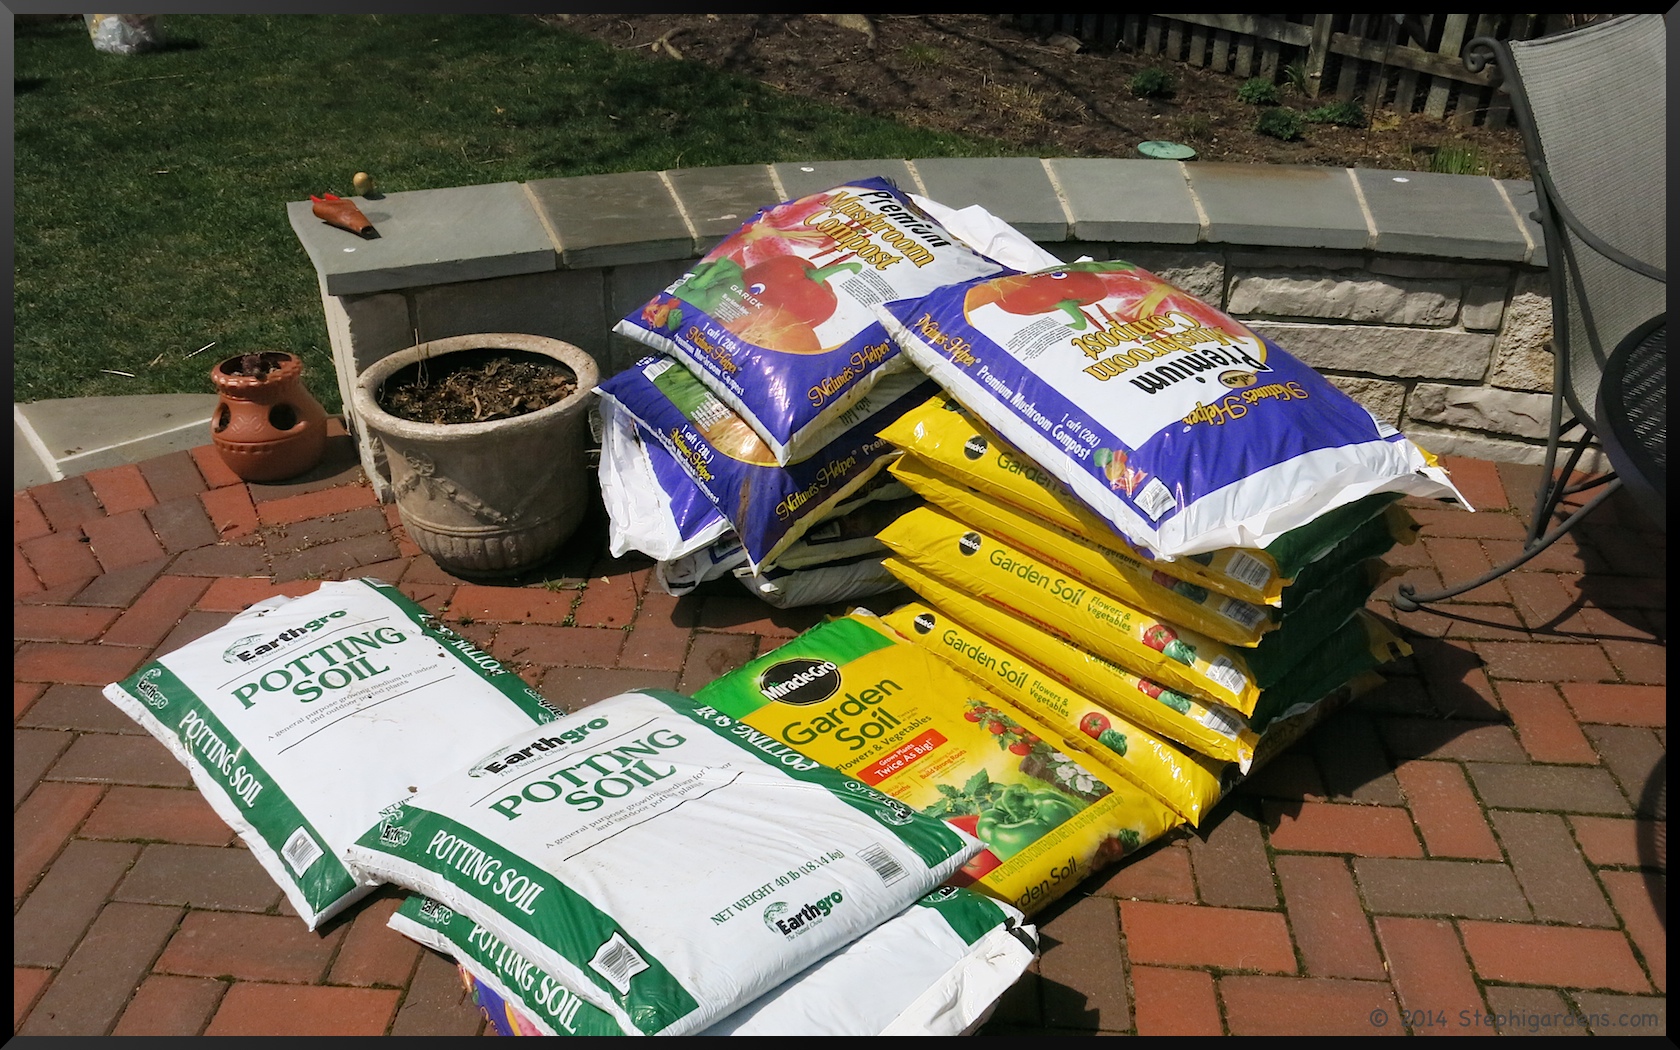
For my current raised bed, I used a mixture of top soil, mushroom compost and potting soil in a 6:3:1 ratio. I had great success with that, so I’ll use the same mixture in the new beds. I calculated that I needed 32 cf total for both beds. As I was buying the bags of dirt and compost, that seemed like a lot, so I cut that back. I still ended up with a couple of bags too many. As the dirt settles, I’ll need to add some, so I just put it away until I need it. I ended up buying 15 cf of topsoil (actually Home Depot had the Miracle Gro Garden Soil on sale so I bought mostly that), 8 cf of mushroom compost and 3 cf of potting mix.
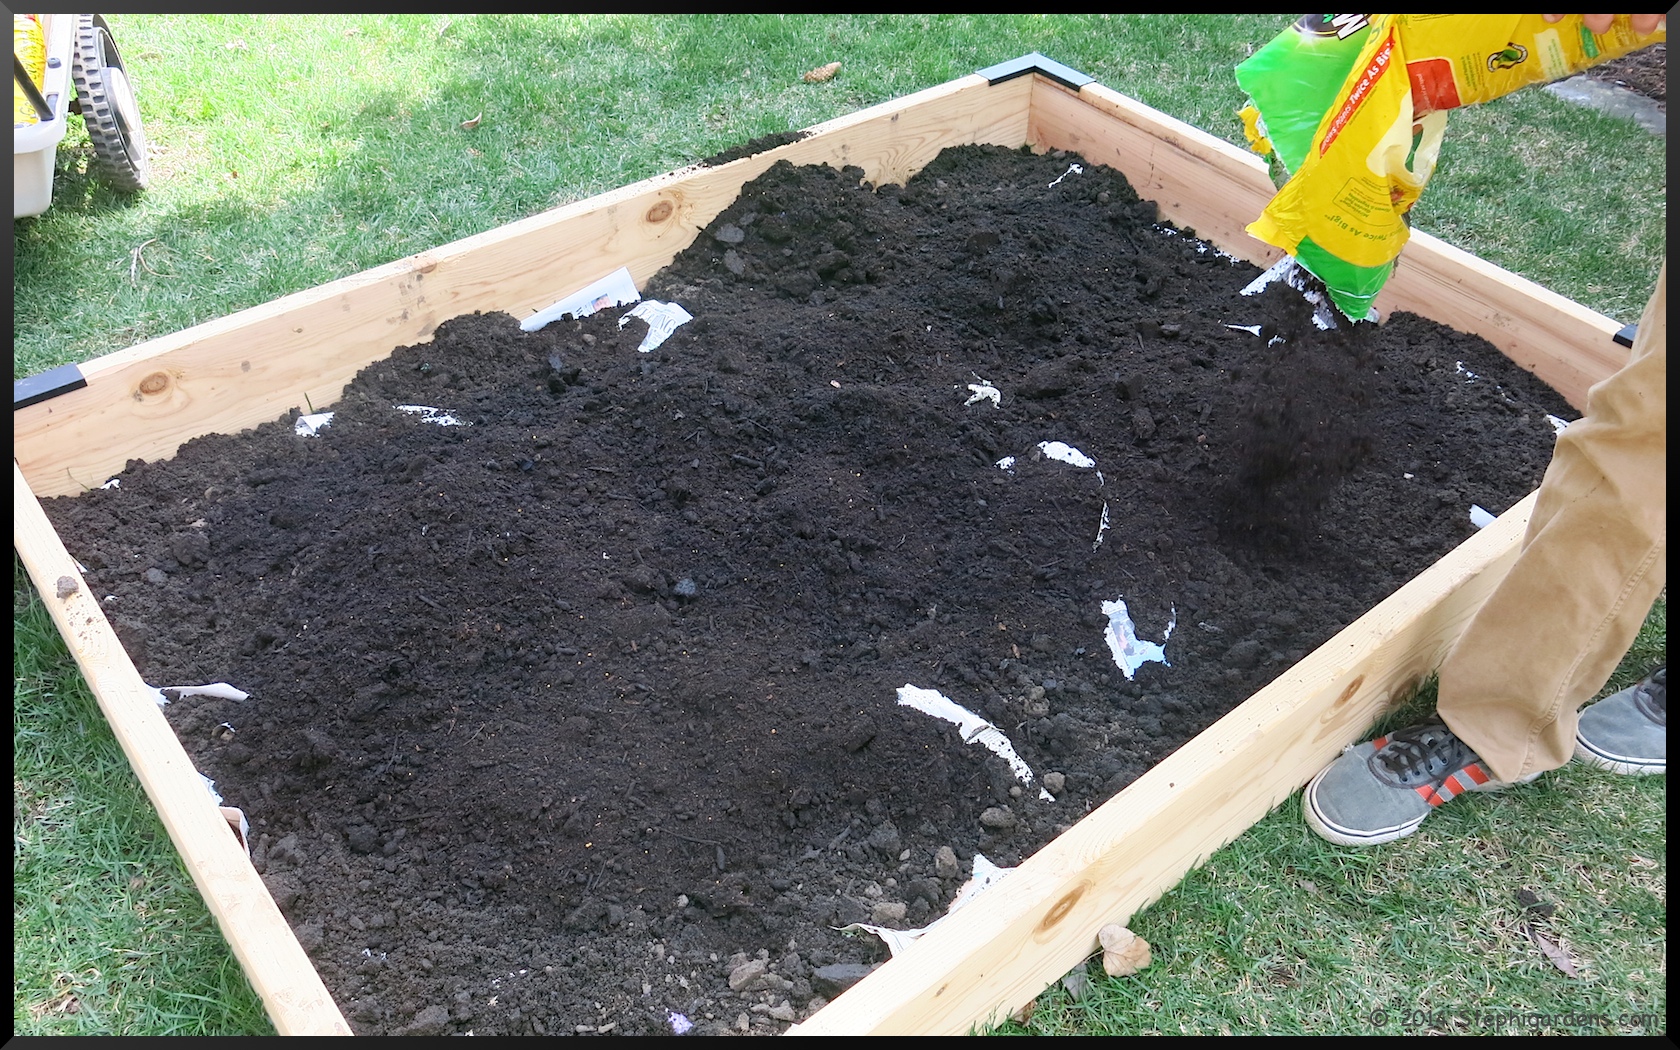
I cajoled my teen-aged sons into being part of the garden project, and they dumped all that soil and compost into the beds for me. My back sincerely thanks them (My husband was at work, so not around to help either. He did help with the construction part, making this a true family project). I alternated what was put in and spread it around as they were dumping it in. This makes for a really healthy, light soil mixture that will be perfect for vegetables.
All finished and ready to plant. I’ve never had so much vegetable garden space, so I’m really excited to have the space to spread out the plants like they should be, as well as try some new things.
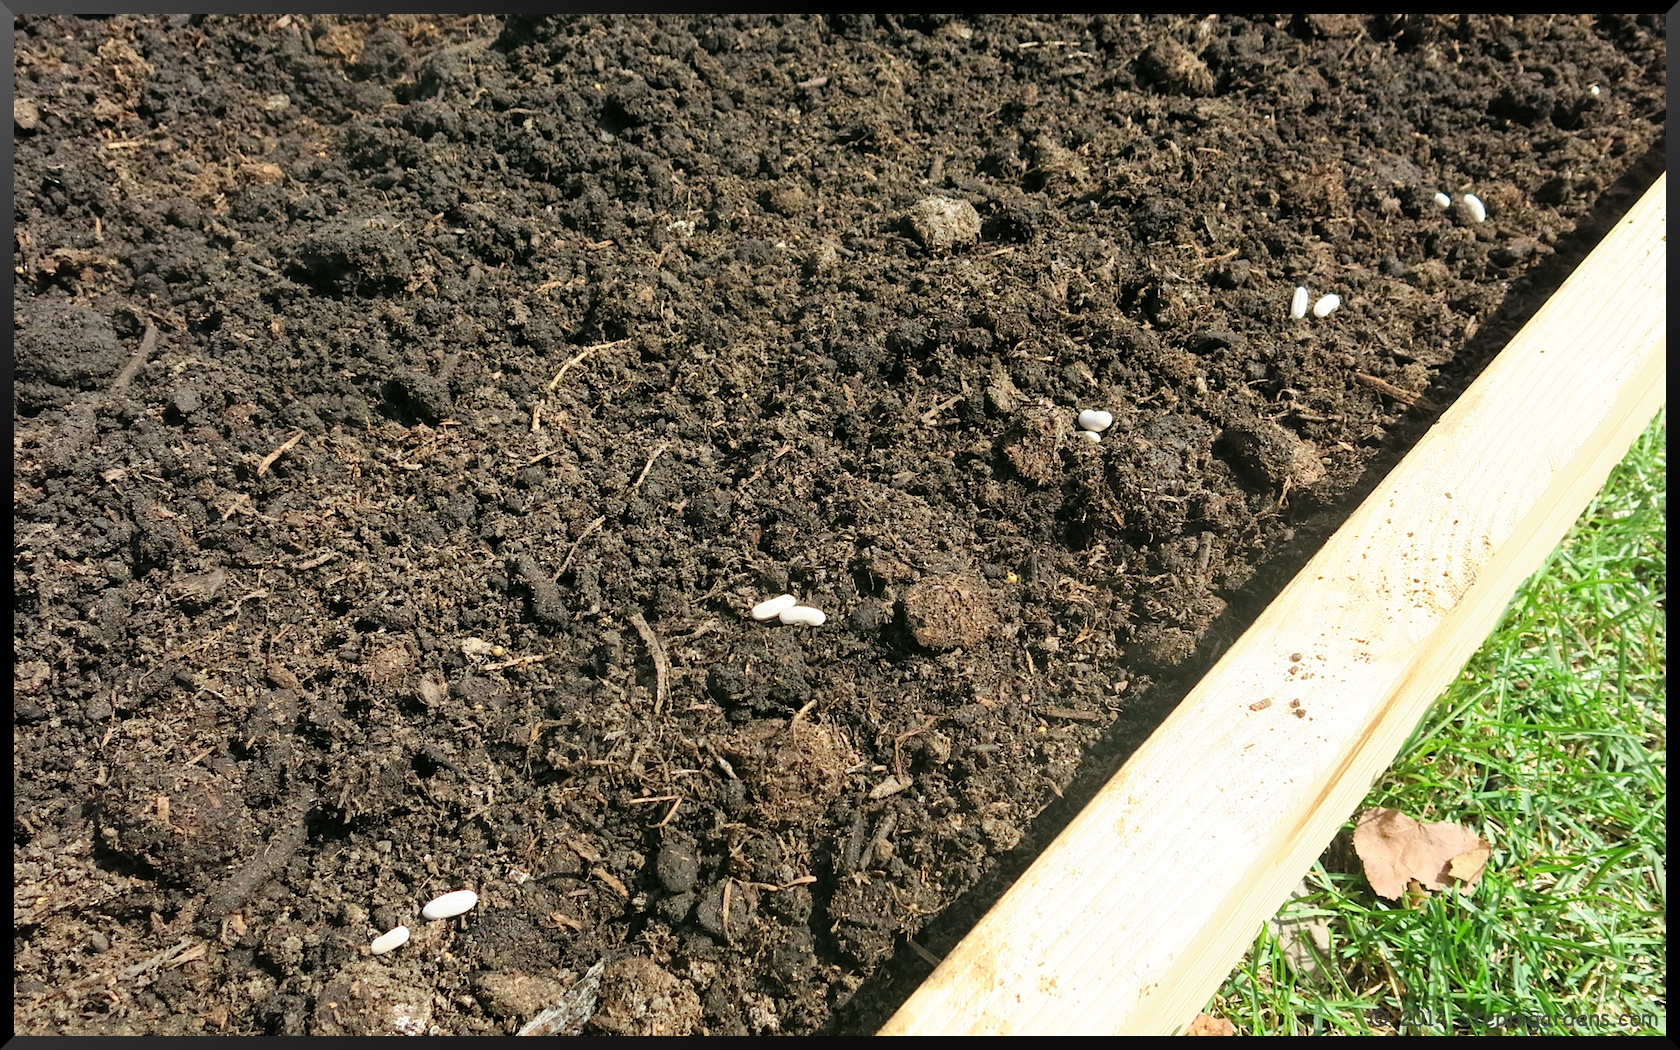
I’m optimistic that freezing temperatures are behind us, and planted the second round of lettuce, beets, swiss chard, spinach, radish. I also started some sunflowers and bush beans.
I just checked the other seeds I planted a couple of weeks ago, and they are just starting to sprout. We’ve had some pretty cold temperatures so it took a little longer than I would have thought.
Did you build any new gardens or see any seedling yet?
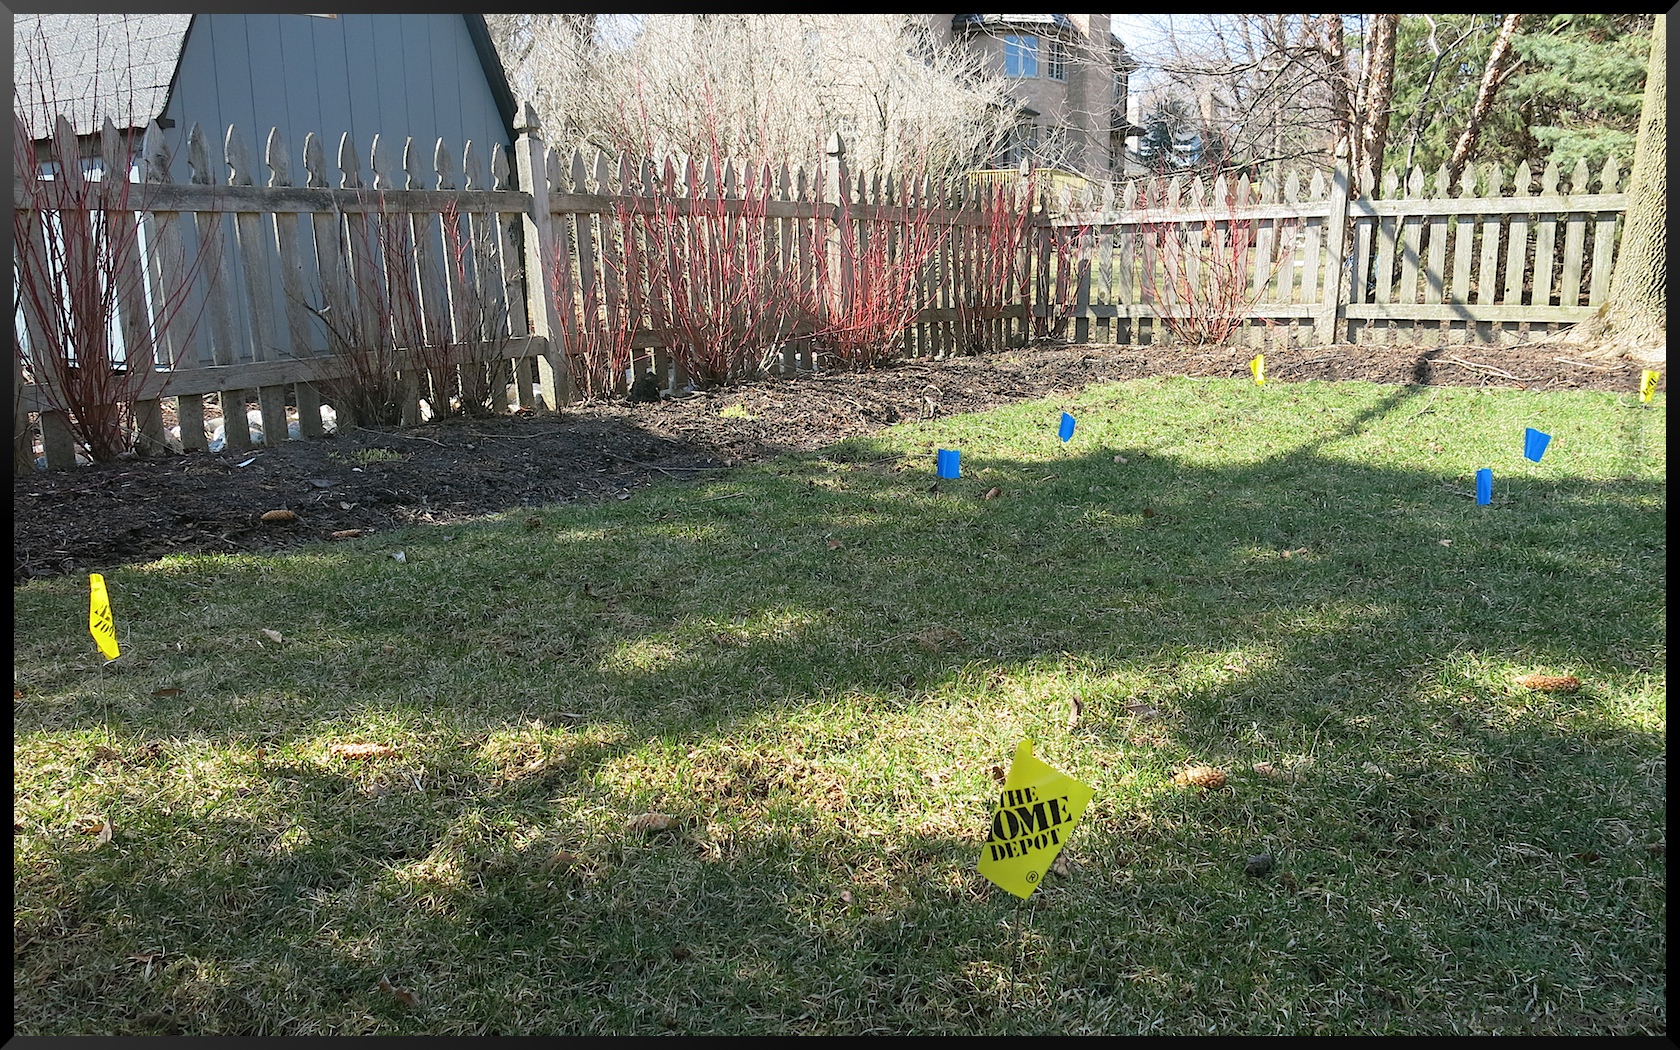
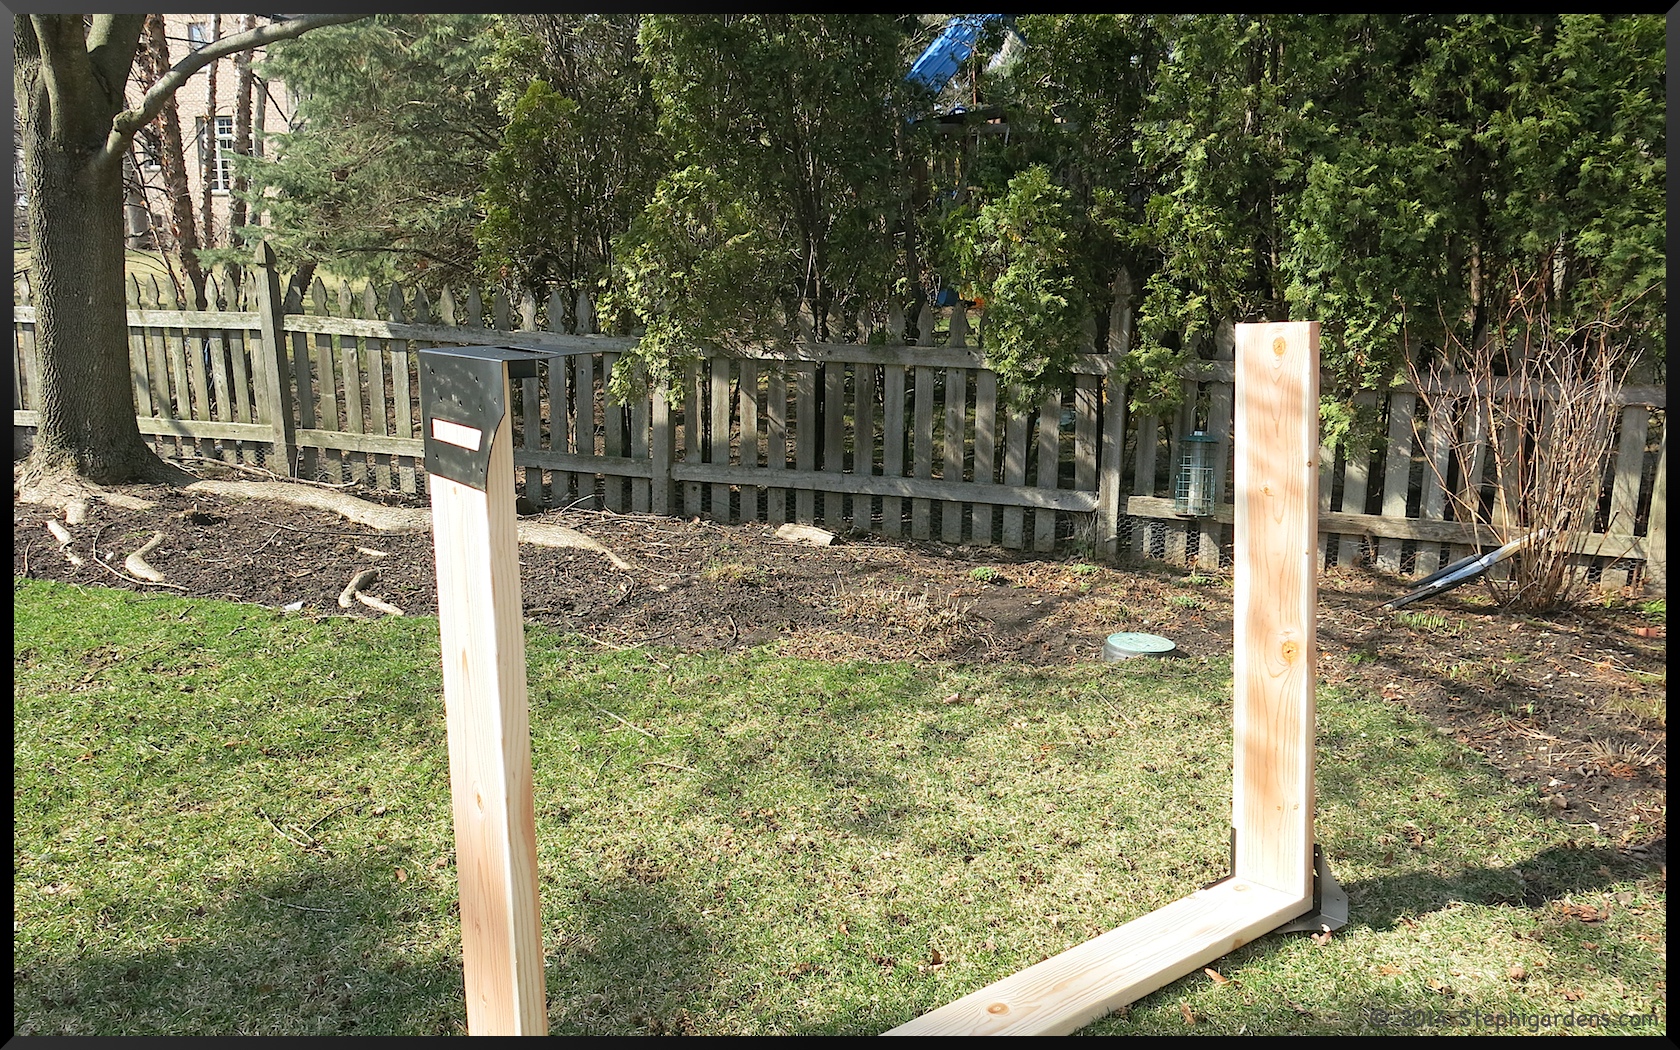
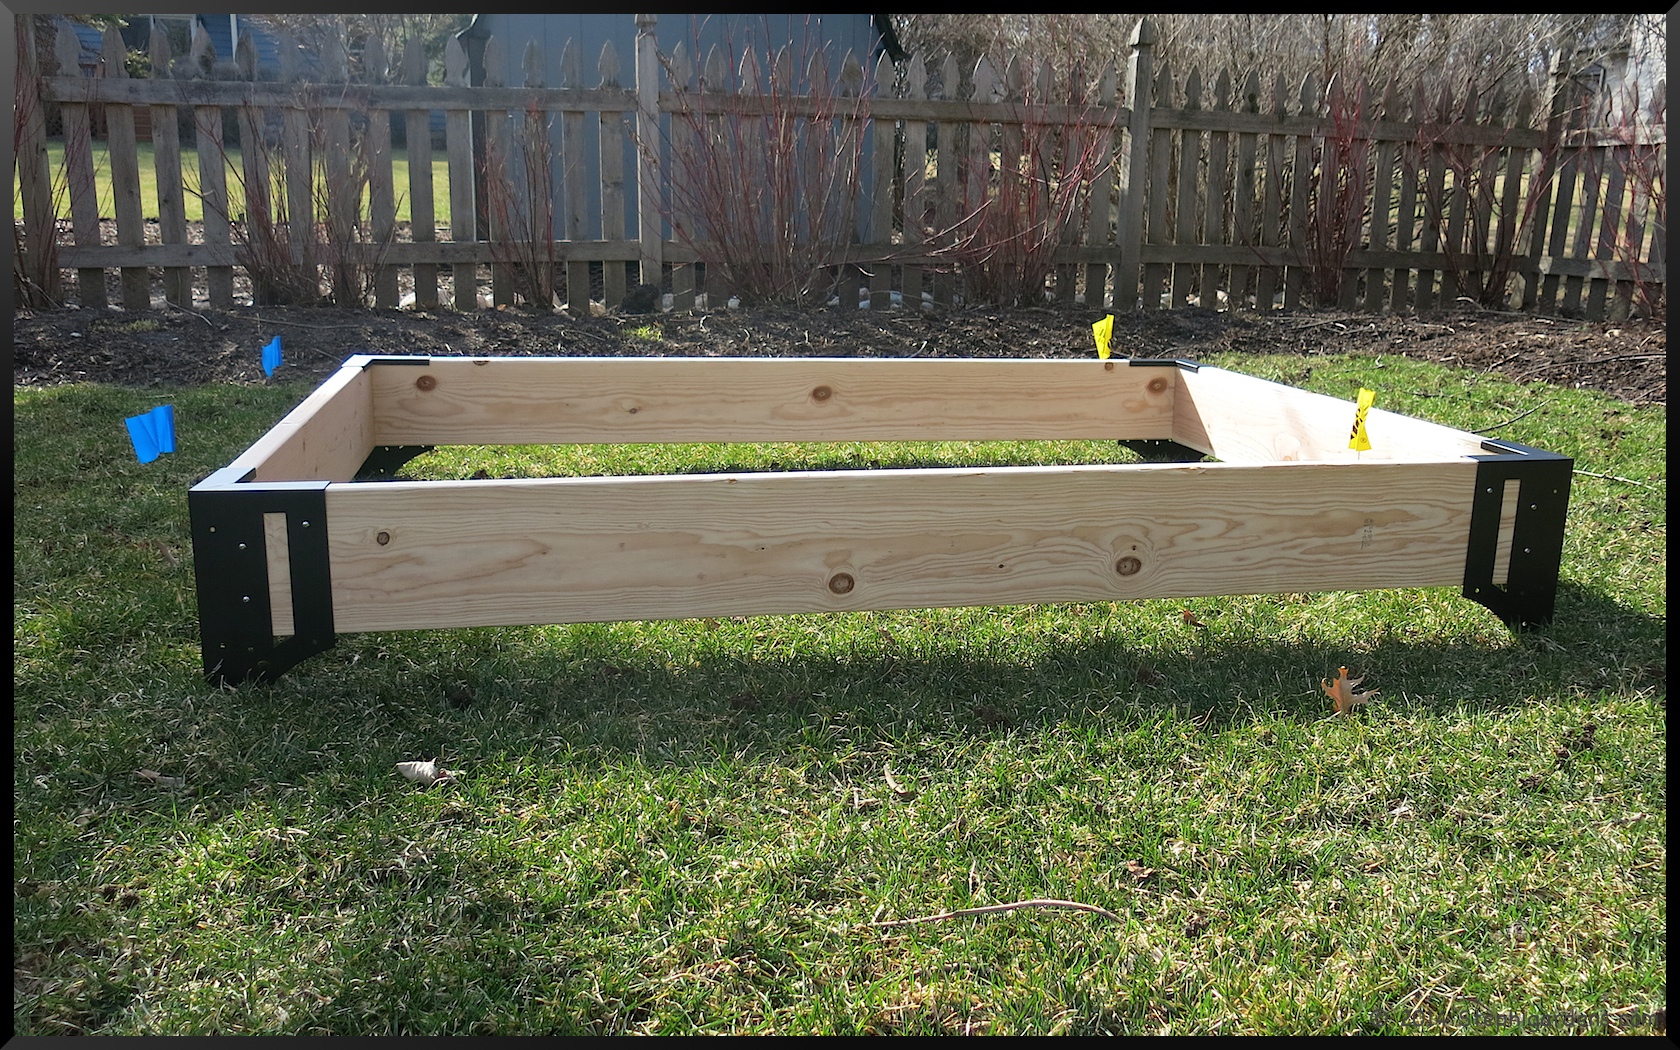
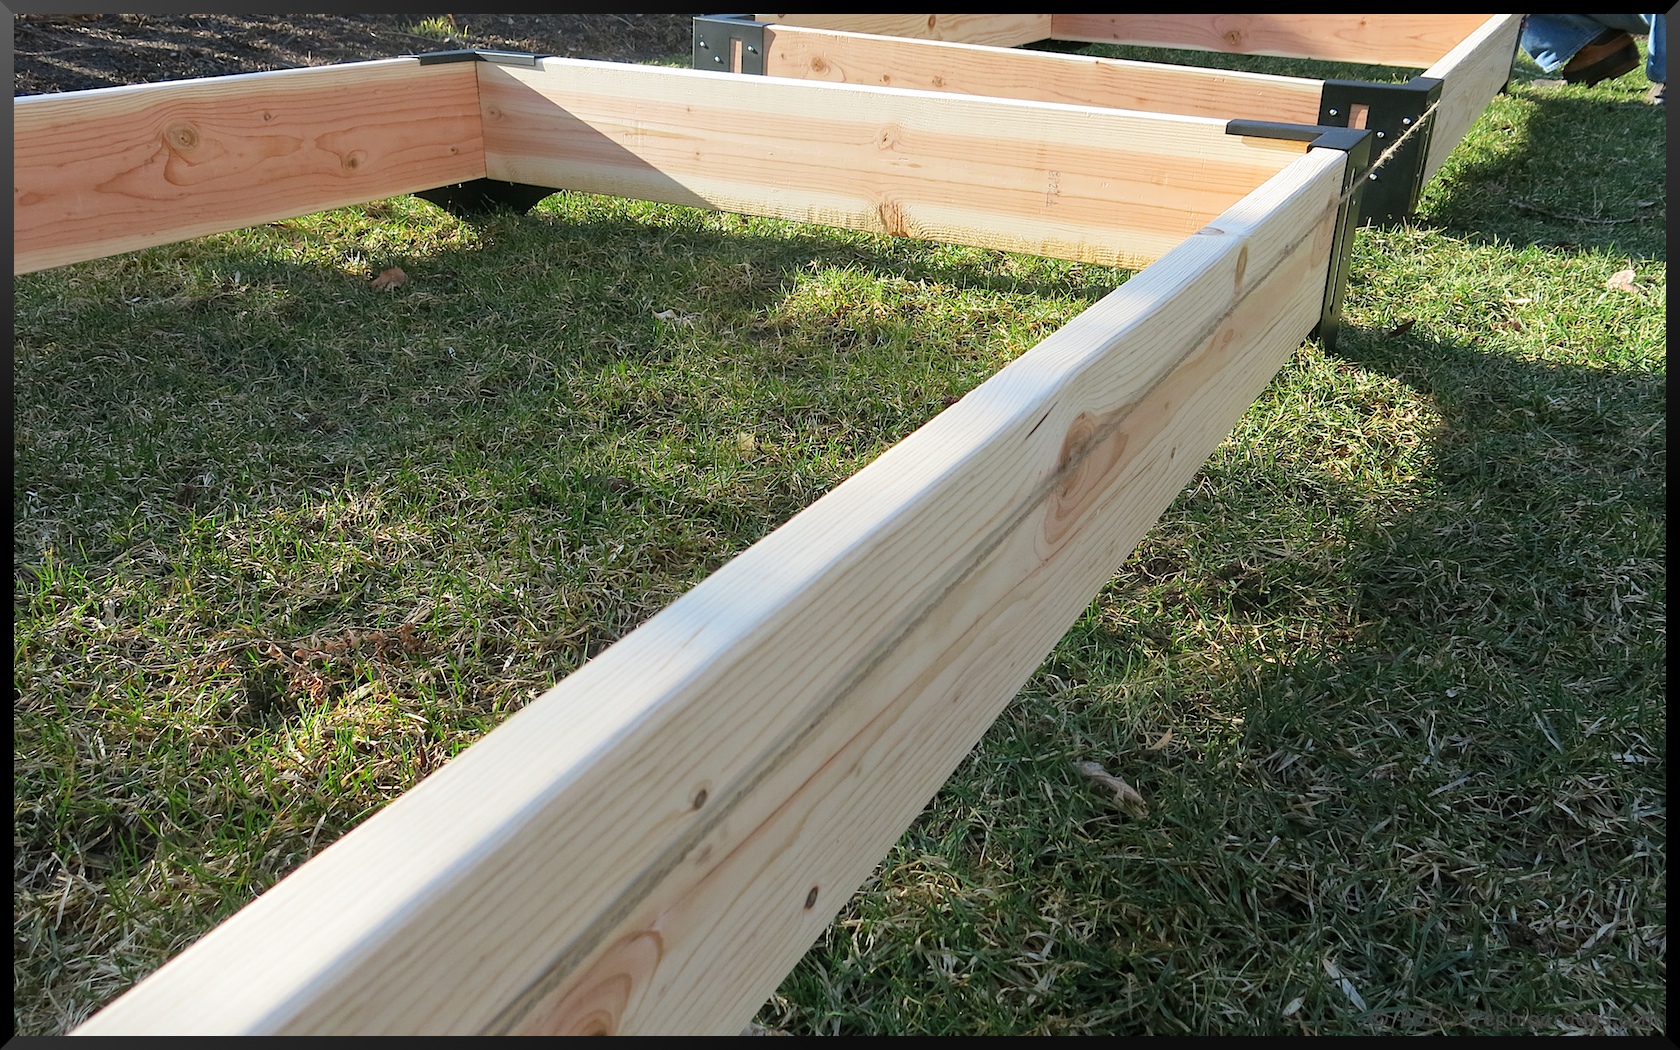
It took a couple of weeks because of the weather and finding the time, but the new raised vegetable beds are finally finished! We had scoped out a site last fall that got a reasonable amount of sun and wouldn’t interfere too much with existing beds, drainage, play space for the kids, etc. Getting full sun on my yard is a bit tricky, but most of the beds will be in full sun mid-summer, and the parts that aren’t, I’ll plant accordingly. After measuring it out, we decided two 4’x6’x8″ beds were the ideal size for the space. Anything more than 4′ wide is too difficult to garden in physically.
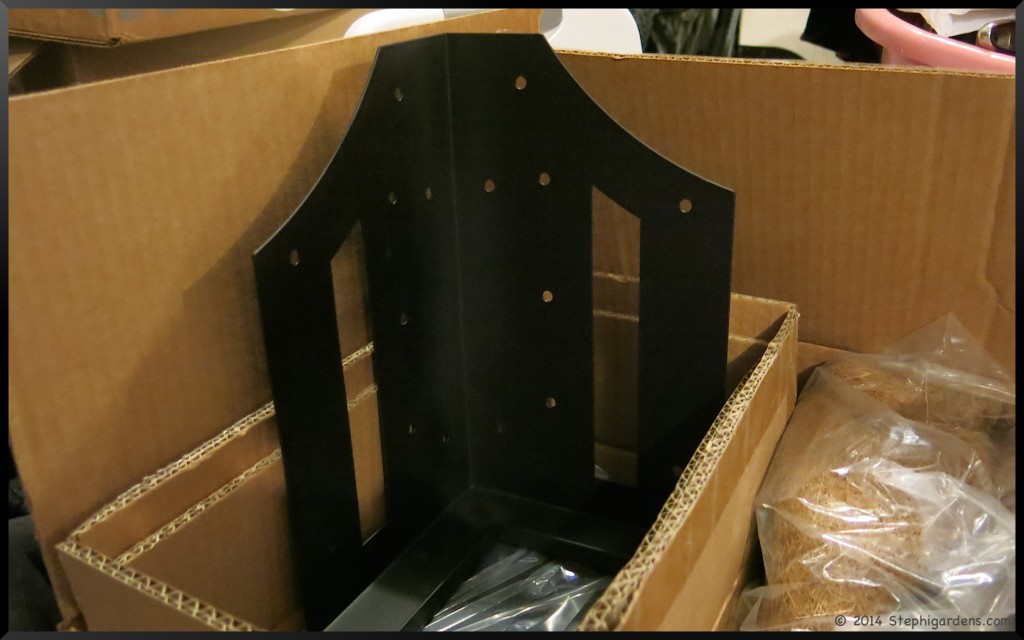
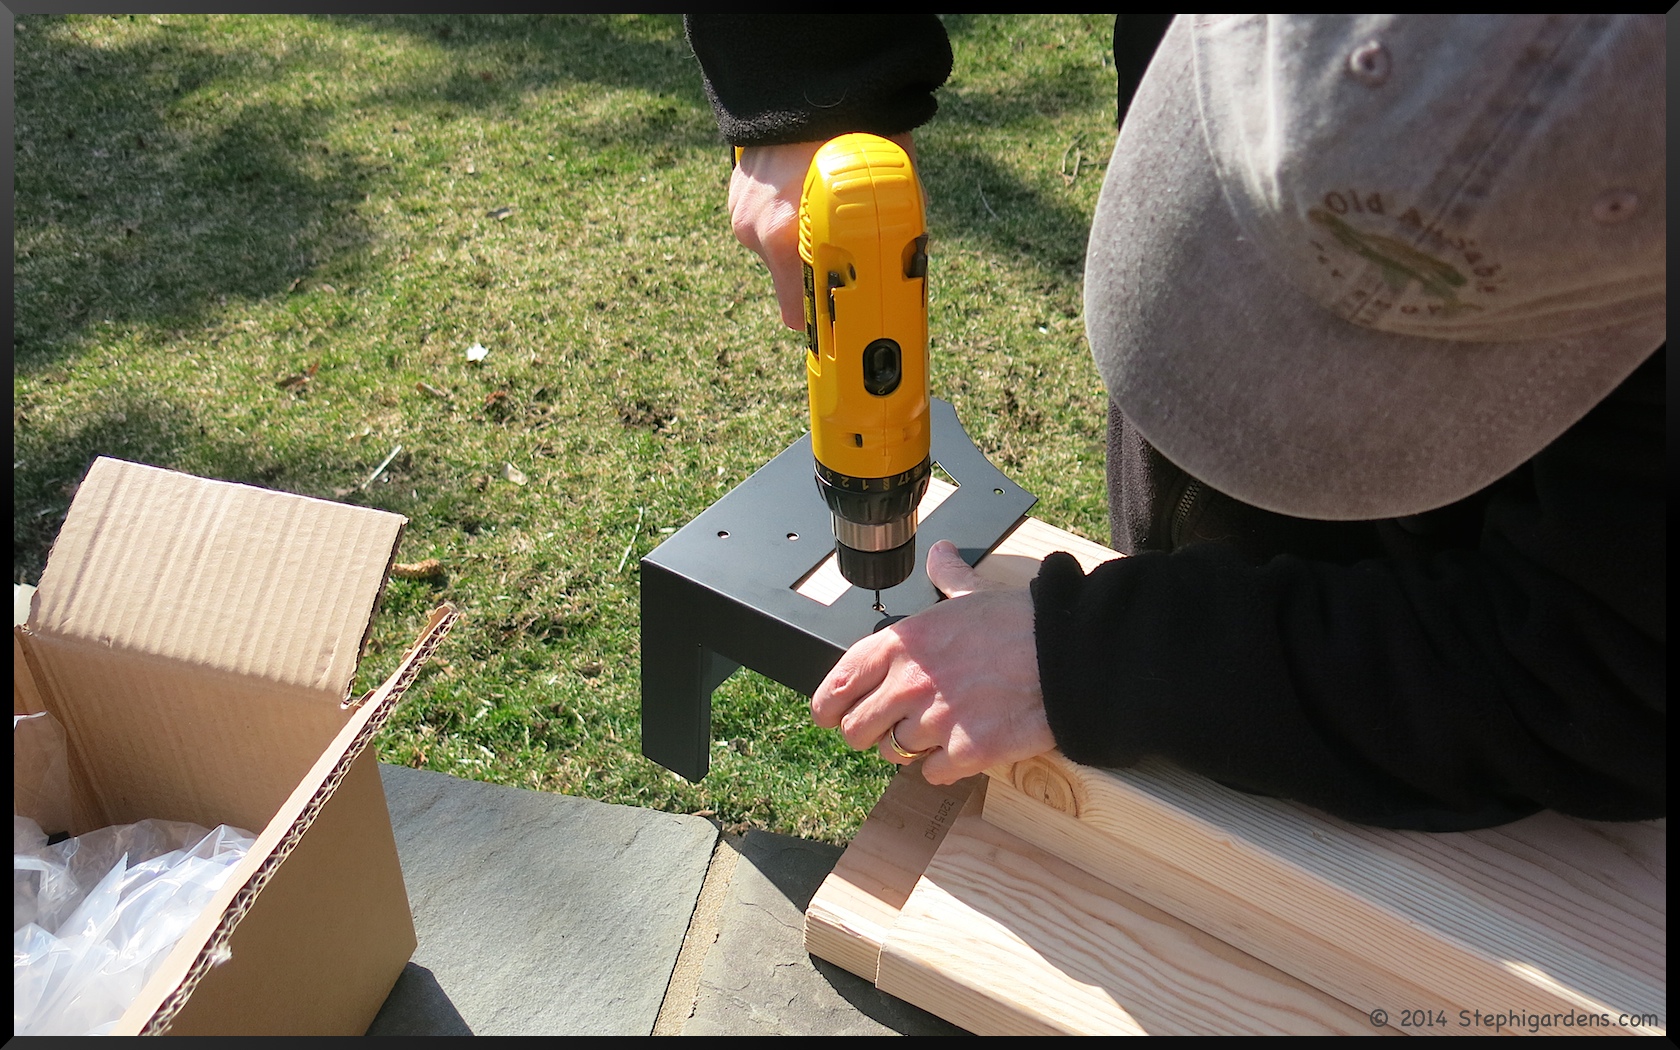
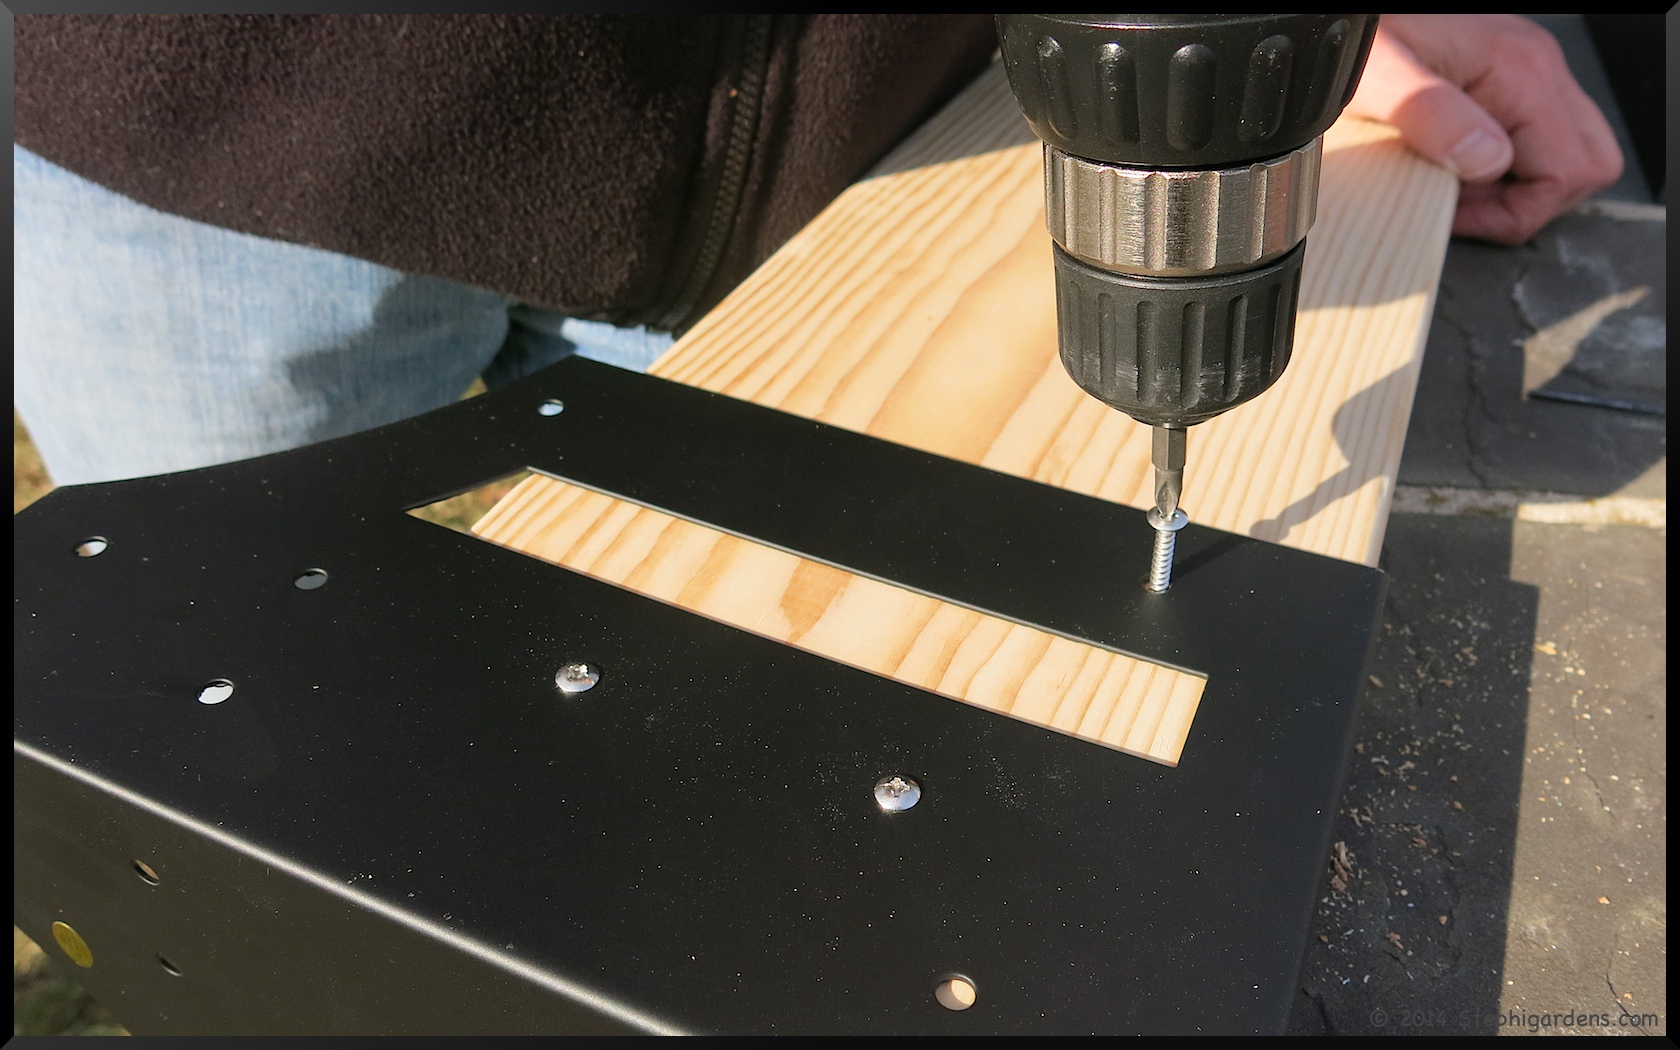
I bought corner brackets from Plow and Hearth to simplify the construction of the beds.
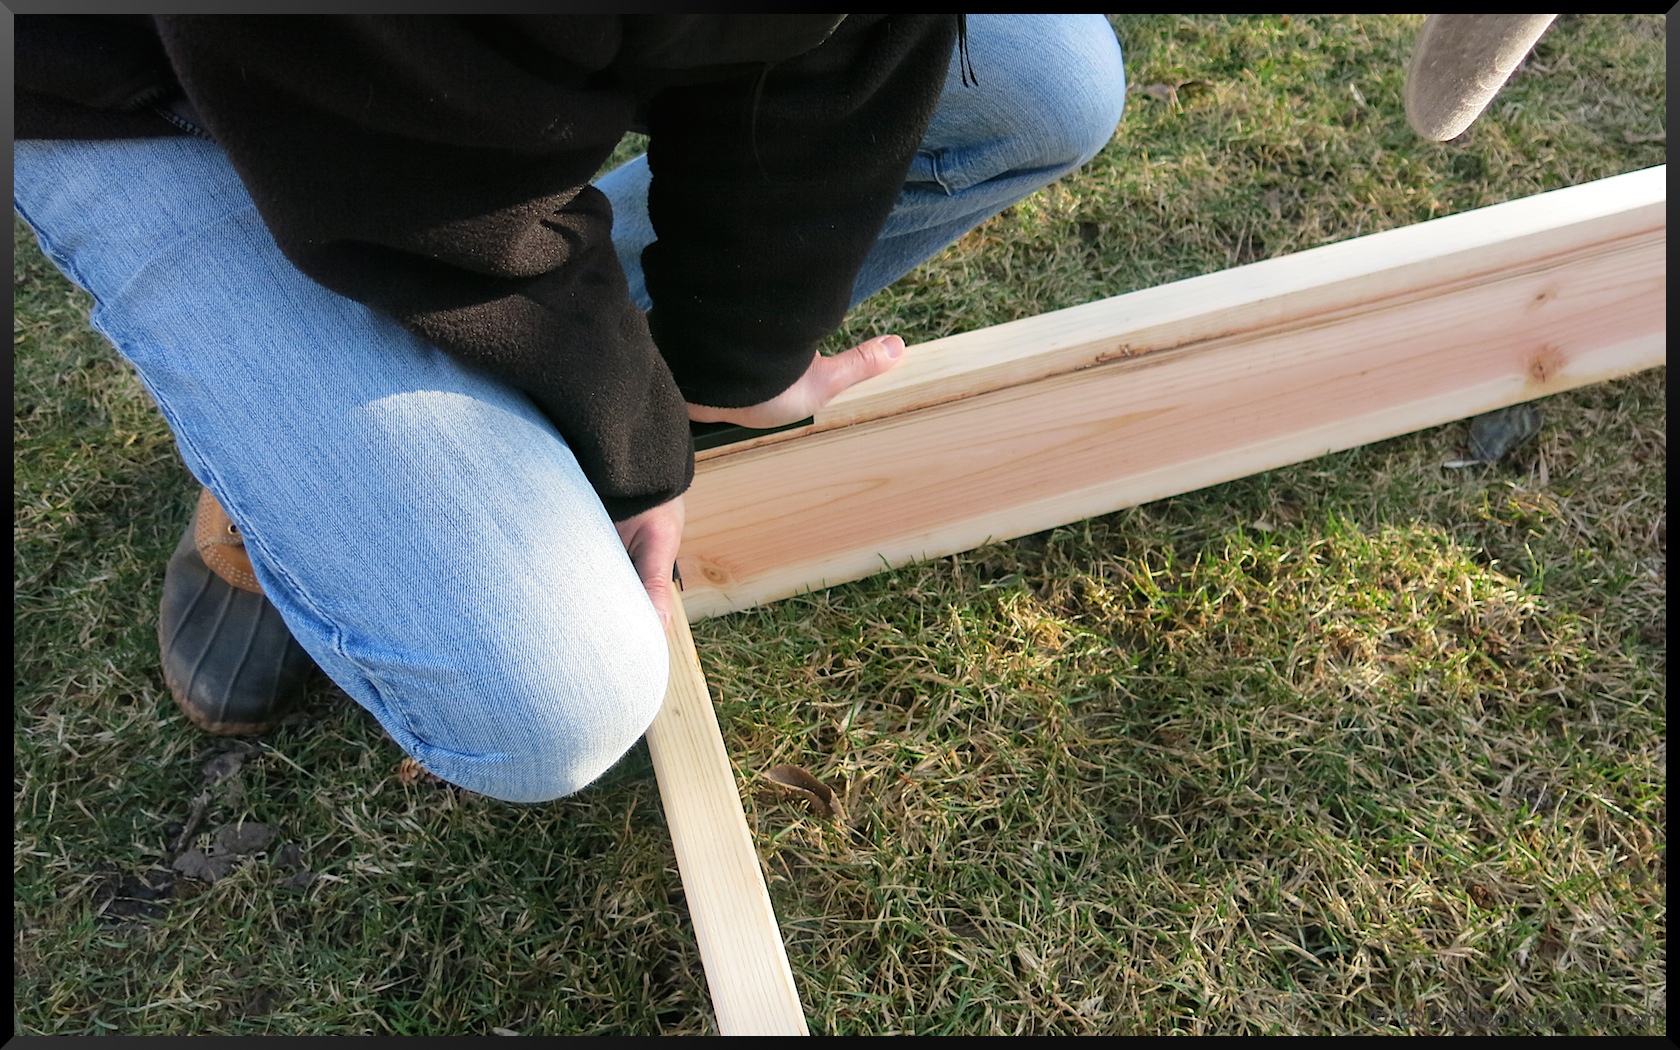
Then we went to Home Depot to get lumber. We had planned to use cedar, but they only came in 6″ heights. That just seems too short and doubling was too high and expensive. We researched our options and finally decided on regular pine. While they are not pressure treated, we used them on the other beds and after 3-4 years, they are weathered, but fine. The possibility of eventual rot outweighed the potential toxins in pressure treated wood. To make the job a bit easier, we had Home Depot cut the boards for us for free.
Now the construction began. All the hardware was included in the corner kit, we just had to supply the drill for drilling pilot holes and screwing in all the screw.
One was done!
Only took a couple of hours to build both, and they couldn’t be easier. We lined them up, leveled them and then pushed them into the ground.
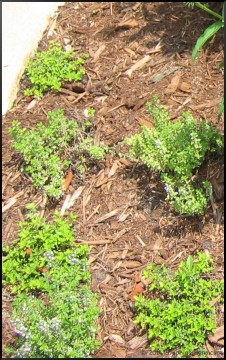
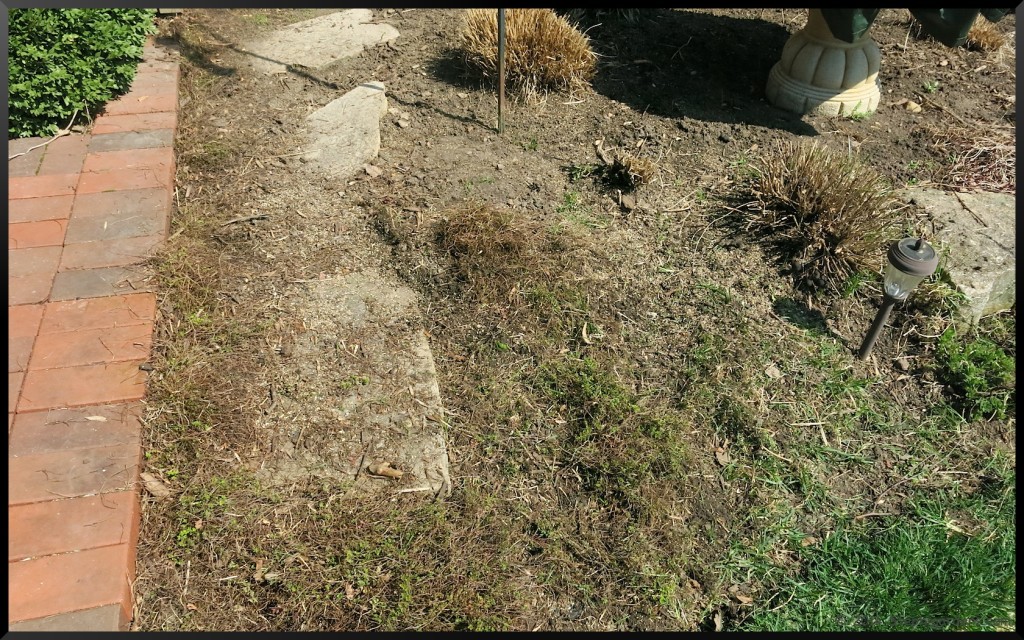
When we first redid the landscape along the back of the house, we included a small stone walkway to get to the spigot. It was a full sun location, and needed to take some light foot traffic. We settled on Creeping Thyme.
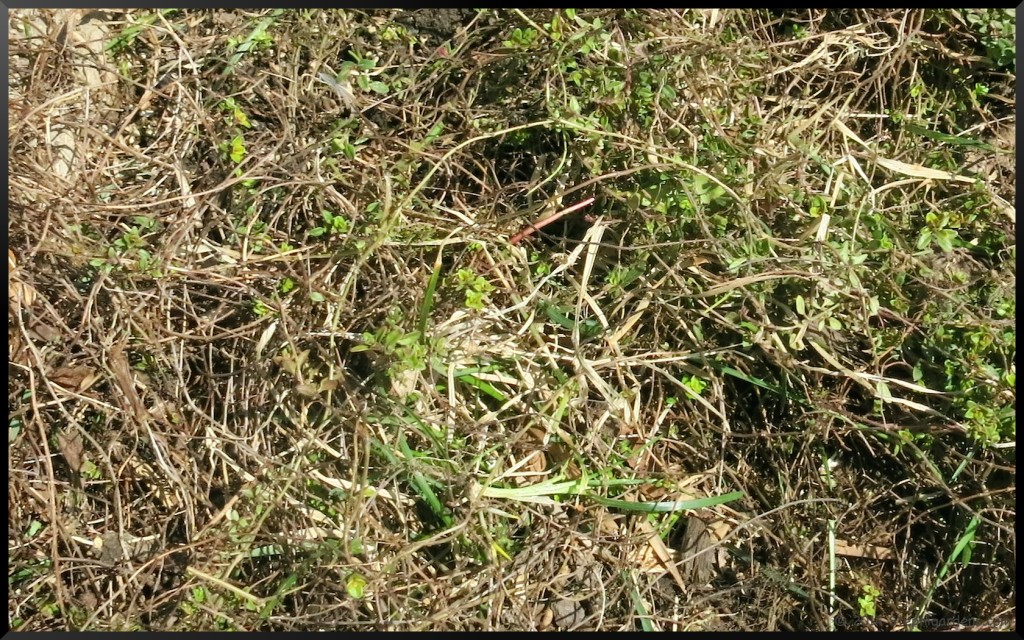
I thought it was no maintenance, but over the years it become more ingrown with grass and full of woody stems. These plants look NOTHING like it’s supposed to. I’ll put this in the truly embarrassing category.
The only way I know of to really keep the grass out is to keep a clean cut edge with the lawn and pull it as soon as you see it sprouting. You need to get right down to the roots, otherwise you’ve just “cut” the grass. That means pulling back the thyme and getting under it to get the whole grass shoot. Rather tedious, but easier to do early rather then later.
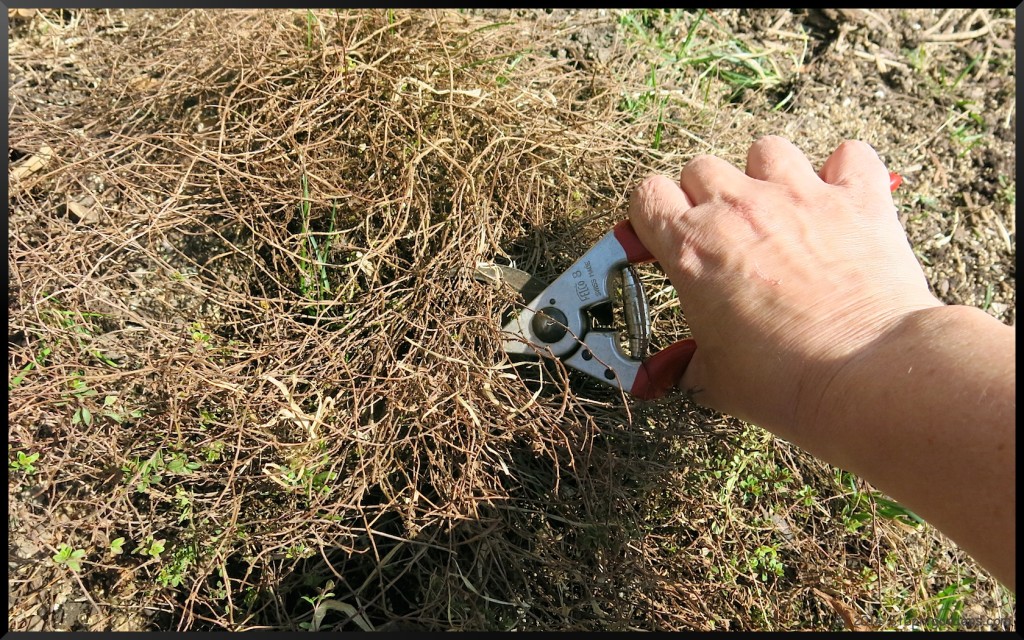
The woody stem issue is something easier to deal with. It simply requires some attention each spring. After the first year, the plants can be lightly pruned back, about 1/3 max. This keep the plants rejuvenated and full. Be careful to cut above the new growth, or it will not regrow. Cutting is also better than trying to pull out the dead, woody parts. The plants have fairly shallow roots and you just end up ripping everything out.
Before:
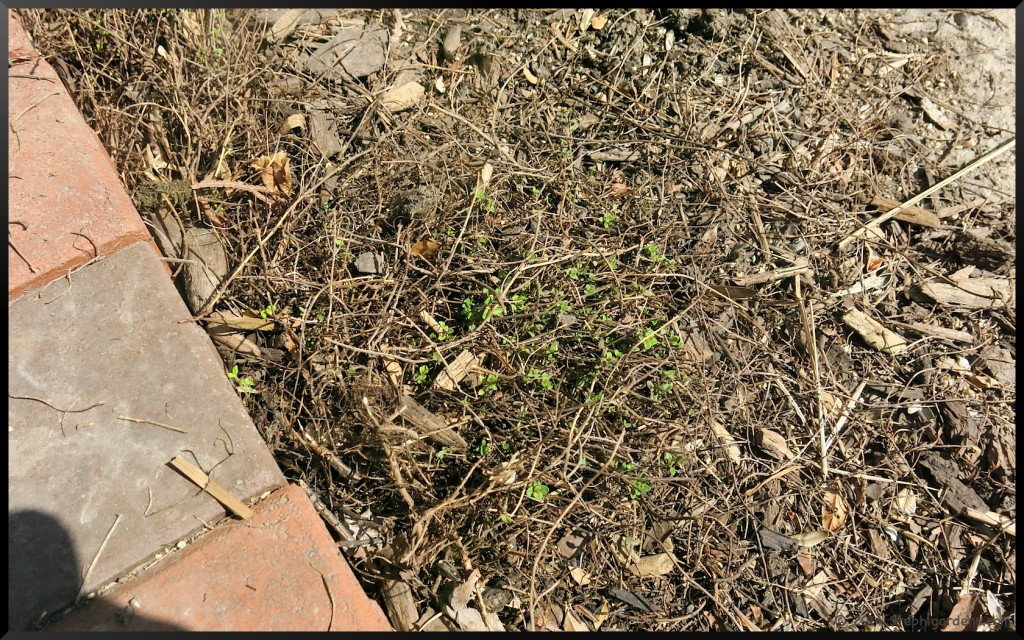
After:
This is what it looks like now.
I have a feeling this is going to be a multi-year process. We’ll see how it looks in a couple of weeks. If still looking peaked after a few weeks, I may need to add some fresh plants and chalk it up to a learning experience. If it does seem healthy, I may be able to divide the plants and make new clumps. You can also do this if the plant has become too woody in the center (oldest growth) and you want the outer, younger growth to grow unimpeded.
Overall, I think is still the best plant for the location, it just takes a little bit of care and attention. No matter how it looks, it smells wonderful to work with and walk on!
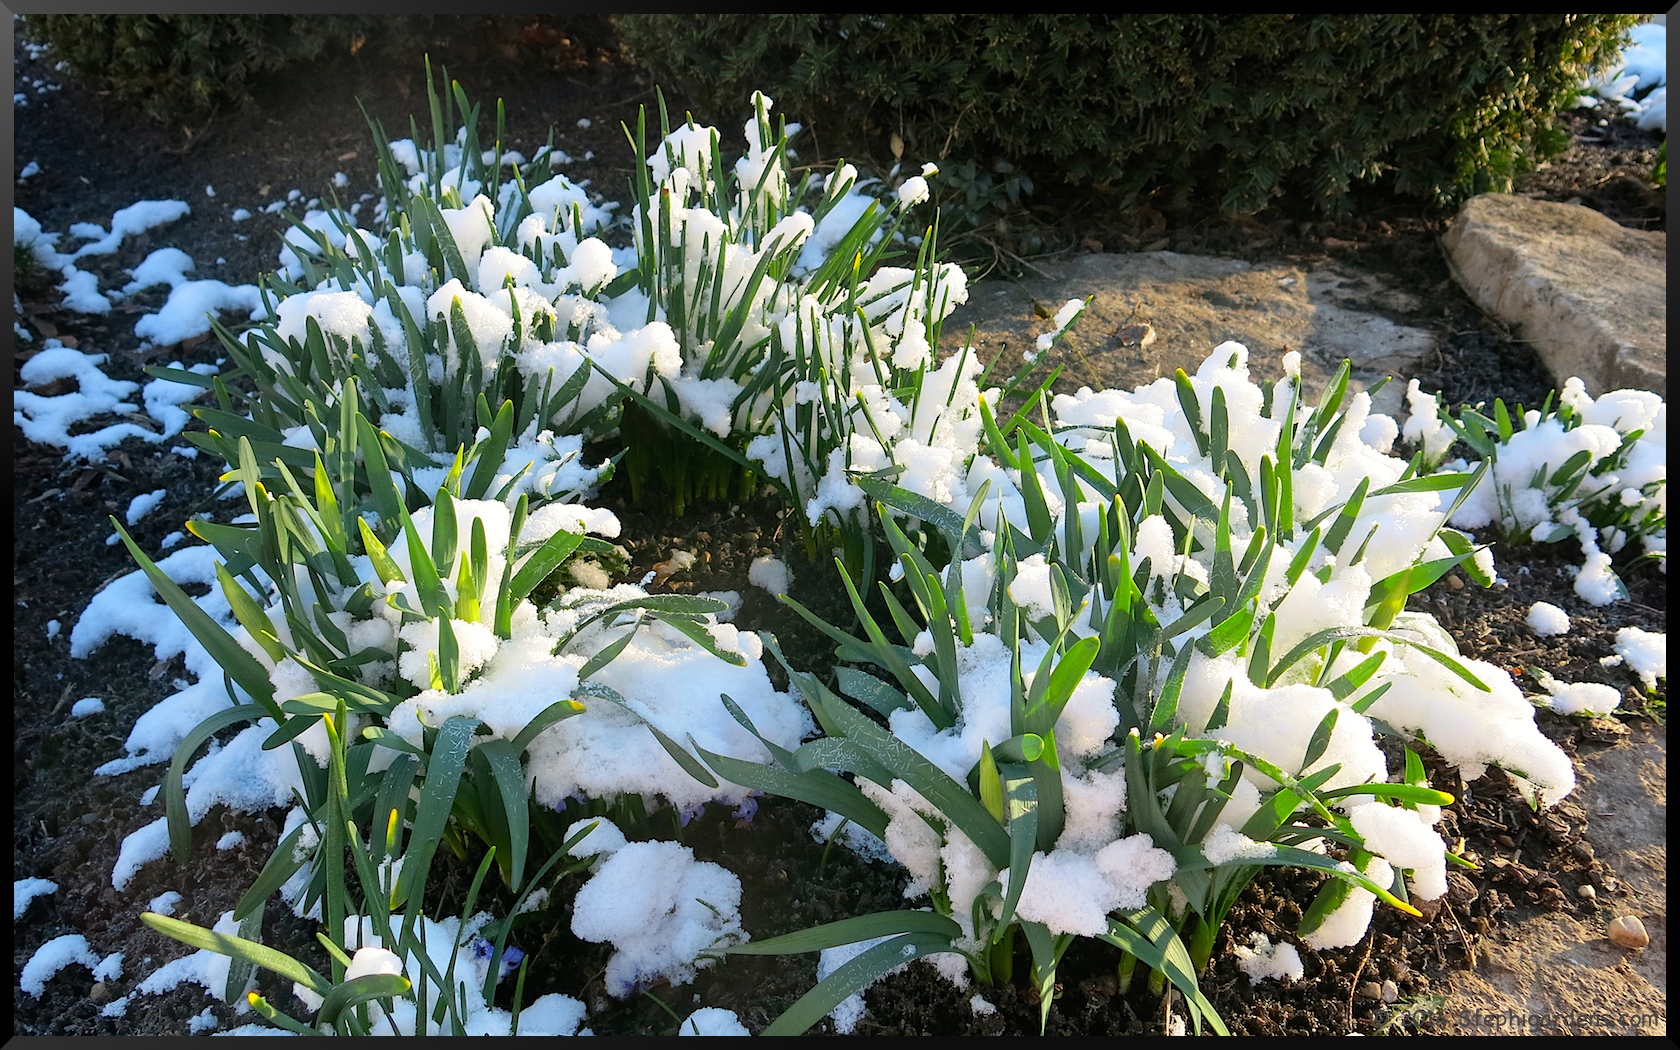
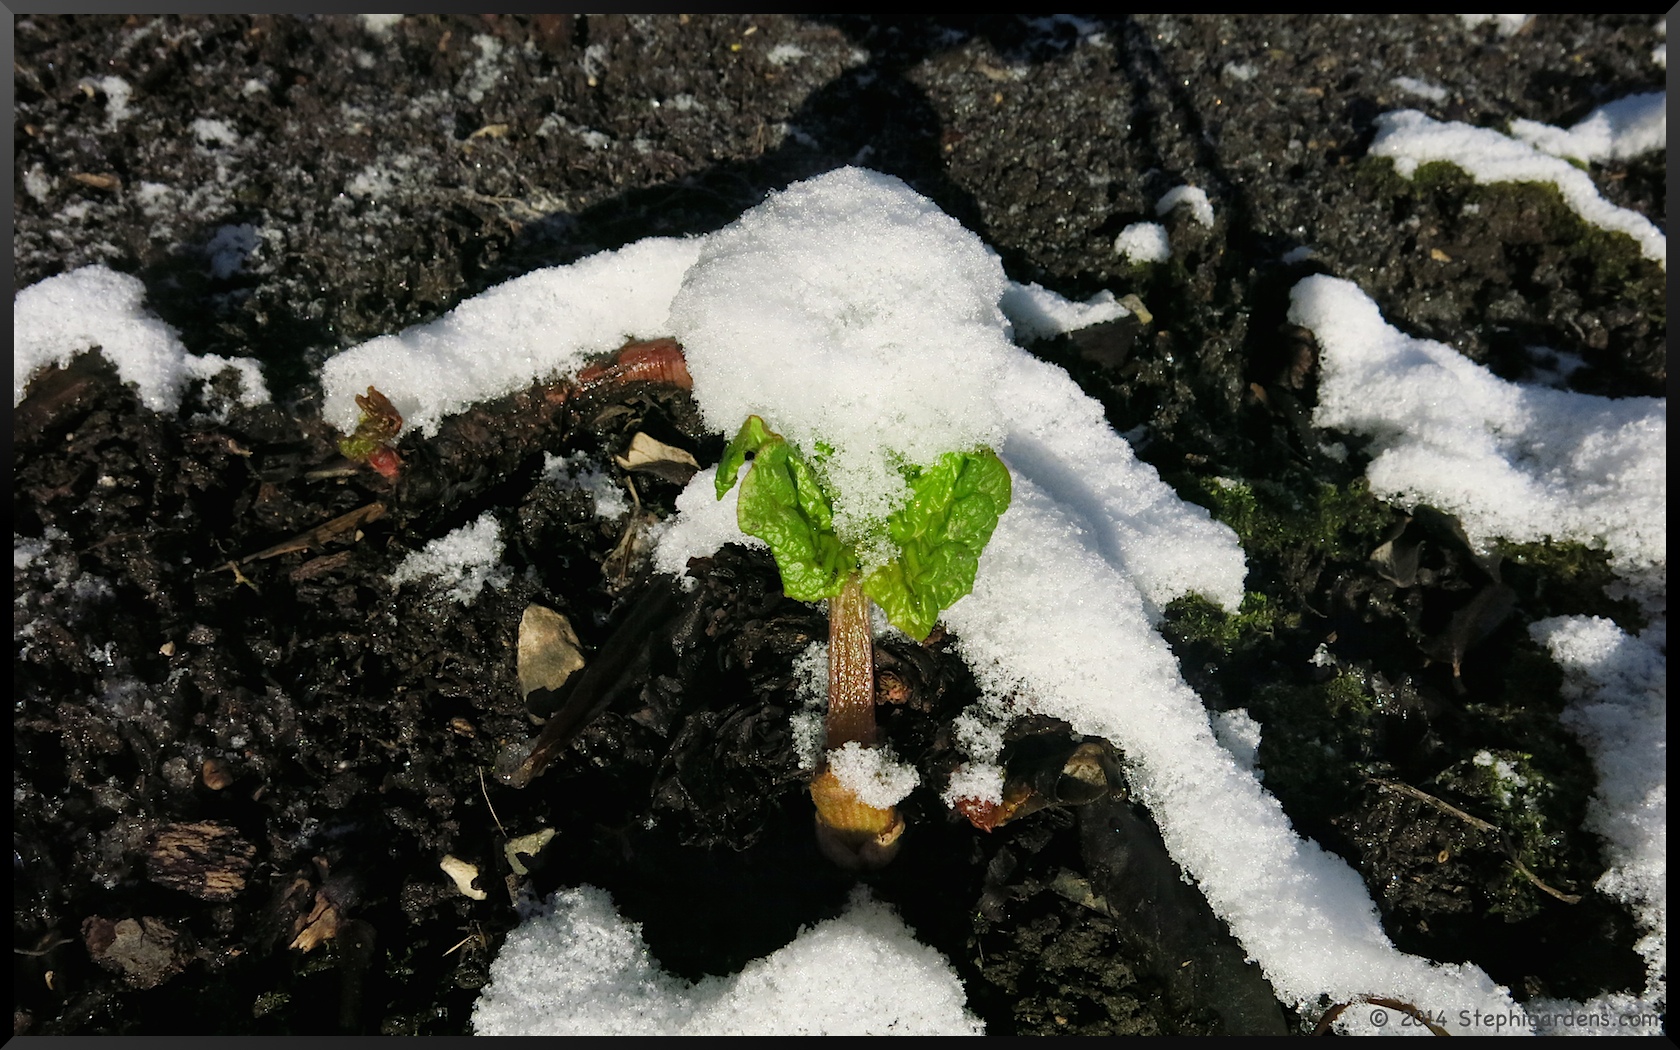
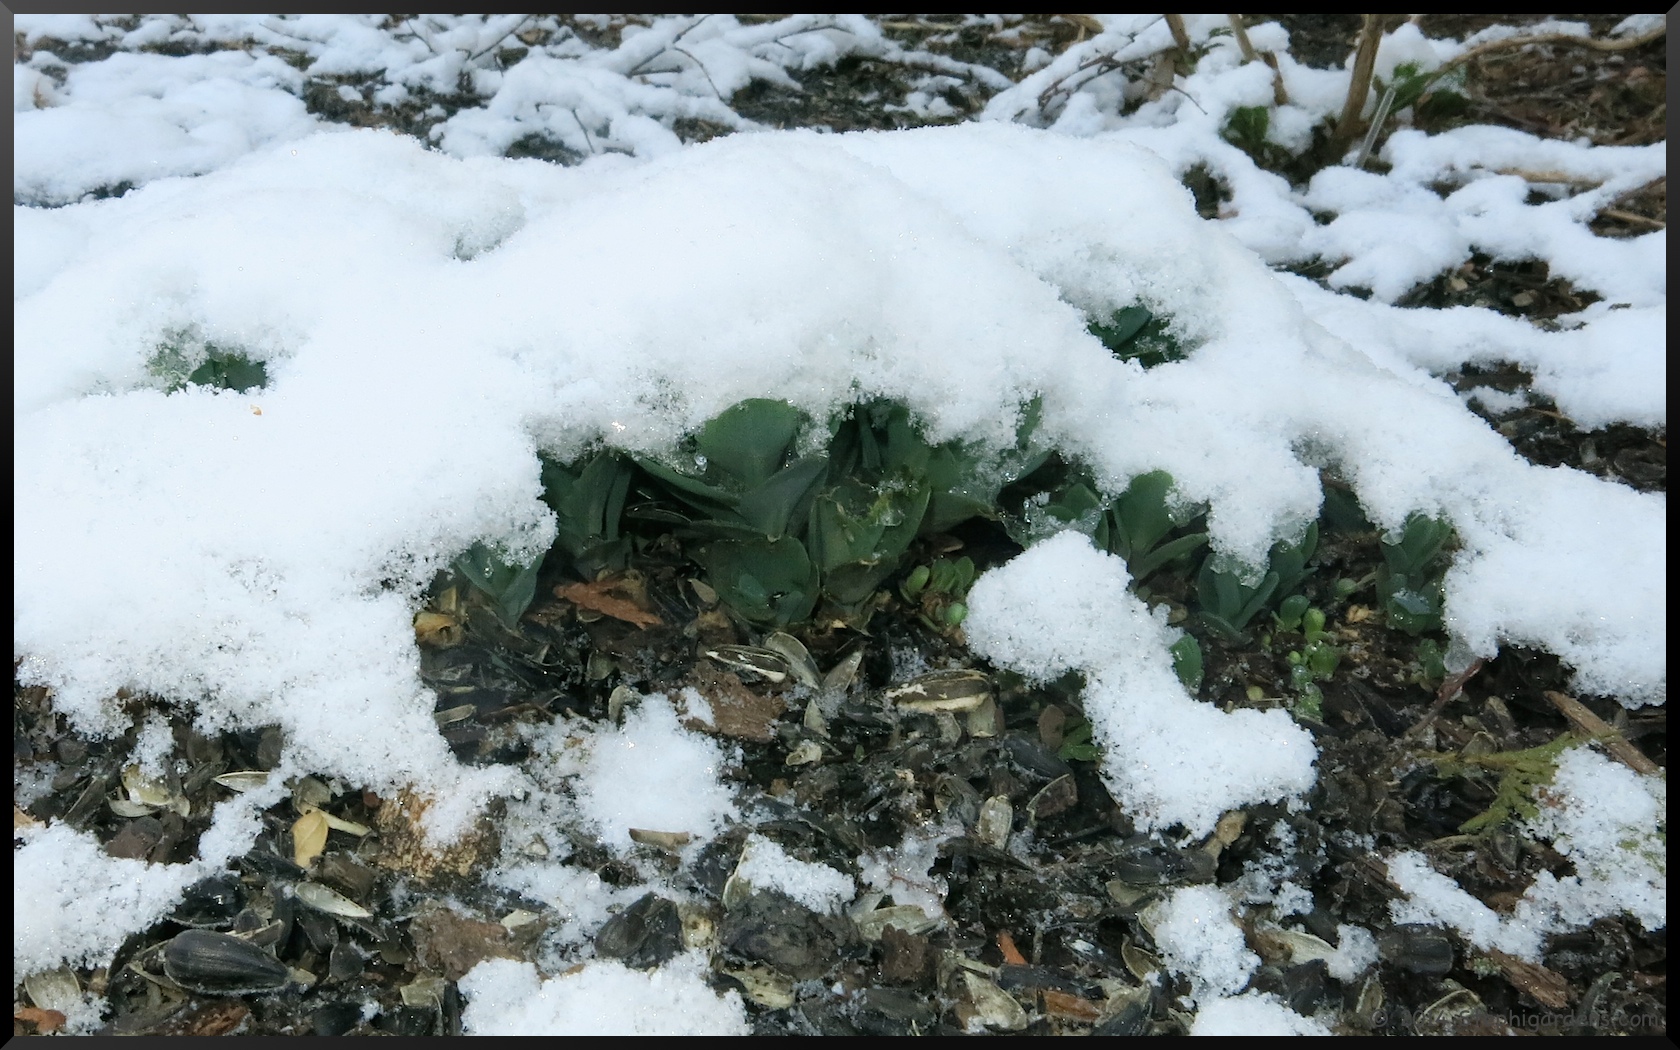
Just when we all thought we had turned the corner to spring, Mother Nature decided she doesn’t want to let go of winter quite yet.
Temperatures dropped down into the mid 20’s and we got about 1.5 inches of snow, although it didn’t really stick to any pavement type surfaces.
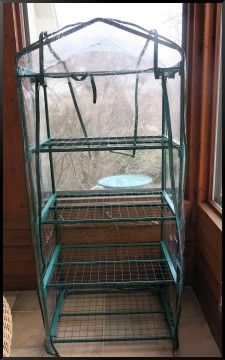
Because of the freezing temperatures, my seedlings that have been quite happy on the porch in their mini greenhouse needed to come inside or risk freeze damage. Quite unceremoniously, they get to spend the next couple of days on the kitchen table in the warmth of the house. Luckily no company coming over, but even if they did, they know me so they’d understand. Temperatures should be back up by midweek, although still below average. I’ll move them back outside when the danger of sub-freezing temperatures has passed. It’s probably a good thing I got the seeds started a little late.
The rhubarb is looking wonderful and will handle the snowfall just fine.
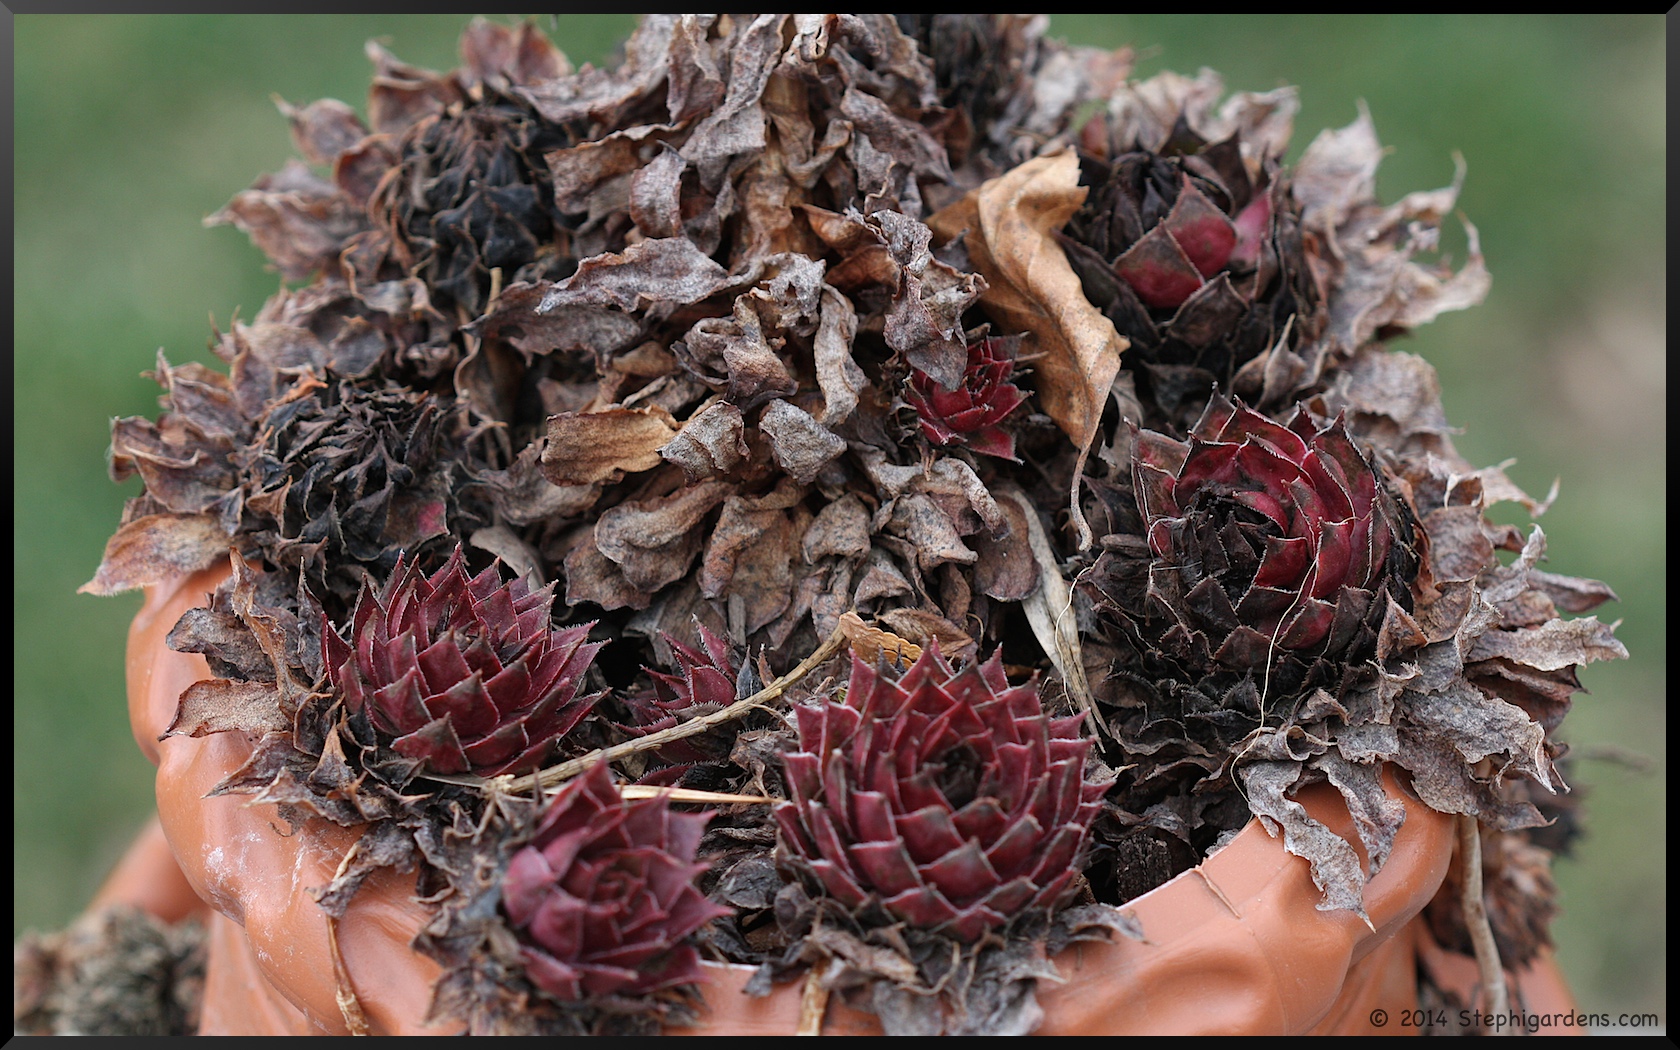
The Sedum “Autumn Joy” and Hens and Chicks that looked so good over the weekend, got a little buried last night. Hopefully, they will be ok with the additional moisture and freezing temperatures. Not too worried about the sedum, but the potted Hens and Chicks are less predictable.
Relaxing on the patio will have to wait for another day.
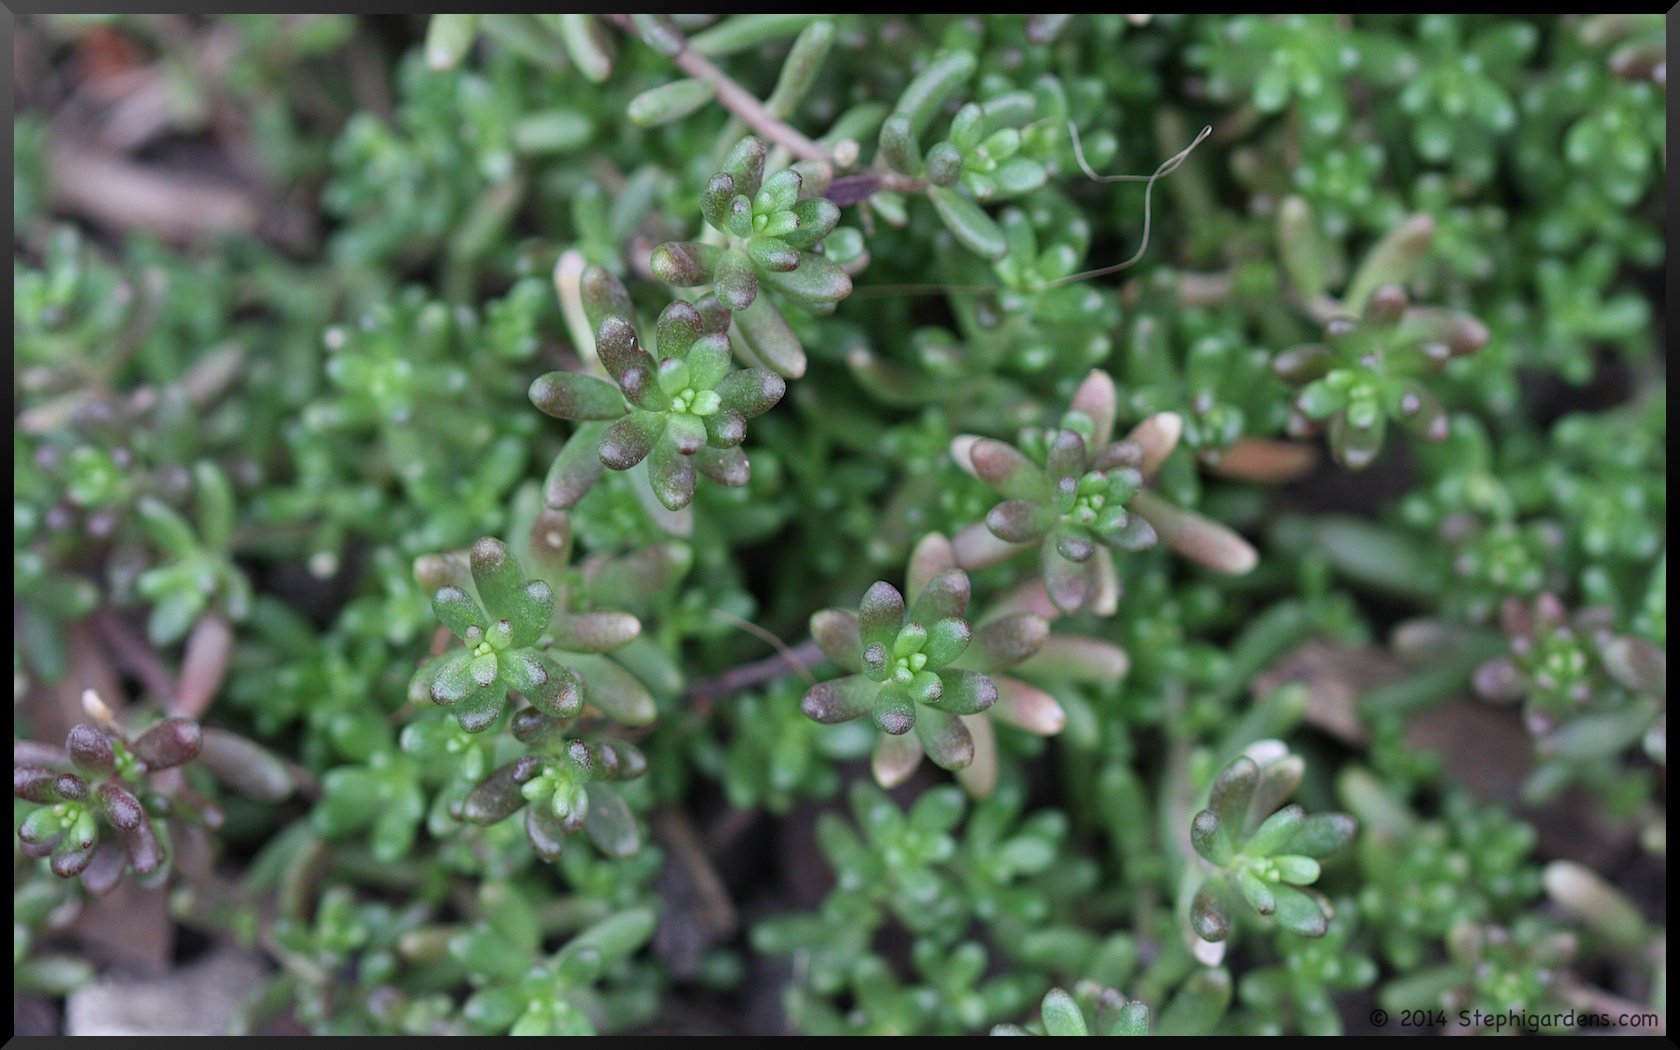
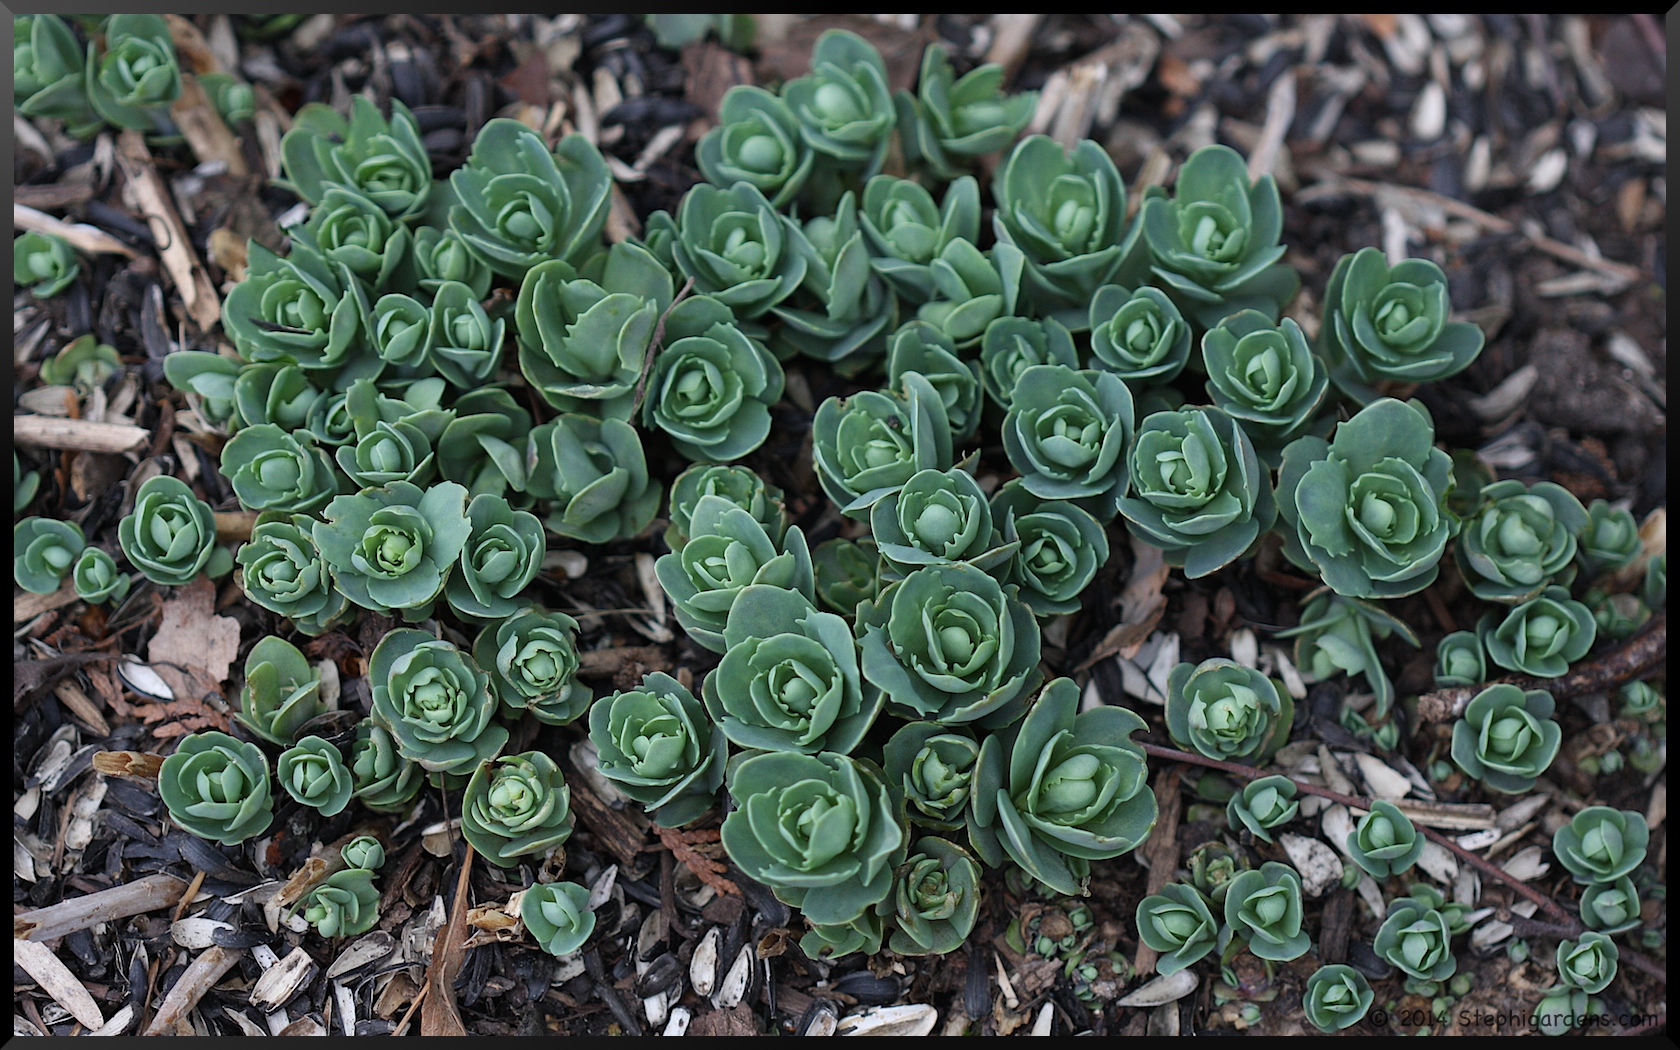
This winter was a particularly harsh one, so as new growth is starting I’m excited to see what has survived. Over the last few years, I’ve planted a number of sedums in hot dry areas that other plants have not fared well in. I also have almost too many Sedum “Autumn Joy” around the yard. Happily, many of them seem to have survived and are already greening up the garden.
Sedum “Autumn Joy”
I have clumps of Sedum “Autumn Joy” all around my yard that started from only a couple of plants. In my soil conditions, they are fast growers and easy to divide in only a few years. These are one of those plants that I’ve found that “less is more” when developing a landscape plan. They will fill in the space fairly quickly so don’t over plant. They are also one of the earlier plants to begin leafing out, despite them being a fall flowering plant.
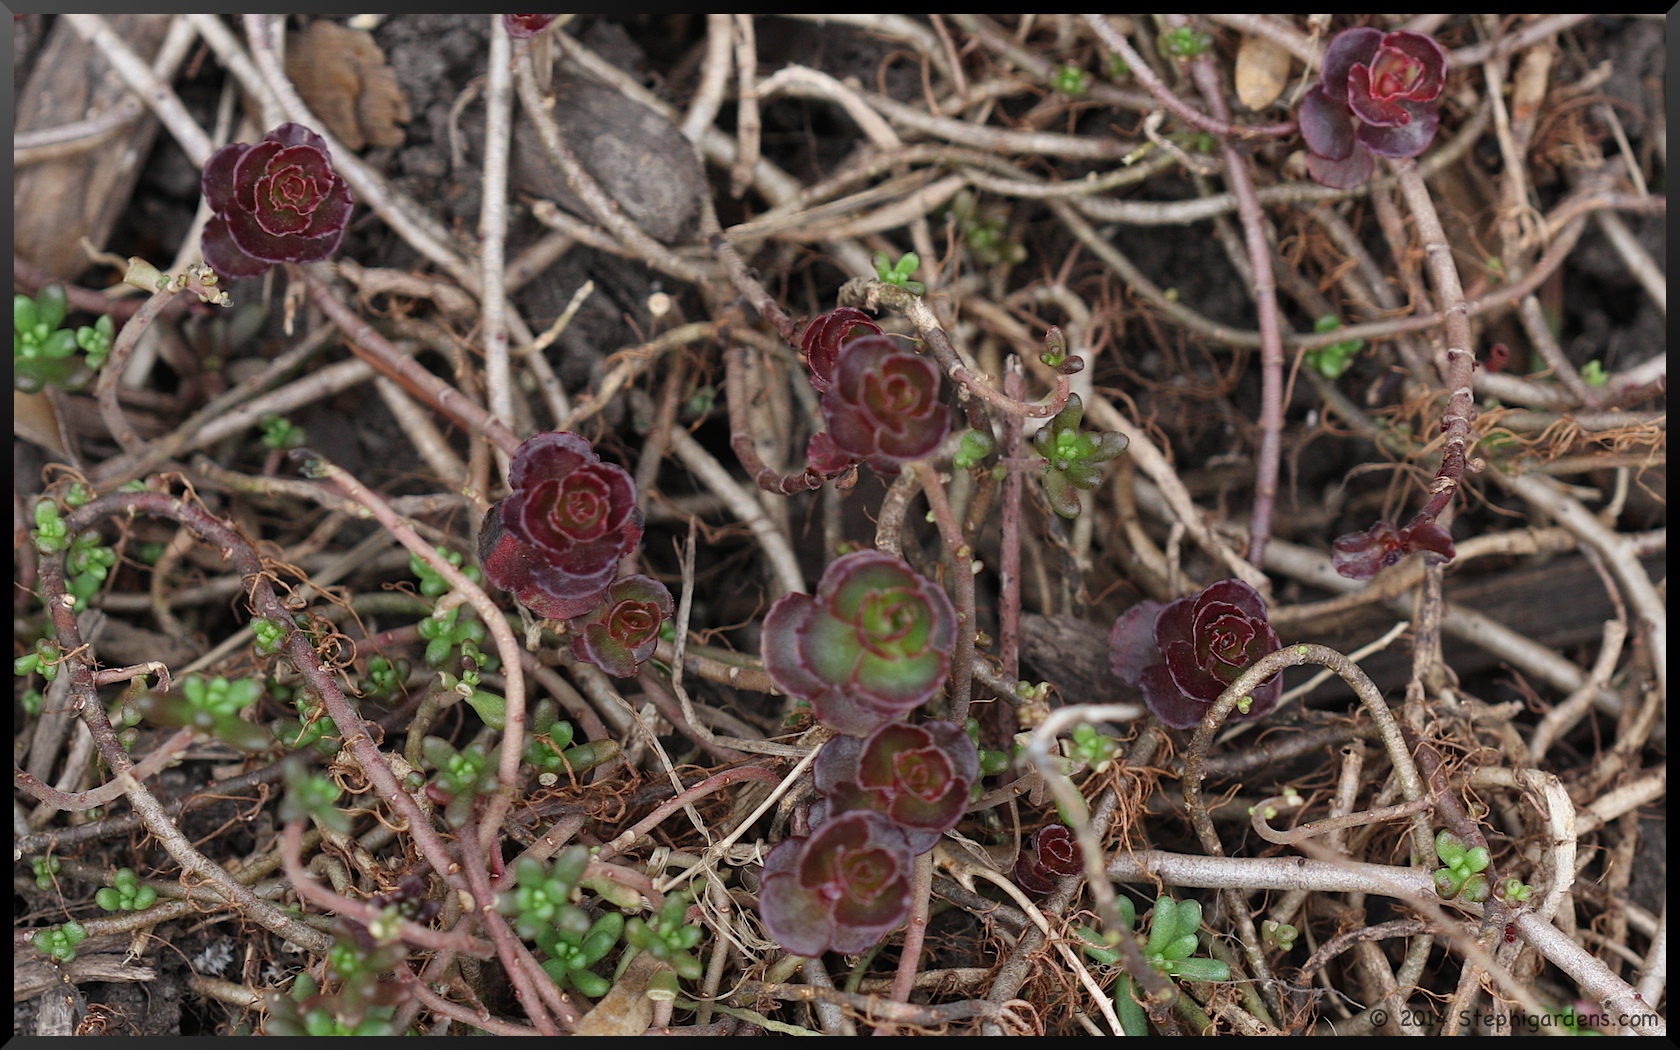
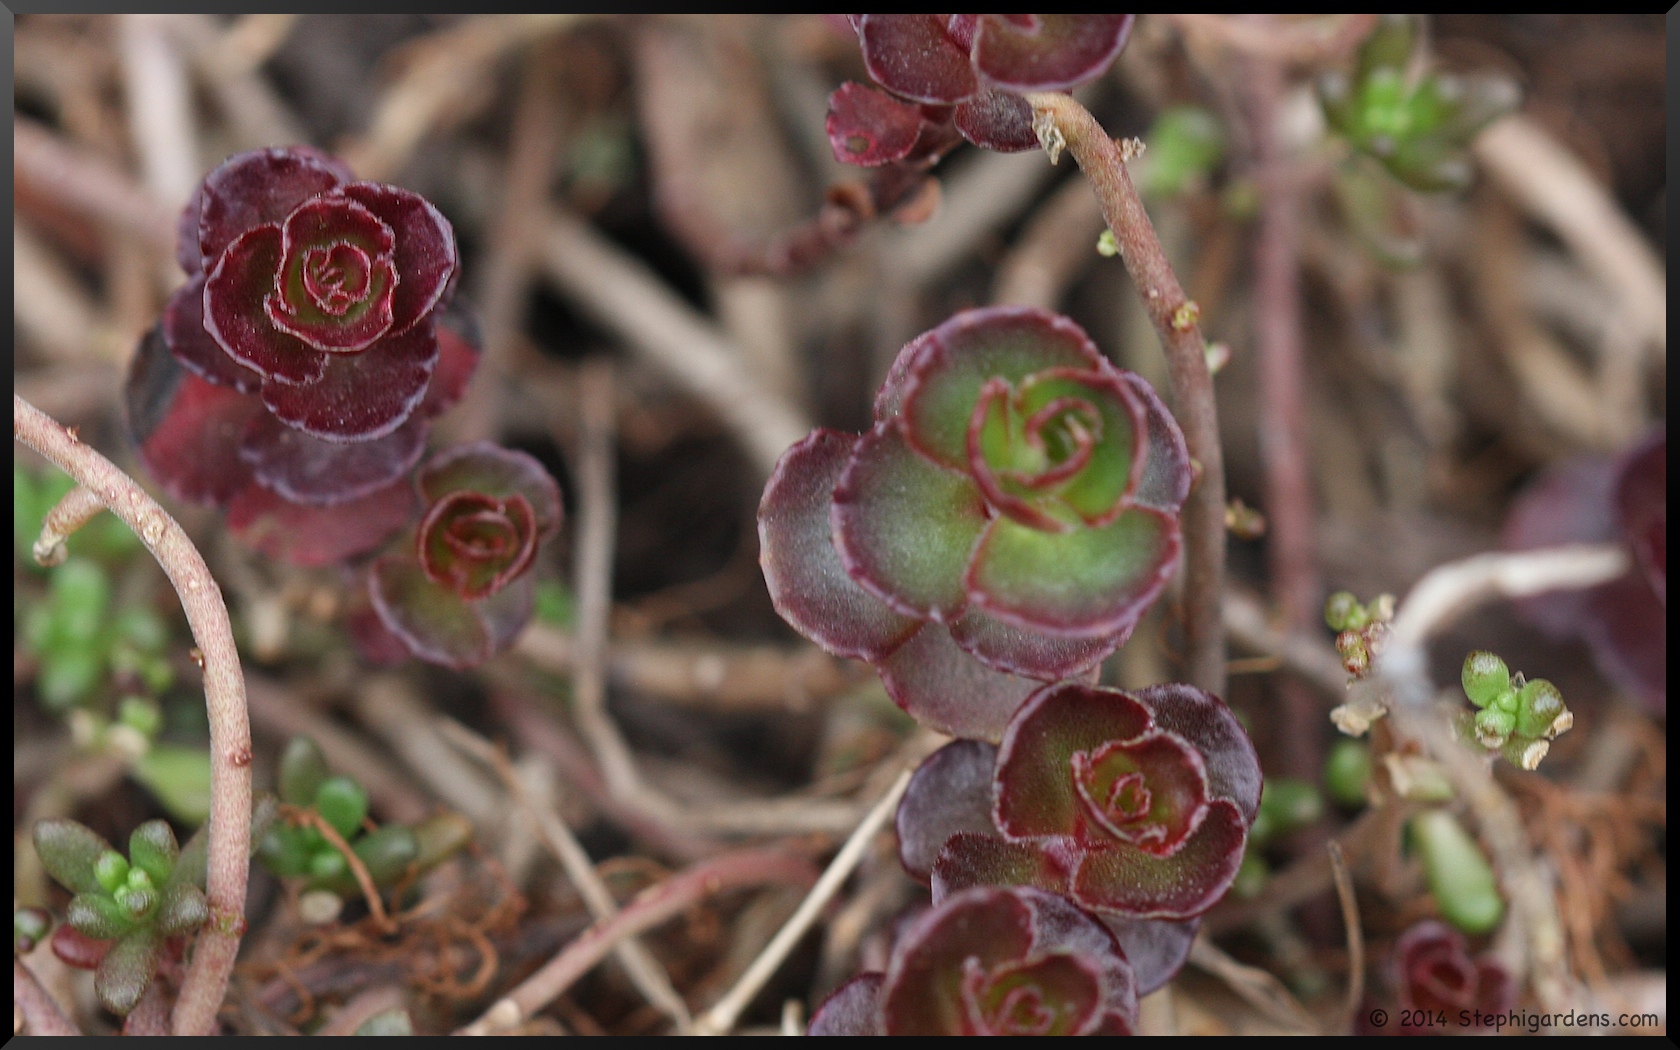
Hens and Chicks
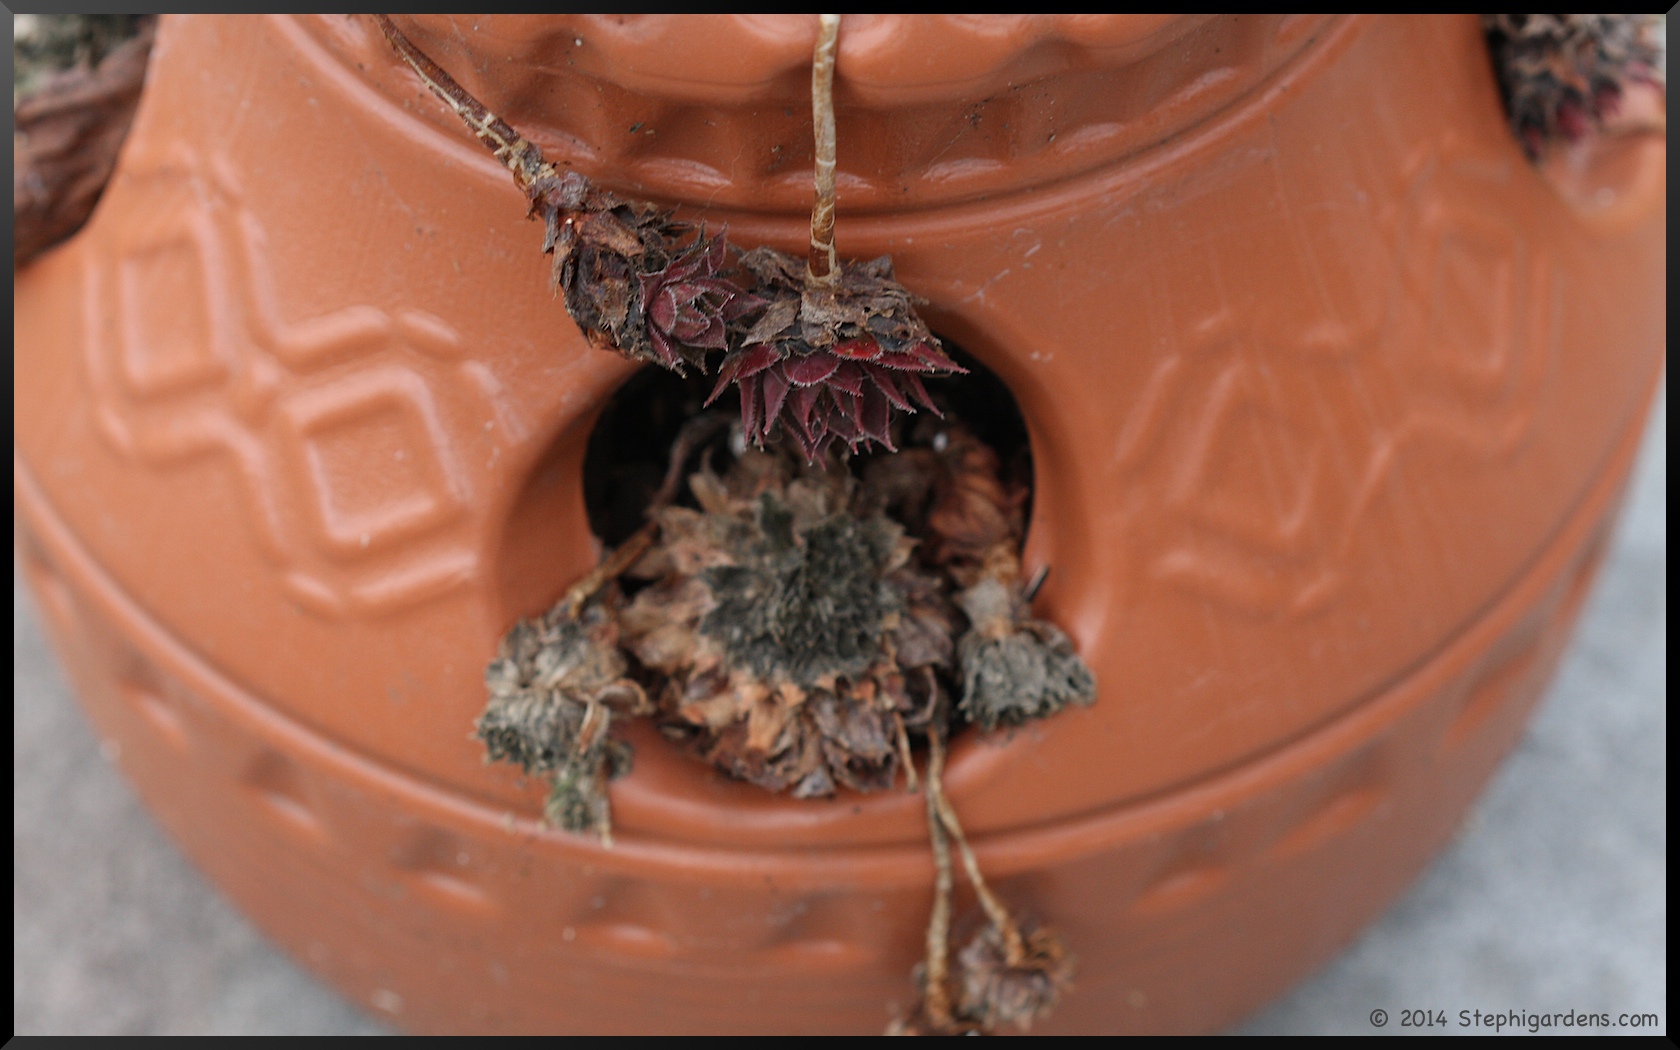
I don’t usually leave the potted Hens and Chicks out over the winter, but this was one of those winters that snuck up on me and I never got around to putting them on the porch. It seems that they mostly survived and don’t look much worse than normal. I did expect the center of this one to be dead since it had flowered so beautifully last summer. That marks the end of its life cycle. Depending on what the pot looks like in a couple of weeks, I’ll pull out all the dead parts and try to plant the chicks in the empty spots. Otherwise, I’ll pull it apart and plant the remaining plants in the garden.
I’m still looking for the Hens and Chicks that are in the garden to appear. They really don’t die back, so the fact that they are “missing” suggests maybe they didn’t survive the winter. Maybe they’ll surprise me.
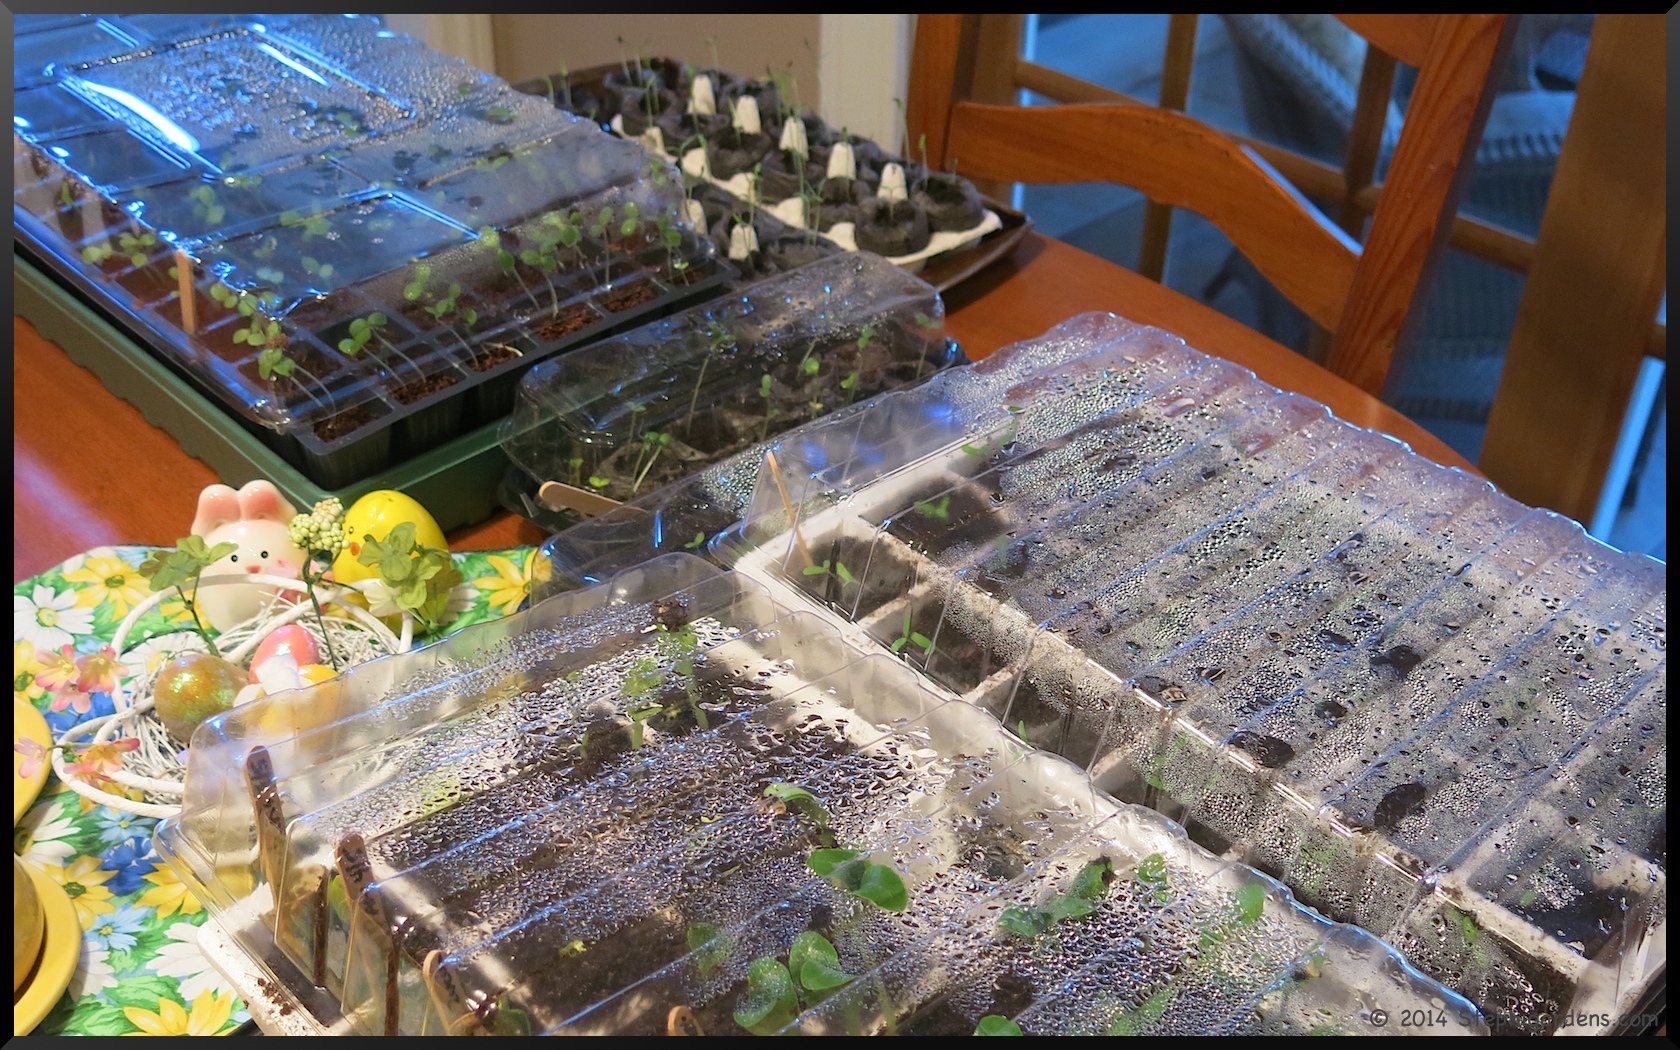
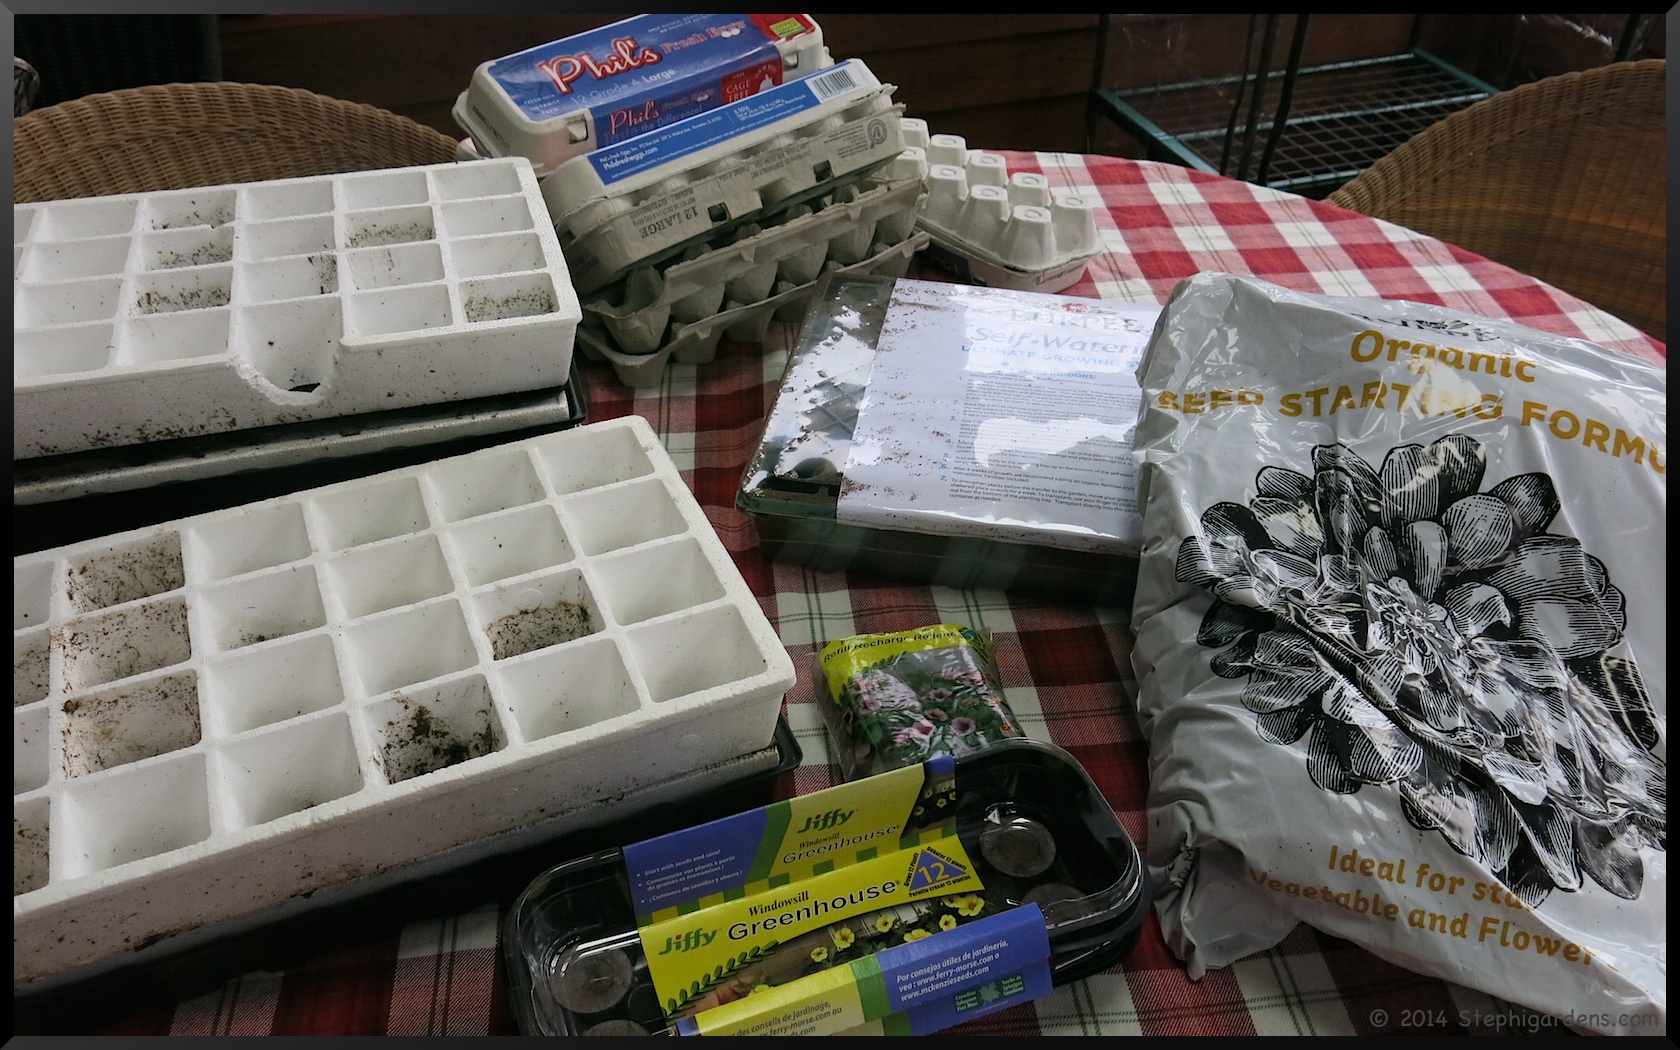
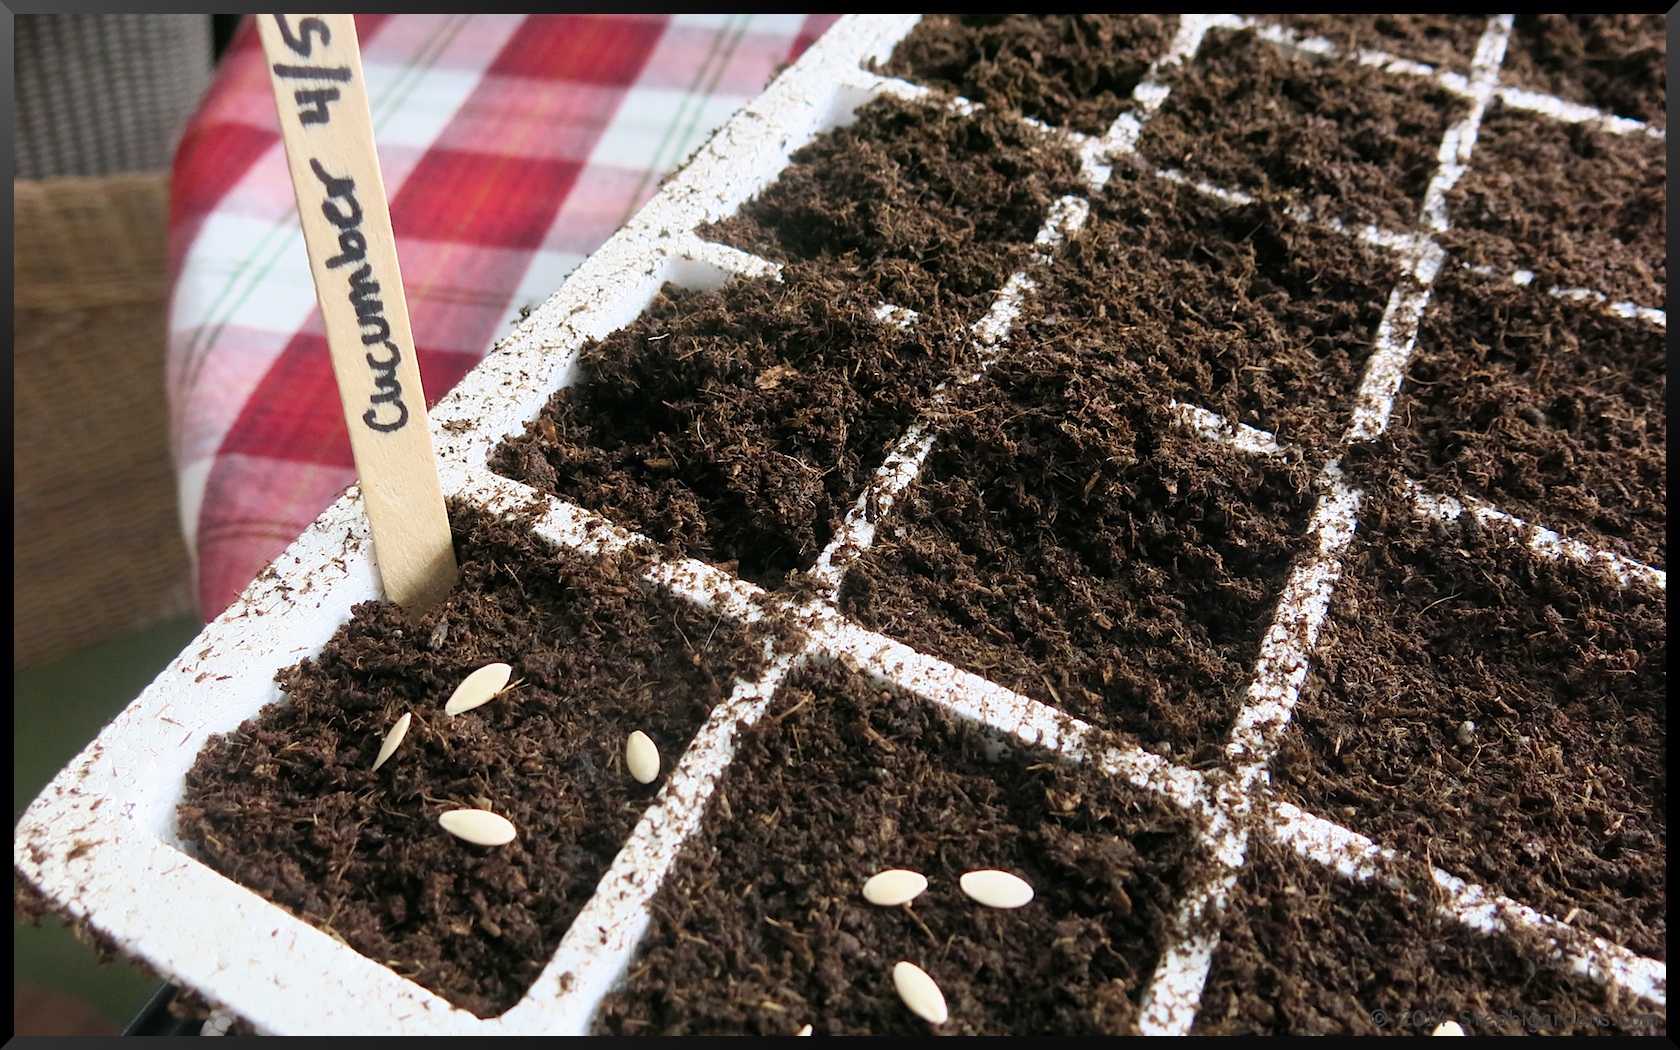
This weekend I finally had time to get my seeds and seed starting materials out to get them started indoors. I usually try and plant vegetables like cucumbers and summer squash that I have trouble finding in stores, but I buy my tomatoes and pepper plants from a local nursery who has a great selection.
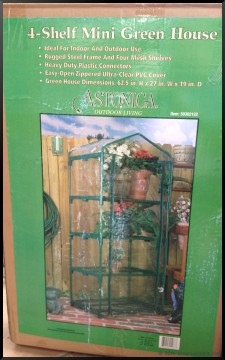
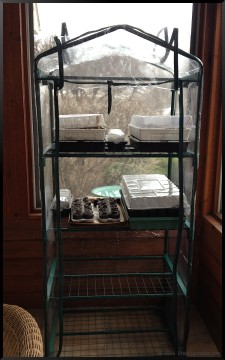
I hauled out all the seed starter kits I had (see Starting Seeds Indoors), plus I bought some new trays to expand what I can grow. I also bought a great new mini greenhouse to set all the trays on and set it up on the porch. I’m hoping this will work better then the tray tables in front of a bedroom window!
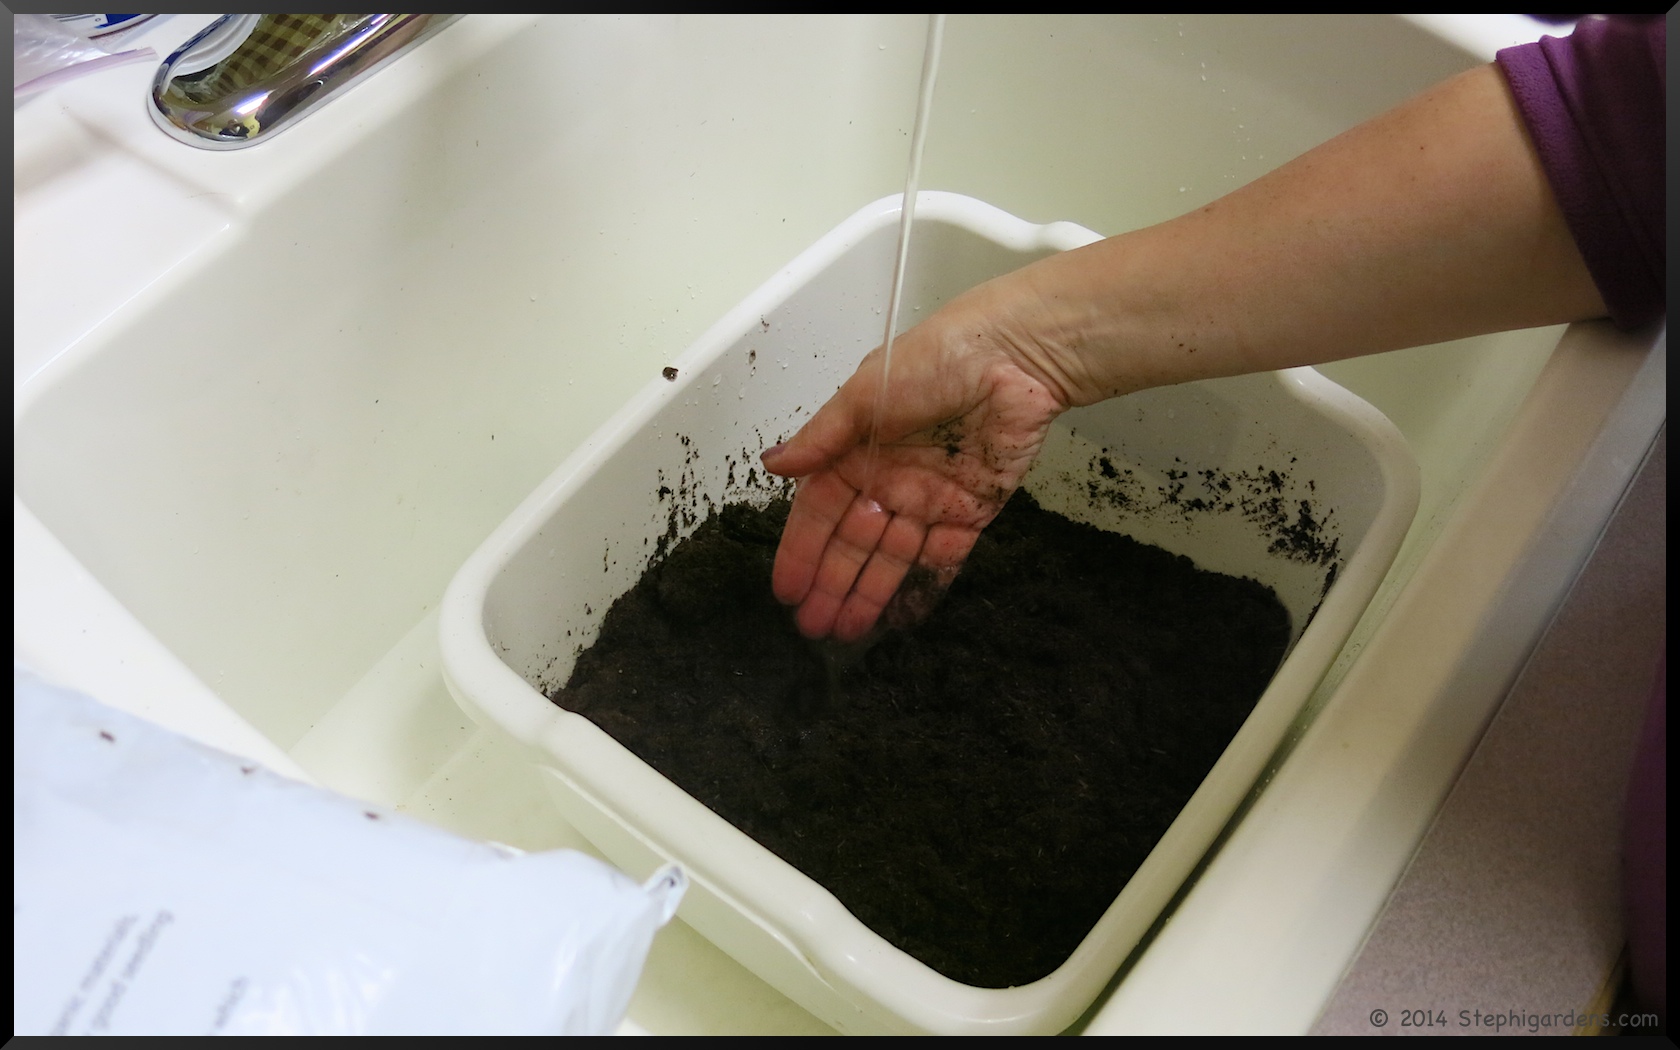
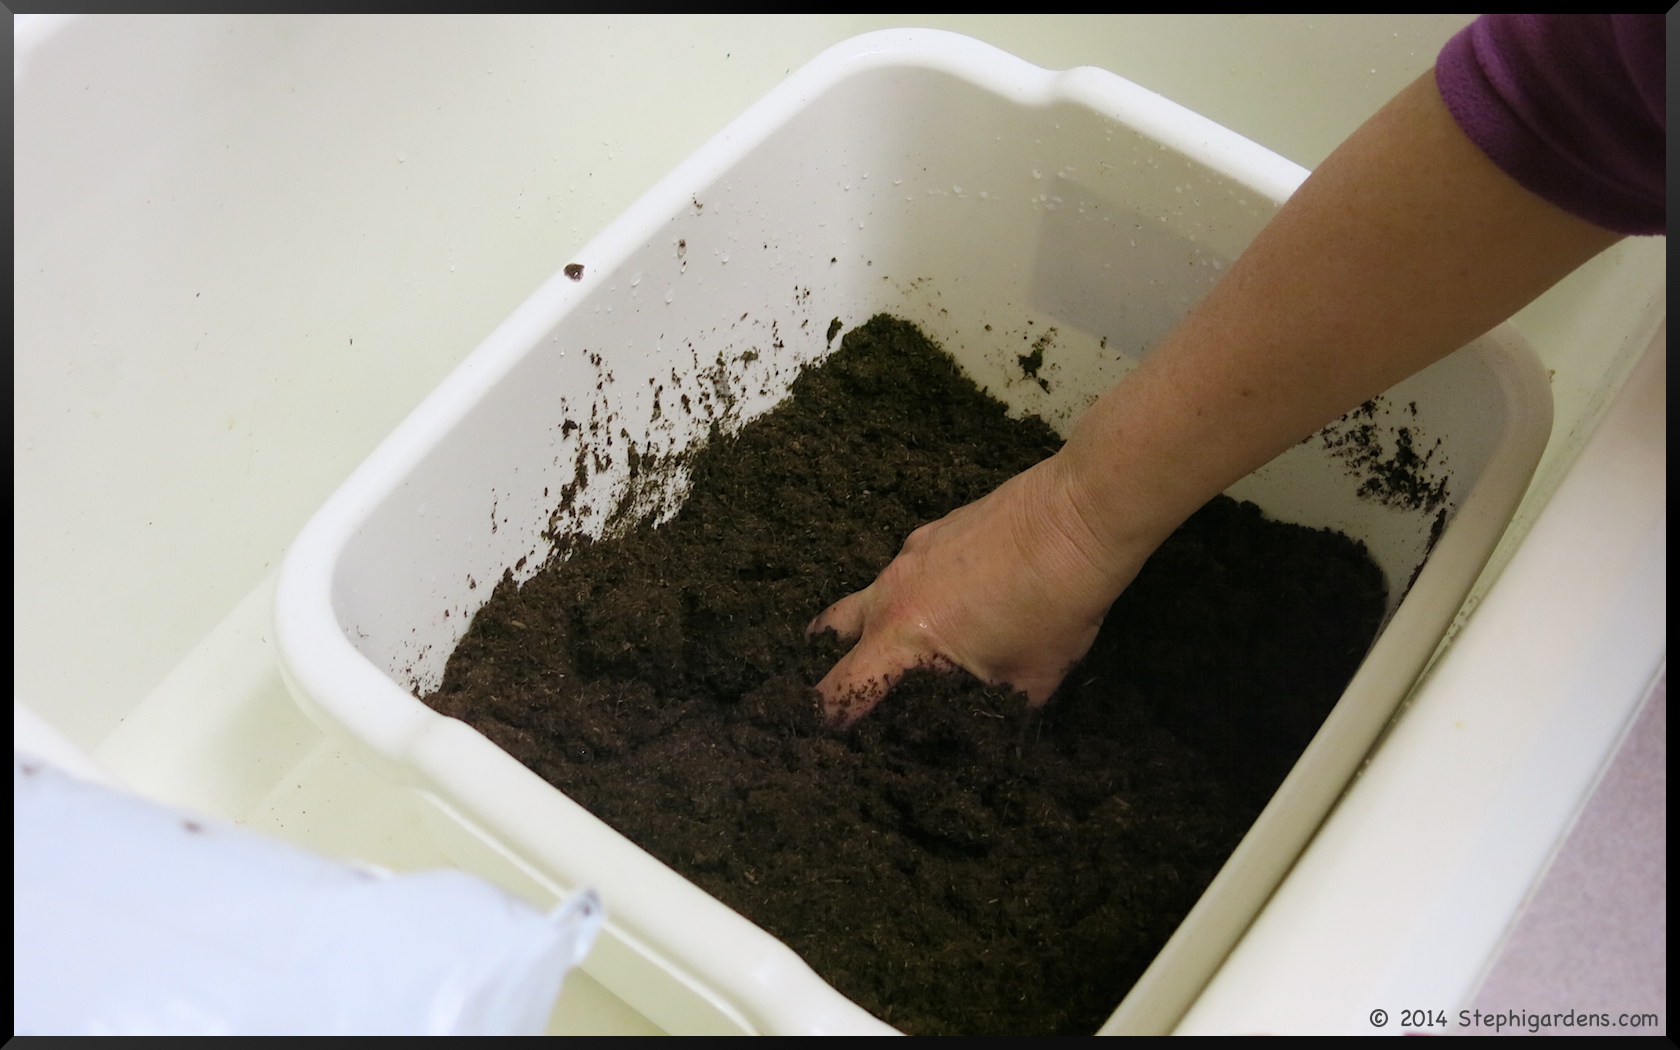
I first started with my APS-24 systems (see Starting Seeds Indoors for more thorough instructions) I like this size for starting vegetables and larger flowers. Be sure to thoroughly wet the capillary mat and pre-moisten the sterile germinating mix used to fill the holes.
Then add the seeds according to directions as to how many per grouping and how deep (you’ll thin them later). Be sure to label them so you know what you’ve planted!
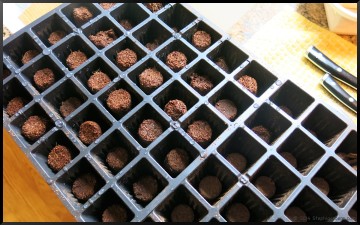
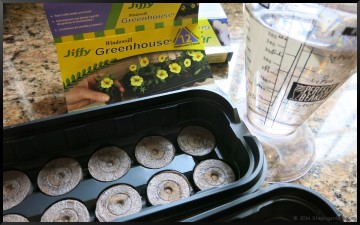
Since I have my new shelf and have space for more trays, I added to my collection of seed starting trays. I bought a couple of different kinds to try, a 72 cell Ultimate Growing System from Burpee to replace my missing APS one, and some smaller Jiffy 12 cell kits.
Both of these use soil pellets that you add water to and they expand. Like the instructions say, warm water does work better. After setting up all three kinds of soil cells, I think I prefer the old fashioned germinating mix that I pack myself. I found the pellets a bit difficult to get to rise evenly and needed to still fluff the mix in the Burpee kit.
I’ll see what I think after everything gets going as to which system I prefer for ease of use, and which holds up better for use year after year. For anyone who noticed the chunk missing from the styrofoam APS system, that was my fault. I’m not sure why I decided it what a good idea to pick up the full tray with one hand to move it. That missing piece would be where my thumb was. Otherwise, I’ve had these for years without any problems. Best to move all these trays with two hands!
Most of the germination instructions say plant inside 4-6 weeks prior to the last frost date. I’m about 3 weeks prior, although I usually wait a couple more weeks until mid-May before putting them in the ground. They should be fine starting this week. Here’s what I planted:


 We had skipped dinner, so we stopped by the