Grill Roasted Potatoes

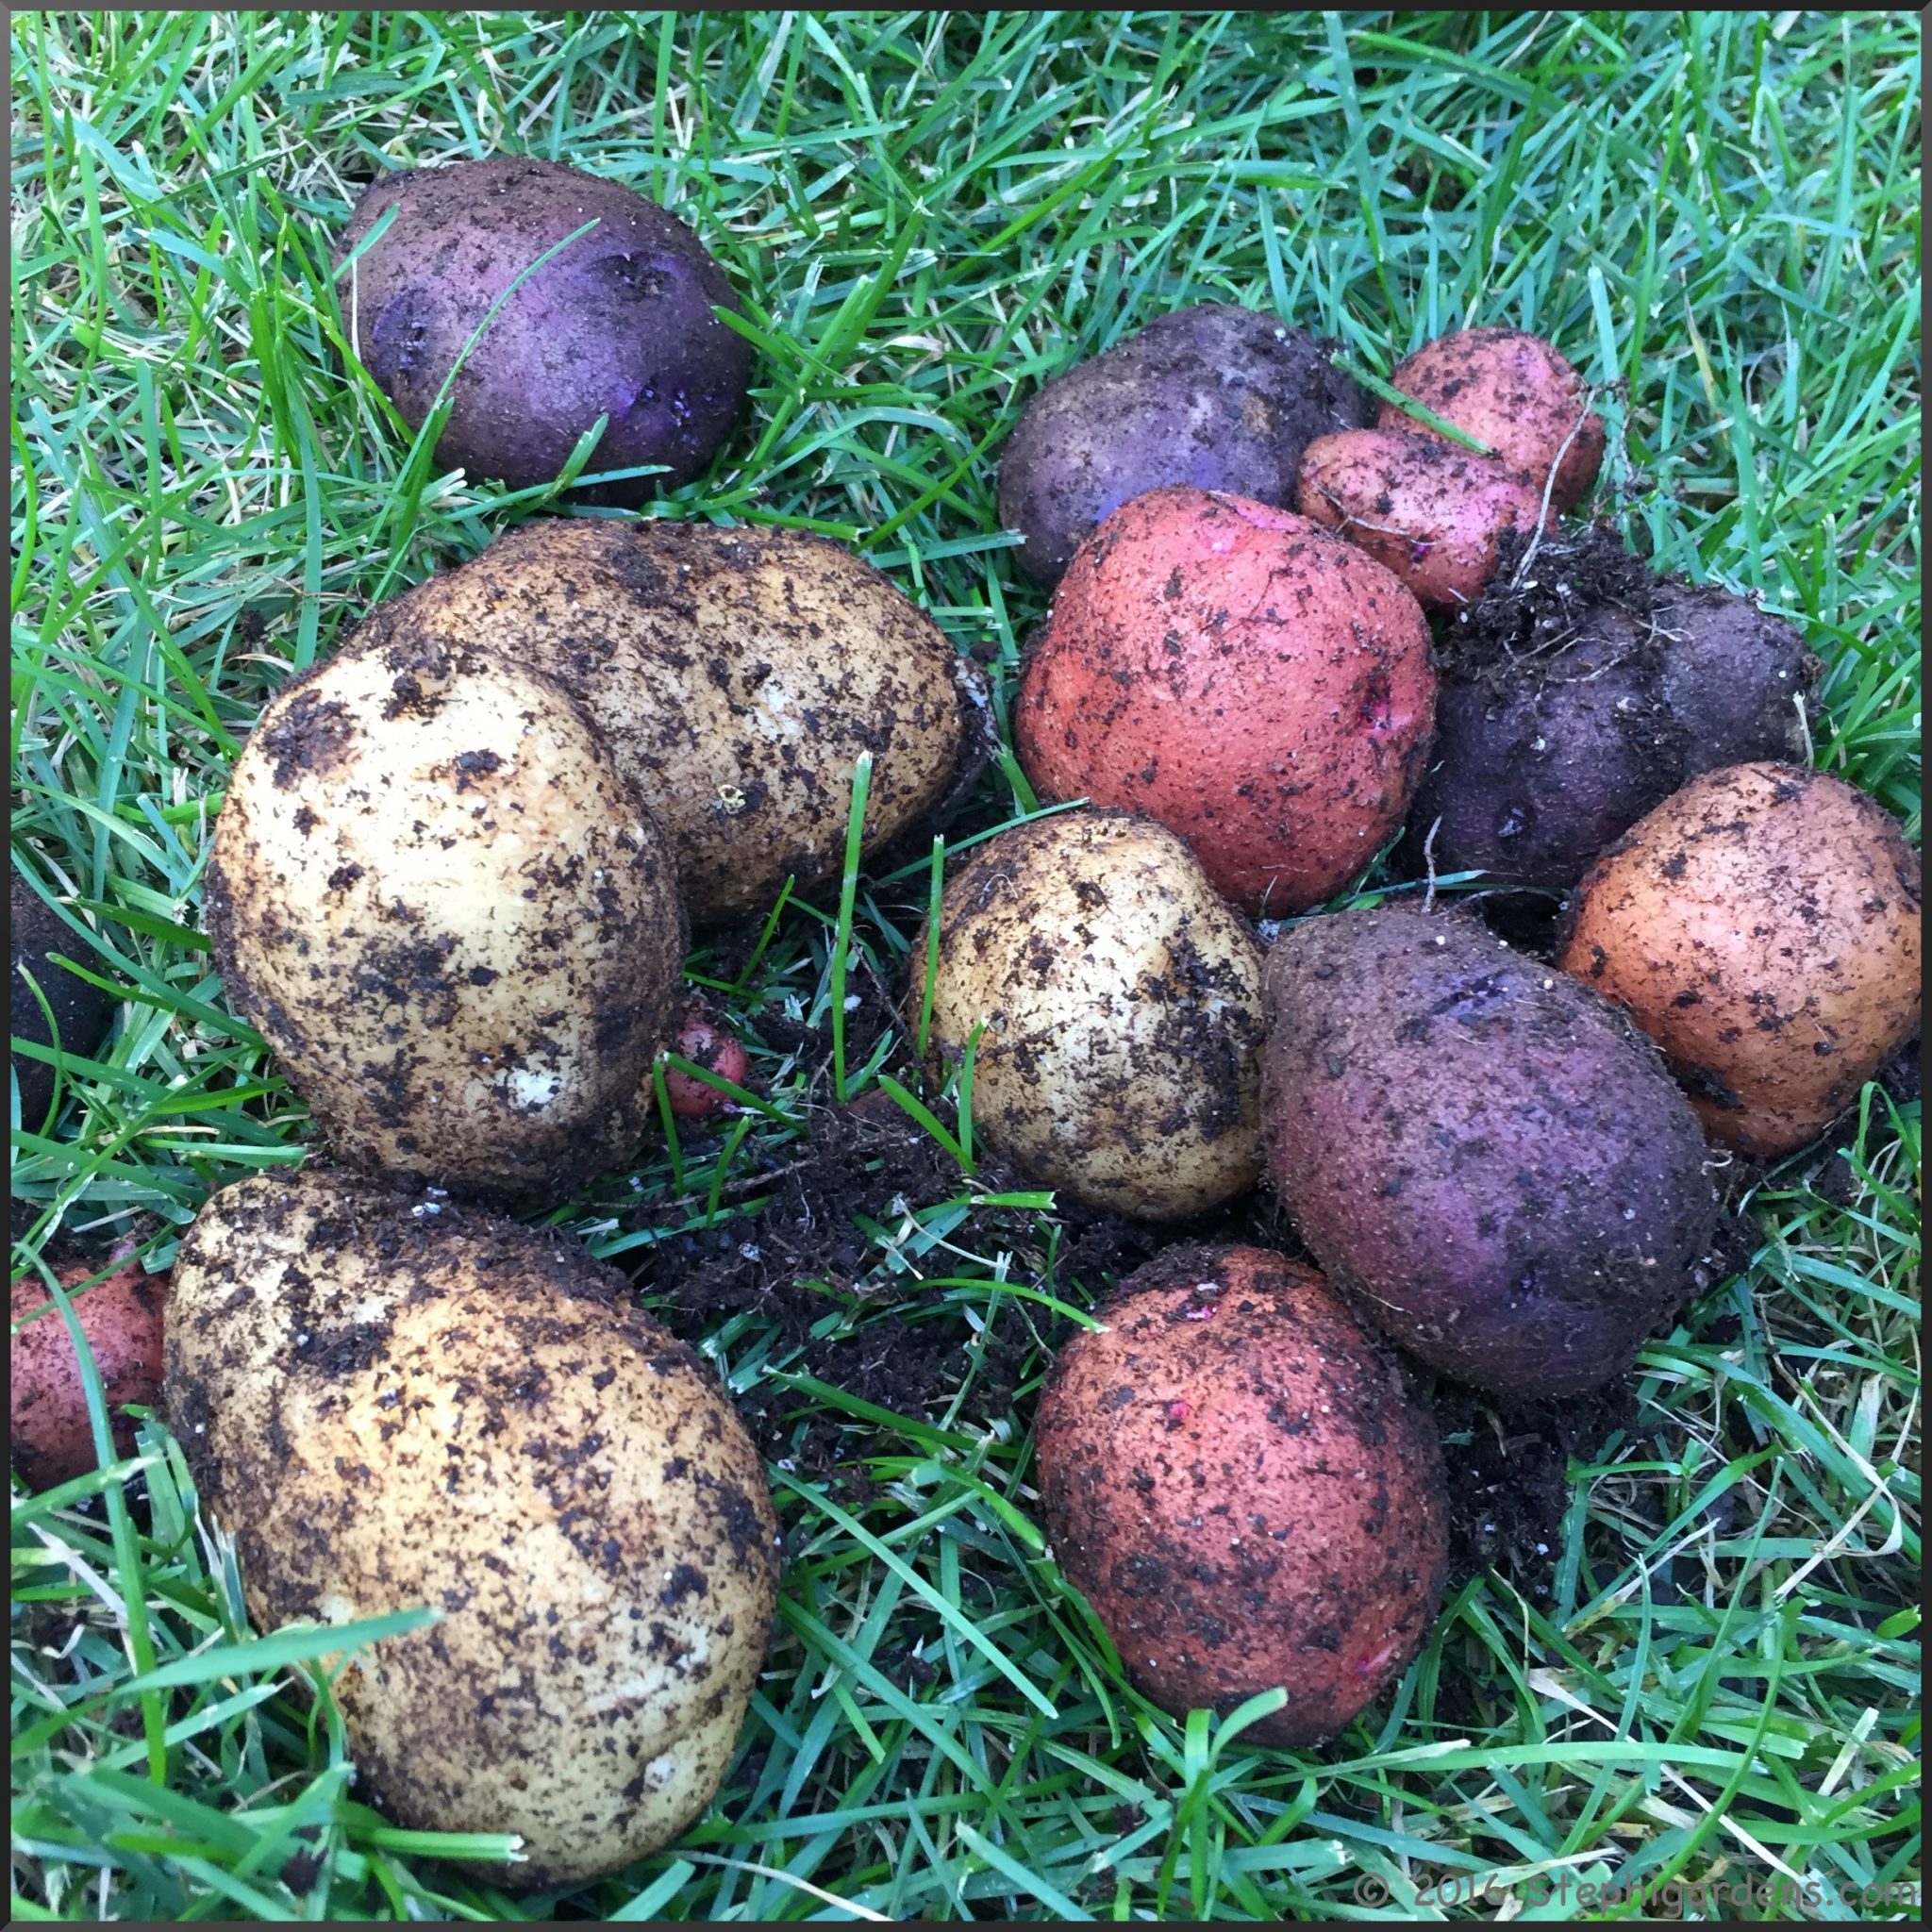
Now that I’ve planted and grown all those potatoes last year, what was my favorite way to eat them?  Roasting on the grill!

This is a great simple recipe that can be adapted for the grill or the oven.  Pick your favorite potatoes.  I mainly used thin skinned Yukon Gold or an assortment of the Red, White and Blue blend potatoes that I grew last summer.

Wash and dry 1 1/2 pounds of potatoes and cut into quarters or cubes depending on the size of your potatoes.  You’re looking for even pieces of about 1 inch cubes.  In a large bowl, toss the potato cubes and with 2 Tbsp extra-virgin olive oil and salt (if desired).

Preheat a grill pan over indirect high heat for about 10 min.  Add the potatoes.  To keep grill flare-ups to a minimum, I recommend spooning on the potatoes rather than dumping them onto the pan.

Grill the potatoes 30-45 minutes, keeping gill cover closed as much as possible, and turn 2-3 times until golden brown and fork tender.

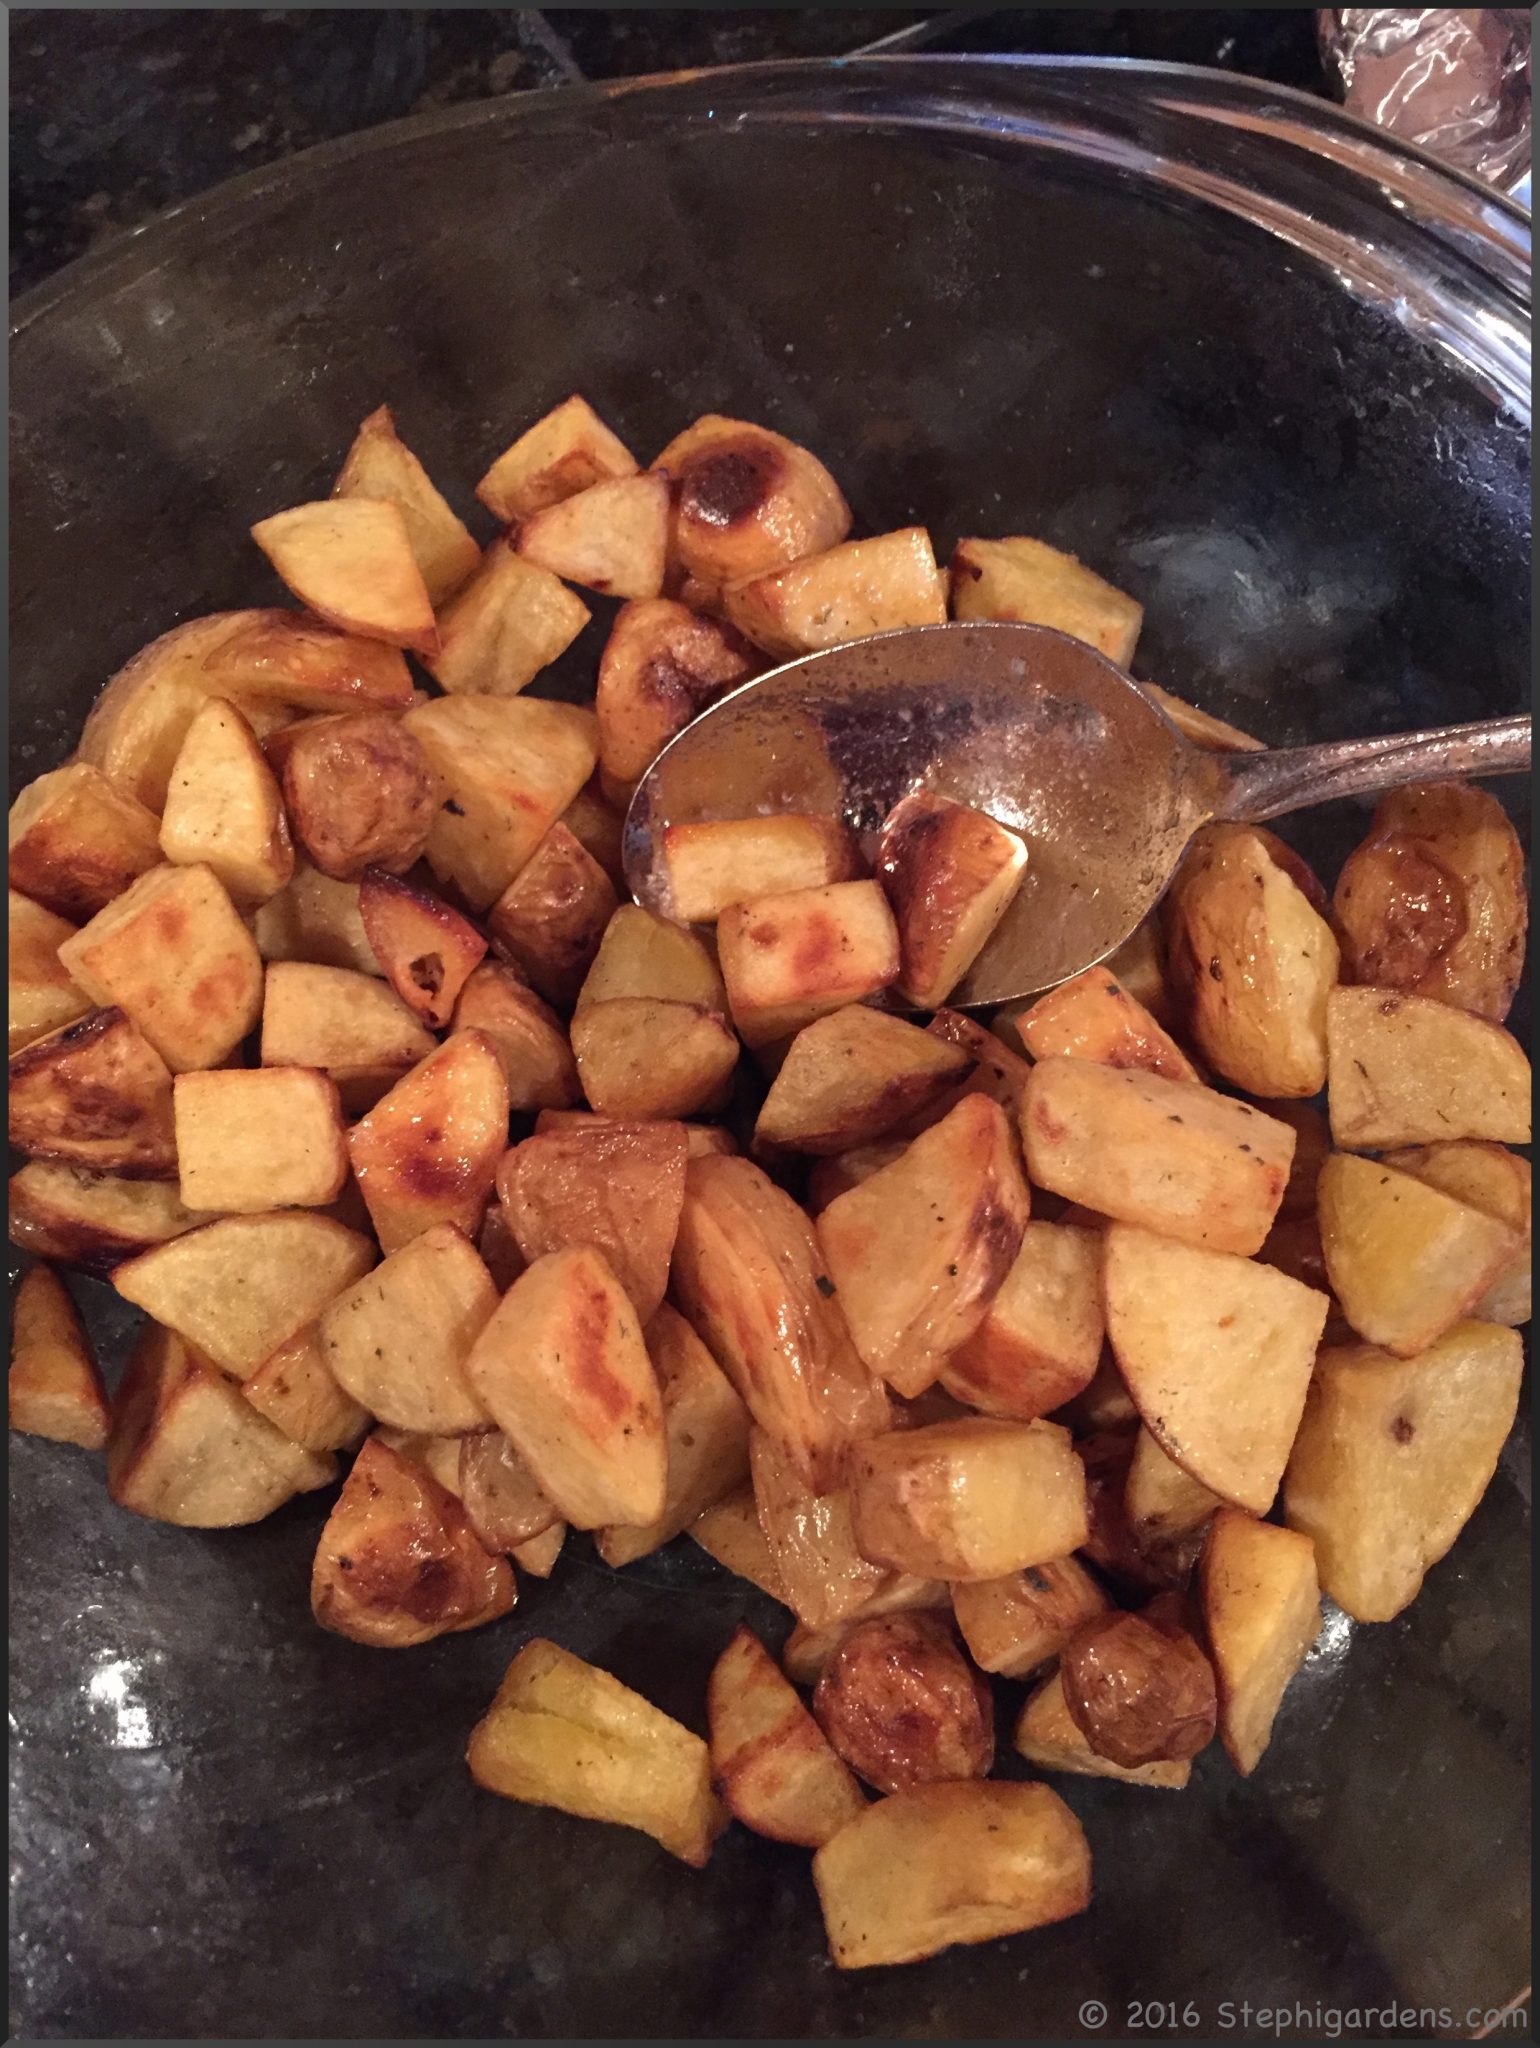
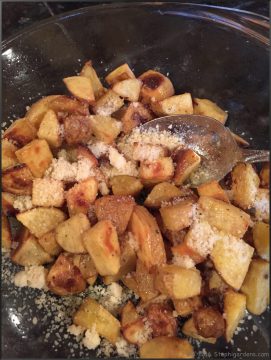
When finished, remove potatoes, place in a aluminum foil “boat”, pan or heat safe bowl.  Don’t cover or the potatoes will lose their awesome crispness.  Toss with 1/2 c feta (or grated or shredded Parmesan cheese), 2 Tbsp fresh chopped parsley and freshly ground black pepper.

Cooking Notes:

  • Great with any of your favorite grated or shredded cheeses.
  • Change up the seasoning–cook with sliced onions or add chives, garlic salt, dash of cayenne powder–endless ideas.
  • You can par cook the oiled potatoes in the microwave before grilling to speed things up. Cook 2-3 minutes on potato setting, check with a fork.  Done when just getting soft, but can’t get fork all the way through.
  • Not grilling, cook in a 400°F oven.
  • Easily adapted for fewer or more people
  • Low sodium?  Omit the salt and cut back on cheese as desired

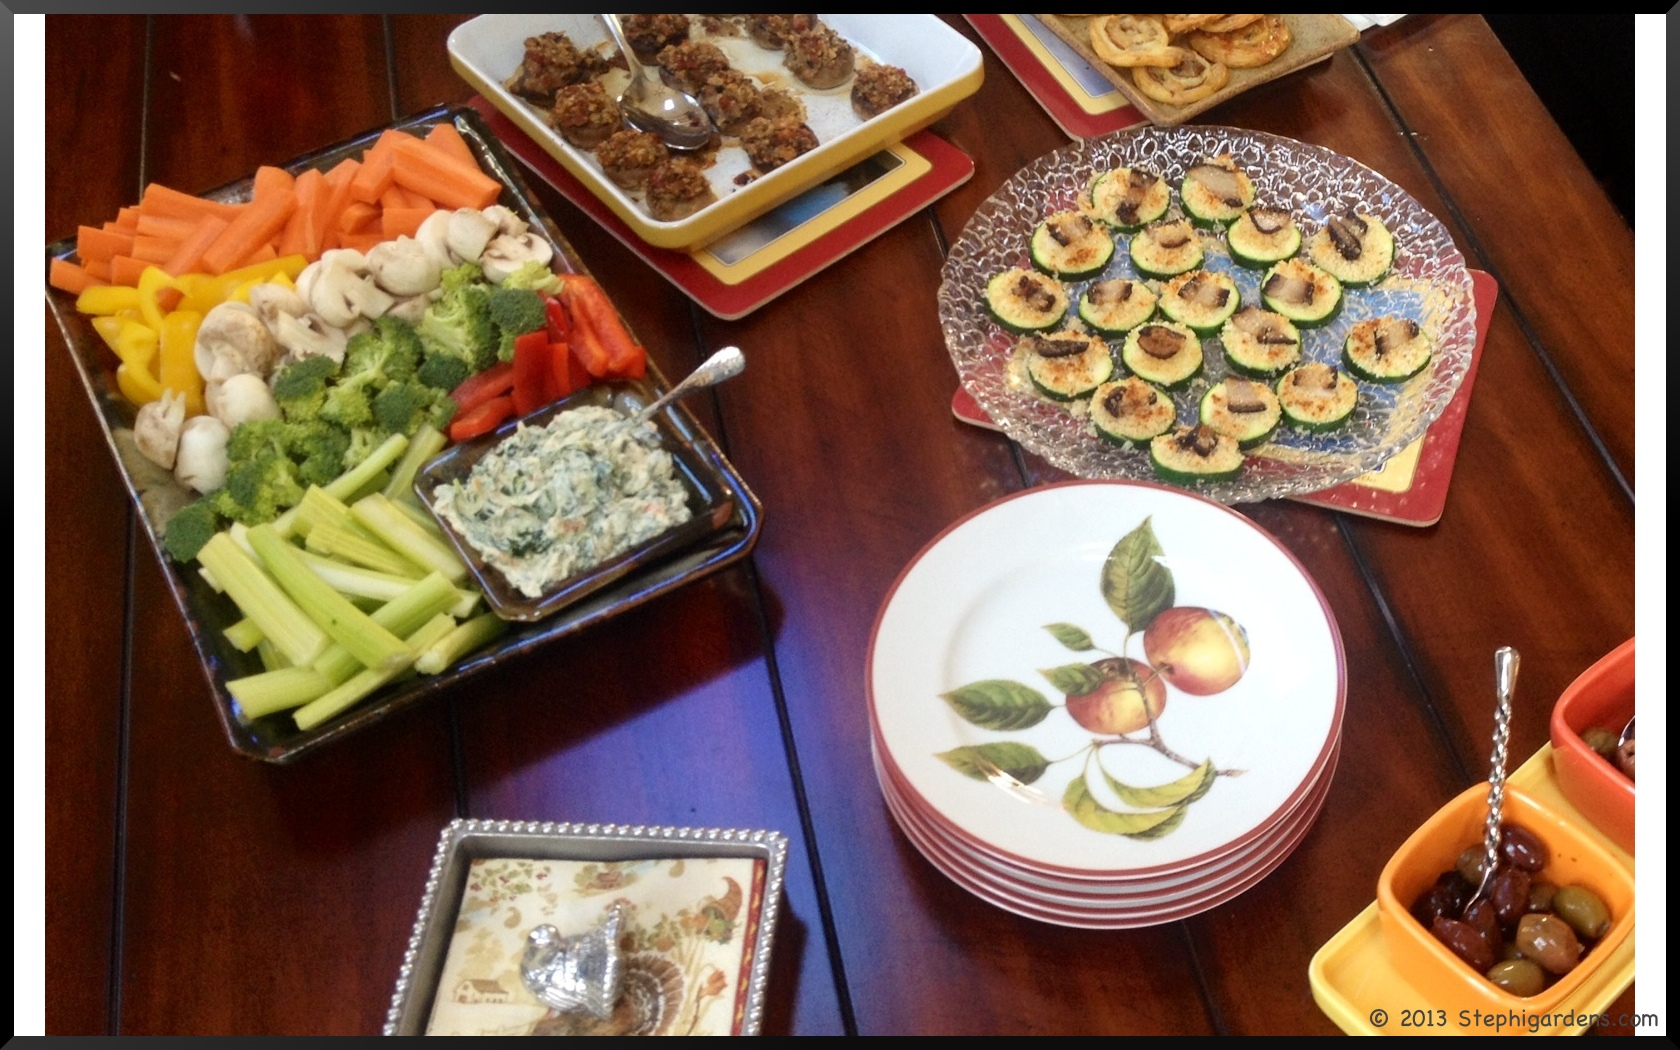
What a great side dish for any grilled meal!

Grill Roasted Potatoes
Print
Recipe type: Side dish
Cuisine: American
Author:
Ingredients
  • 1½ lbs thin skinned potatoes (Yukon Gold or red), washed and cut into 1 inch cubes or quarters
  • 2 T extra virgin olive oil
  • salt (optional)
  • ½ cup crumbled feta, shredded Parmesan or grated Parmesan cheese
  • 2 T chopped parsley
  • fresh ground pepper
Instructions
  1. Wash and dry 1½ pounds of potatoes and cut into quarters or cubes depending on the size of your potatoes.
  2. In a large bowl, toss the potato cubes and with 2 Tbsp extra-virgin olive oil and salt (if desired).
  3. Preheat a grill pan over indirect high heat for about 10 min.
  4. Add the potatoes to the grill pan.
  5. Grill the potatoes 30-45 minutes, keeping gill cover closed as much as possible, and turn 2-3 times until golden brown and fork tender.
  6. When finished, remove potatoes, place in a aluminum foil "boat", pan or heat safe bowl.
  7. Toss with ½ c feta (or grated or shredded Parmesan cheese), 2 Tbsp fresh chopped parsley and freshly ground black pepper.
  8. Keep warm over indirect heat until ready to eat.

Adapted from Weber’s Way to Grill Book.

SaveSave

Warding off the Vampires|Harvesting Garlic

Well not really, but that’s what I think of when I see the garlic curing in the screen room.

Garlic

Last fall I planted garlic for the first time (see “Planting Garlic”) and I can happily say I probably have enough harvested this summer to carry me through the winter.  I planted 3 different varieties, 2 hardneck (Chesnok Red and Purple Glazer) and 1 soft neck (California Early) from Botanical Interests.

chesnok red garlic

Softneck varieties tend to grow in a wider variety of climates and can be grown in warmer areas, last longer in storage and are good for braiding.  They also tend to be a little milder in taste.  Hardneck varieties require some time in frozen ground, so are not recommended for warmer climates.   In the spring, they produce a tall edible stem called a “scape”  that should be cut and can be used as a mild garlic seasoning.  The hard neck varieties are also generally known for their stronger taste.

I planted the cloves in 2 different locations and one location definitely did better than the other.  Within a couple of weeks of planting, green sprouts could be see popping up as expected.  Then winter settled in and the garlic just had to hibernate and do its thing. I tried to mark it clearly, but as usual by spring I only sort of knew where it was planted and which variety was which.  Typical 🙁

By early spring, the garlic was sprouting.

garlic

By late spring the hardneck varieties were sending up scapes.  I trimmed them to send the plant’s energy into producing healthy garlic heads, but unfortunately didn’t get around to using them in any recipes.  Next time for sure.

garlic

garlic

By July, the garlic was ready for harvest.  How do you know when to harvest?  It can be a little tricky, but usually you want to wait until several lower leaves turn brown, but the top leaves are still green.  Harvesting the garlic is easy, but you need to be gentle.  Unlike onions, you can’t just yank it out of the ground.  Too easy to damage the head or accidentally tear off the leaves.  Garlic also cures better when the leaves are still on.

So grab a trowel and dig gently around the bulbs to loosen the soil.  Be careful not to hit the heads and damage the tight cluster of cloves.

garlic
Gently pull to release the garlic from the soil.

Garlic

Gently shake off the dirt, without disturbing the head.  It’s fine to leave some dirt on the head and roots, it’ll come off easier when it’s dry.

Garlic

Now it’s time to find a spot to cure the garlic so that it’ll be ready to store for the winter.  Garlic should be cured in a protected area, like a garage or porch, out of direct sunlight and where there is reasonable air circulation.  It should be hung with the leaves  and roots still attached.  I hung mine in the screen porch.  On particularly hot days, I turned on the overhead fan to keep the air circulating.

Garlic

Curing can take three to eight weeks and you know it’s done when the roots are dry and shriveled, the leaves completely brown and dried, and the skin feels dry and papery.  This step should not be skipped or the garlic will not last properly through the winter.

Once done, the leaves and roots are trimmed off, and the remaining dirt gently brushed off.  Be careful not to expose any of the cloves.  The garlic is now ready for storage.   Garlic can be stored in any type of breathable, dry container such as mesh bags, paper bags, cardboard boxes or ceramic pots with holes.  Under perfect home storage conditions, the garlic should keep for 6-8 months.  Ideally to achieve that, the garlic should be stored in a cool, dark room with good air circulation.  Not always easy to do, but just do the best you can.  I am going to store some in an unfinished part of my basement and the rest in an open container in the coolest cupboard in the kitchen.  Kind of a test to see what works better.

garlic

garlic

No matter what you do to store the garlic, never put it in the refrigerator or store in a sealed container.  That will lead to early sprouting and the garlic will quickly become bitter, soft and moldy.  Time to toss it if it starts to sprout, it’s spoiling at this point.  Most importantly, NEVER  store raw garlic in oil at room temperature.  This can lead to botulism and death!

As a last resort if your garlic seems like it’s not going to last as long as you’d like, it can be safely frozen.  It will change the flavor and texture to freeze raw, so to help preserve the flavor the peeled cloves can be put in oil and stored in the freezer (but again, not in oil at room temperature).  Other ways to store garlic include drying, dehydrating or even turning it into garlic butter.

I’ve already ordered more garlic for next year.  I was a little late ordering, so this year I ordered Music, Purple Glazer and Susanville garlic from Territorial Seed Company.   Can’t wait to get it in the ground.  It’s not too late to order yours, but act quickly.  Lots of varieties have already sold out so you may need to check around a few sites.   Planting season is 6-8 weeks before the likely hard frost date for your area, so it is quickly coming upon us here in zone 5.  Some reputable places to try are Botanical Interests,  Territorial Seed Company and Burpee Seeds.  Do you have a favorite place to order from?

Wherever you decide to order it from, don’t try to use the garlic you buy from the grocery store.  Much of that garlic, unless locally grown, has been treated to prolong its life during storage and transportation.  Some may sprout, but anything you get to grow from them will be of undesirable quality.

Happy Planting!

Save

Homemade Suet Cakes

I was at my favorite local butcher shop (Prime-N-Tender Meats) the other day, and asked if they had any suet I could have to make homemade suet cakes for the birds.  They went in the freezer and came out with this bag containing a big bag of fatty glop.

Homemade Suet Cakes

I’m not really sure what I was expecting.  This was a bit of a last minute idea that I came up with while I was there.   I thought seemed like an quick, easy project.  Oops.  I really should have thought this through a little better.  But in the end, I did get some really nice looking suet cakes for the birds.  Would I do it again?  Yes 🙂

Making Homemade Suet Cakes

Ask your local butcher for suet.  You may need to ask around, as not all will carry it, and some may charge a nominal fee for it.  Cut it up into small, even chunks.  Put everything in, even the stuff that doesn’t look at all like anything would eat it.  The fat then needs to be rendered.  After trying a couple of different ways, (see below), I found that the best way was to use a crock pot over low heat.  I felt confident that I could safely leave it to cook all day without worries of starting a grease fire.  To get the rendering started, I added a 1/4 cup of water.

Homemade Suet Cakes

Then cover and let it cook all day until the the remaining fat is crunchy and there’s a good amount of liquid fat in the bottom.

Homemade Suet Cakes

Strain out the crunchy remains and place the liquified fat (and little crumbs) in a bowl.

Homemade Suet Cakes

Now it’s time to pull together the ingredients to make the suet cakes.  There’s lots of things to use that the birds will love.  This time I chose:

  • cornmeal
  • peanut butter
  • bird seed
  • sunflower seeds

Homemade Suet Cakes

To the 1 c of liquified fat I ended up with, I added about 1/2 c cornmeal, 1/2 c peanut butter, 1 cup mixed seed and 1/2 c sunflower seeds.  It should be fairly thick.

Homemade Suet Cakes


Homemade Suet Cakes

I then used 2 glass storage containers to make the cakes in.  I don’t have a lot of plastic containers around anymore, but you can use whatever you have in the cupboard–plastic storage containers, plastic tubs, paper cups, whatever you might have around that is the right size.

Homemade Suet Cakes

Place in the refrigerator to harden.

Homemade Suet Cakes

Remove from container and use immediately or store in freezer bags in the freezer.  I got them to release from the glass bowls by putting them in warm water for about 30 sec.  They may also needs a little coaxing with a knife.

Homemade Suet Cakes

Yum!  Now I have 2 very tasty smelling suet cakes ready to be put out for the birds.  Whatever you don’t use you can freeze for later use.

Homemade Suet Cakes

Notes:

**Everything I’ve read says it’s not a good idea to have suet out in the warmer weather.  It can melt, go rancid, start to smell bad or can simply damage birds wings or your patio.  All good reasons to store the leftover suet in the freezer until next fall.

**When I first started to try and melt the suet, I tried the big chunks in a saucepan, and then cut up in the saucepan.  Both terrible ideas from a fire safety standpoint.  If you do want to use a saucepan, a double boiler would be a much better idea.

Homemade Suet CakesHomemade Suet Cakes

**My mom, Peggy, simplifies things even further by just putting the fat from the butcher in a net or cage and let the birds go at it.  They love that, too.


Freezer Slaw

Back in the fall when I was preparing all the garden goodies for winter storage, my friend Kathy told me about a family favorite, Freezer Slaw. Her family has made this for generations with the extra garden cabbage heads left in the fall.  I was a little skeptical about not ending up with a pile of mush from the freezer, but to my pleasant surprise, we’ve been eating the most delicious, crunchy slaw all winter.  Here’s Kathy’s family recipe that has been passed down from her grandmother, to her mother, and now to her (and us). Thanks for sharing, Kathy!

**Freezer Slaw**

Here’s what you’ll need: 

1 lg. head cabbage, shredded
1 or 2 carrots, shredded
1 med green pepper, finely diced
2 cup sugar
1 cup apple cider vinegar
1/4 cup water
1 tsp celery seed
1 tsp mustard seed

Freezer Slaw

Shred and chop the vegetables.  Place in a colander to drain while you make the dressing.

Freezer Slaw
In a saucepan place remaining ingredients and boil for 5 minutes, Let cool.

Freezer Slaw
Squeeze out any excess water from cabbage mix and put in a large bowl.   Pour on the dressing and stir.

Freezer Slaw
Serve fresh or put in freezer containers for storage (I used quart sized freezer bags).  When ready, thaw. It will last a fews days in the fridge after thawing.

Freezer Slaw

We ate it cold from the fridge or warmed slightly after being thawed briefly in the microwave. Either way, Freezer Slaw is a tasty, crunchy and easy side dish from the freezer.  Kathy recommends it as a sandwich topping as well.

Enjoy garden fresh food all winter long!

Kathy's Family Freezer Slaw
Print
Recipe type: Salad
Author:
Delicious slaw that uses garden fresh vegetables and can be frozen for later use.
Ingredients
  • 1 lg. head cabbage, shredded
  • 1 or 2 carrots, shredded
  • 1 med green pepper, finely diced
  • 2 cup sugar
  • 1 cup apple cider vinegar
  • ¼ cup water
  • 1 tsp celery seed
  • 1 tsp mustard seed
Instructions
  1. Place all the shredded and diced vegetables in a colander to drain.
  2. In a saucepan, place remaining ingredients and boil for 5 minutes. Remove from heat and cool slightly.
  3. Squeeze out as much remaining water as you can from the cabbage mix and put in a large bowl.
  4. Pour sauce mixture over vegetables and stir.
  5. Serve, or put in freezer containers for storage (I used quart sized freezer bags).
  6. Thaw before serving. It will last a few days in the fridge after thawing.


Easy Peppermint Bark

This time of year I seem to head into the kitchen to make some family holiday favorites that tend to disappear as fast as I make them.  One of those is Peppermint Bark.  It’s really easy to make, and makes a great gift.  I’ll describe a single batch, but it’s easily increased to make enough to give away.

You’ll need:

  • 4 oz high quality milk or dark chocolate-broken into squares
  • 4 oz high quality white chocolate-broken into squares
  • package of candy canes or peppermint star candy-broken into small pieces
  • Line a small baking sheet (7×10) with waxed paper.

Peppermint Bark

  • Break apart and melt the milk or dark chocolate in the microwave according to package directions. (Hint: heat until almost melted, stir until all remaining pieces are melted and chocolate is creamy)

Peppermint Bark

  •  Spread over the waxed paper until even.

Peppermint Bark

  • Place pan in freezer for at least 30 minutes.
  • When ready, melt white chocolate in the microwave according to package directions. (Hint: heat until almost melted, stir until all remaining pieces are melted and chocolate is creamy)
  • Once melted, remove baking sheet from freezer, spread the melted white chocolate on top of the frozen milk or dark chocolate. (Be careful not to work quickly so the 2 chocolates don’t start to mix.).
  • Sprinkle crushed candy over the top, pressing in the bigger polices to secure them.

Peppermint Bark

  • Place in freezer for 30 minutes to overnight.
  • When firmly solid, peel off waxed paper and break apart into pieces by hand.

Peppermint Bark

Some helpful hints:

* Some recipes use chocolate chips, but I’ve found they melt too easily when serving.

*I like to melt the chocolate in the microwave.  Just break into pieces, put in a microwave safe bowl and heat as directed.  I usually cook in 20-30 second intervals, stirring in between.  Stop before it’s fully melted.  Stir to finish melting the few remaining pieces.  You’ll have smooth, creamy melted chocolate in less than 2 minutes.

* Easiest way to crush the candy is to place in a plastic baggie, seal and pound gently with the smooth side of a meat mallet.

Peppermint Bark

Enjoy!!

Peppermint Bark
Print
Recipe type: Candy/Sweets
Author:
Serves: 6
Delicious peppermint-chocolate treat
Ingredients
  • 4 oz high quality milk or dark chocolate-broken into squares
  • 4 oz high quality white chocolate-broken into squares
  • package of candy canes or peppermint star candy-broken into small pieces*
Instructions
  1. Line a small baking sheet (7x10) with waxed paper.
  2. Break apart and melt the milk or dark chocolate in the microwave according to package directions. (Hint: heat until almost melted, stir until all remaining pieces are melted and chocolate is creamy)
  3. Spread over the waxed paper until smooth.
  4. Place in freezer for at least 30 minutes.
  5. When ready, melt white chocolate in the microwave according to package directions. (Hint: heat until almost melted, stir until all remaining pieces are melted and chocolate is creamy)
  6. Once melted, remove baking sheet from freezer, spread the melted white chocolate on top of the frozen milk or dark chocolate. (Be careful not to work quickly so the 2 chocolates don't start to mix.).
  7. Sprinkle crushed candy over the top, pressing in the bigger polices to secure them.
  8. Place in freezer for 30 minutes to overnight.
  9. When firmly solid, peel off waxed paper and break apart into pieces by hand.
Notes
* Easiest way to crush the candy is to place in a plastic baggie, seal and pound gently with the smooth side of a meat mallet.
* Some recipes use chocolate chips, but they will melt too easily when serving.


Time to be Thankful

I’ve been away for a bit, enjoying time with my family. I was lucky enough to host everyone here for a Thanksgiving gathering, that included my daughter that lives on her own now, my mom and my sister. Thanksgiving is definitely a wonderful time to spend with family, and to remember those who can’t be with us. For many years, Thanksgiving was just the five of us since my husband rarely had time off, so traveling was out of the question. But we still made it special and developed our own wonderful family traditions, mostly centering around food.

We get up to a yummy brunch…

brunch

…and in the last couple of years, one or more of the kids are off to a turkey trot first.

Pie 3.14 Race

After brunch, the turkey gets stuffed with my delicious Leek, Apricot and Chestnut Stuffing and put in to cook, making the house just smell delicious.

[mv_create key=”1″ type=”recipe” title=”Leek, Apricot and Chestnut Stuffing” thumbnail=”http://stephigardens.com/wp-content/uploads/2020/11/IMG_9255-3-scaled.jpeg”]

Then there’s time for a bit of relaxation to catch the end of the parade or maybe kick-off, before the midday appetizers and drinks come out.  On the menu this year was Sage and Prosciutto Stuffed Mushrooms, Prosciutto, Gruyere and Sage Palmiers, Zucchini Casino, Spinach Dip with Vegetables and assorted olives.

We celebrated the holidays this year with delicious, sparkling glasses of Pomegranate Prosecco .

Pomegranate Prosecco

After mid-day appetizers, there’s plenty of time for football and maybe even a walk before the pre-dinner panic sets in. Glad I had so many helpful and willing hands in the kitchen this year.  This year’s dinner consisted of fresh turkey, stuffing, mashed potatoes, gravy, rolls, green beans wrapped with prosciutto, jellied cranberry sauce (from a can, what can I say it’s what everyone wants), celery, carrots, black olives and rolls. Finished off with apple and pumpkin pies.  What a wonderful day!

Thanksgiving


Then of course there’s Daisy who just wants so badly to be part of this all.

Westie

I hope your family had a wonderful Thanksgiving.  Many of the recipes can be found on my Pinterest site

(Many thanks go to Emily, Peggy, Sherry and Steve for helping with the pictures)

35 Pounds of Tomatoes

No, I didn’t grow that many in my garden.   I got a decent harvest this year to keep us in fresh tomatoes for the summer and early fall, but for stocking up for winter, I went to the local Farmers Market.   I bought the large, 10 lb box last week and processed those for the freezer, then decided I needed more.  Being the savvy consumer that I am, I realized I could get 2.5x as many tomatoes in the half bushel as in the large box for only 25% more.  That’s a screaming deal in my book,  and they were beautiful red, perfectly ripe roma tomatoes.  My first hint of how much work was ahead of me was when I picked up the bag they were in to carry them to the car.  A half bushel of tomatoes is really heavy-apparently about 25 lbs.

IMG_3617

Over two nights, I made 2 double batches of pasta sauce using America’s Test Kitchen’s (recipe here).  Instead of the canned crushed tomatoes, I used 3 cups of lightly pureed, peeled tomatoes.  I also found that the texture of the tomatoes was better when pureed in my food processor than in my blender.  As I’ve described before, peeling tomatoes is pretty easy, and I think necessary to have a more pleasing sauce texture.  (Just personal preference, but I’m not a fan of tough skins floating in my sauce, soups or stews.)

IMG_0445IMG_0441

IMG_0443
IMG_0444


While the tomatoes looked beautiful, my kitchen was a mess!

    IMG_0452 (1) IMG_0452

Once I had the tomatoes peeled, I was ready to make the sauce and chop up the rest for a variety of uses.  I left most only roughly chopped to allow for more versatility.  I can further chop or puree the frozen tomatoes depending on what I need them for.

I’m pleased with the final number of bags, it didn’t seem like a lot at first, but I think this will last me quite a while.  The large bag of while tomatoes was turned into 4 more bags of pasta sauce the next evening.  I ran out of garlic so had to have time to run to the store.

IMG_0458

And what are tomatoes without some basil?

IMG_0447

So in the end, did it save me money over buying canned diced tomatoes and jarred pasta sauce?  Maybe, maybe not, but my tomatoes and sauce will definitely have a better, fresher taste, with only those ingredients in them I want.  I’m actually looking forward to winter cooking (but maybe not the weather).

Garden Swag

The other day I decided it was time to get the first of the ripe roma tomatoes packed up for winter.  One of my boys came out with me to help, and needless to say he was impressed with the haul we got. So, in teen-age terms, we had some “garden swag”. It was fun watching him search around for the ripe tomatoes, stumble upon a giant zucchini bat, and then realize that there was a whole pile of cucumbers hidden in the vines and tangled in the tomato plants.

IMG_0126

I didn’t really have enough roma tomatoes to bother getting my canning equipment out, so I decided to freeze them.  It’s really pretty simple and, as with most things, it’s best used for cooking since some of the texture will be lost during the freeze thaw process.  I looked around for instructions and settled on some great information from the UNL Extension and fellow blogger,  Tomato Dirt.

Here’s what I did…

Pick nice ripe tomatoes that are blemish-free.  Wash under running water and trim off the stem end.  I also made a small cut in the bottom to help later with peeling.  I had decided to freeze them peeled since the skins are just too tough in soups, etc.

IMG_0129

 To  easily peel tomatoes, place the washed, prepared tomatoes into boiling water for about 1 minute.  You’ll notice that the peels start to split.

IMG_0133

Remove the tomatoes with a slotted spoon.

IMG_0137

And plunge immediately into an ice-water bath for about a minute or so.  The skins will then pop right off. 

IMG_0135

Then, you can freeze them whole, or chop coarsely.  I chose to chop them.  In the process, I also took out many of the seeds, since it’s really the tomato “meat” that I want for winter cooking.  I packed the chopped tomatoes into freezer ziplock backs, squeezing as much air out of the bag as I can.  If you have a vacuum sealer, that’d be even better.  Off to the freezer they go.  They’ll be fine to use anytime this winter.  

IMG_0147

What are canning or freezing this year?

Whoops-Giant Zucchini

I go on vacation for a week, then got busy and forgot to check the status of the vegetable garden.  Not a good idea this time of the year.  I have HUGE zucchinis and summer squash.  They are the size of kiddie baseball bats and each weigh about 4 lbs.  This is not good!

IMG_5537
IMG_5539
IMG_5540
IMG_5557

When squash get this big, they get tough and develop very big seeds. I’ve tried to cook them before and they just don’t work well for summer recipes. Especially the summer squash. Letting them get this big also saps the plant from any desire to make new squash since it’s real purpose is to produce seeds. And those big ones are just full of them, making the plant content to just continue make them even bigger.

So what to do?????

After some exploring on the web, I decided all was not lost. Looks like my best bets are zucchini bread and freezing for soups and winter dishes. So, my kitchen has been a flurry of baking and cutting trying to use these monsters up. I’ve never made zucchini bread, so again explored the web and came up with what I hoped was two delicious sounding recipes from Fine Cooking and Real Simple. First, I made Chocolate-Nut Zucchini bread from Fine Cooking with a couple of changes. First, I decided that 3/4 lbs of zucchini was about 3 cups shredded, I used whole chocolate chips instead of the bittersweet chocolate and vanilla yogurt instead of plain because that’s what I had on hand, and I then I just simply forgot to put the nuts in.

Because of the very big seeds and pithy center, I cut the zucchini in half and scooped out the center with a spoon before I grated it.  The skin didn’t seem too tough, so I left that on. If you can’t scratch it with your fingernail, it was suggested that it should be peeled then.

IMG_5562
IMG_0873

IMG_0880

This recipe got thumbs up from the family, so I will be making another loaf (or 2) for freezing.

Next, I made Zucchini Spice Bread from Real Simple.   I like the method of getting some of the water wrung out of the grated zucchini from the previous days’ recipe so I did that again here.  Briefly, put the grated zucchini into a colander, sprinkle with 1-2 Tbsp sugar to draw out some of the liquid, let sit for 15-20 minutes.  Then hand squeeze the water out before putting into the bread batter.  The only change I made to this recipe was that I added 1/2 cup of chopped walnuts.

IMG_0890

IMG_0899_2

Again, thumbs up!  Two good recipes.  If you have another you like, I have plenty more zucchini to make into bread.

Lastly, I cut up another zucchini for freezing.

  • I again scooped out the pithy, seedy center, then it cut into about 1 inch chunks.
  • I then blanched them in boiling water for about 3-4 minutes, followed by plunging them into an ice bath to stop the cooking process.  I just want to blanche the chunks, not cook.
  • Then drained in a colander for a few minutes and packed them in 2 cup portions in freezer bags.

IMG_0883
IMG_0886
IMG_0888

Ready for use this winter in some kind of soup or stews. Does anyone have any favorites?  Hopefully now I will be able to pick some nice tender ones to use in my favorite summer side dish and salad recipes.

By the way, I did toss the one giant summer squash.  It was just not salvageable.  That’s where a composter would come in handy.

Cucumbers-Mid summer

My cucumbers, which looked so wimpy when I planted  the seedlings, have grown great.  I grew Burpee Sweet Burpless Hybrid for no other reason than the description sounded good in the catalogue. I do seem to have a lot more squash plants than cucumber, and unfortunately, I like cukes better than squash. Oh well, I guess I’ll be needing some creative squash recipes.

In any case, the cucumber and squash plants are co-existing nicely on my large cucumber trellises from Gardeners Supply Company.

IMG_0765

Cucumber plants naturally are climbers and use tendrils to attach themselves to anything it can–the trellis, the brick wall, the tomato plant next to it.

IMG_0769

IMG_0770

The nice thing about using a trellis is that the cucumbers hang off the back, are easy to find, and don’t lay in the dirt where they can potentially get rotten spots.

IMG_0767

When they are ready to harvest, it’s a good idea to hold onto the spot the cucumber attaches to the plant while pulling it off.  It’ll be pretty stuck on the vine and I’ve pulled whole sections of the plant (with other immature cucumbers) with the ripe vegetable when I’ve tried to pick them.  Also, if this is your first time growing cucumbers, don’t be surprised that the cucumber is covered in little spines.  When I get them in the house, I just use the kitchen scrubber sponge and rub them off and you then have the normal smooth cucumber you’ll find in the store.  Enjoy them in your favorite cucumber salad recipe!

One of my favorite cucumber recipes is a Sweet and Sour Cucumber Salad.  This is an easy recipe that can be made with thinly sliced or chopped cucumbers and makes a great side-dish for almost any summer dinner. It can easily be jazzed up with tomatoes, green peppers, kohlrabi- whatever is available in your garden that day.

Start with your favorite cucumber and either slice it thinly, spiralize it or dice it. All make for a tasty salad. For making wafer thin slices, I love my Kyocera ceramic slicer. But be careful where you store it, it is REALLY sharp.

Sweet and Sour Cucumber Salad
Print
Author:
Delicious, fresh cucumber salad
Ingredients
  • ½ c Rice Wine Vinegar (unsalted)
  • ⅔ c water
  • 3 T sugar
  • 3 cucumbers, sliced, diced or spiralized
  • optional: ½ medium thinly sliced medium red onion
Instructions
  1. Bring vinegar and water to a boil in a saucepan over medium heat. Stir in sugar to dissolve and simmer 15 min, stirring occasionally. Remove from heat and let cool to room temperature.
  2. Pour over prepared cucumbers in a bowl, toss to coat, chill in refrigerator until ready to serve.
  3. Extra dressing can be refrigerated and used within a week.