Checking in on the Clematis (and How do I Prune Them??)

Clematis "Jackmanii superba"

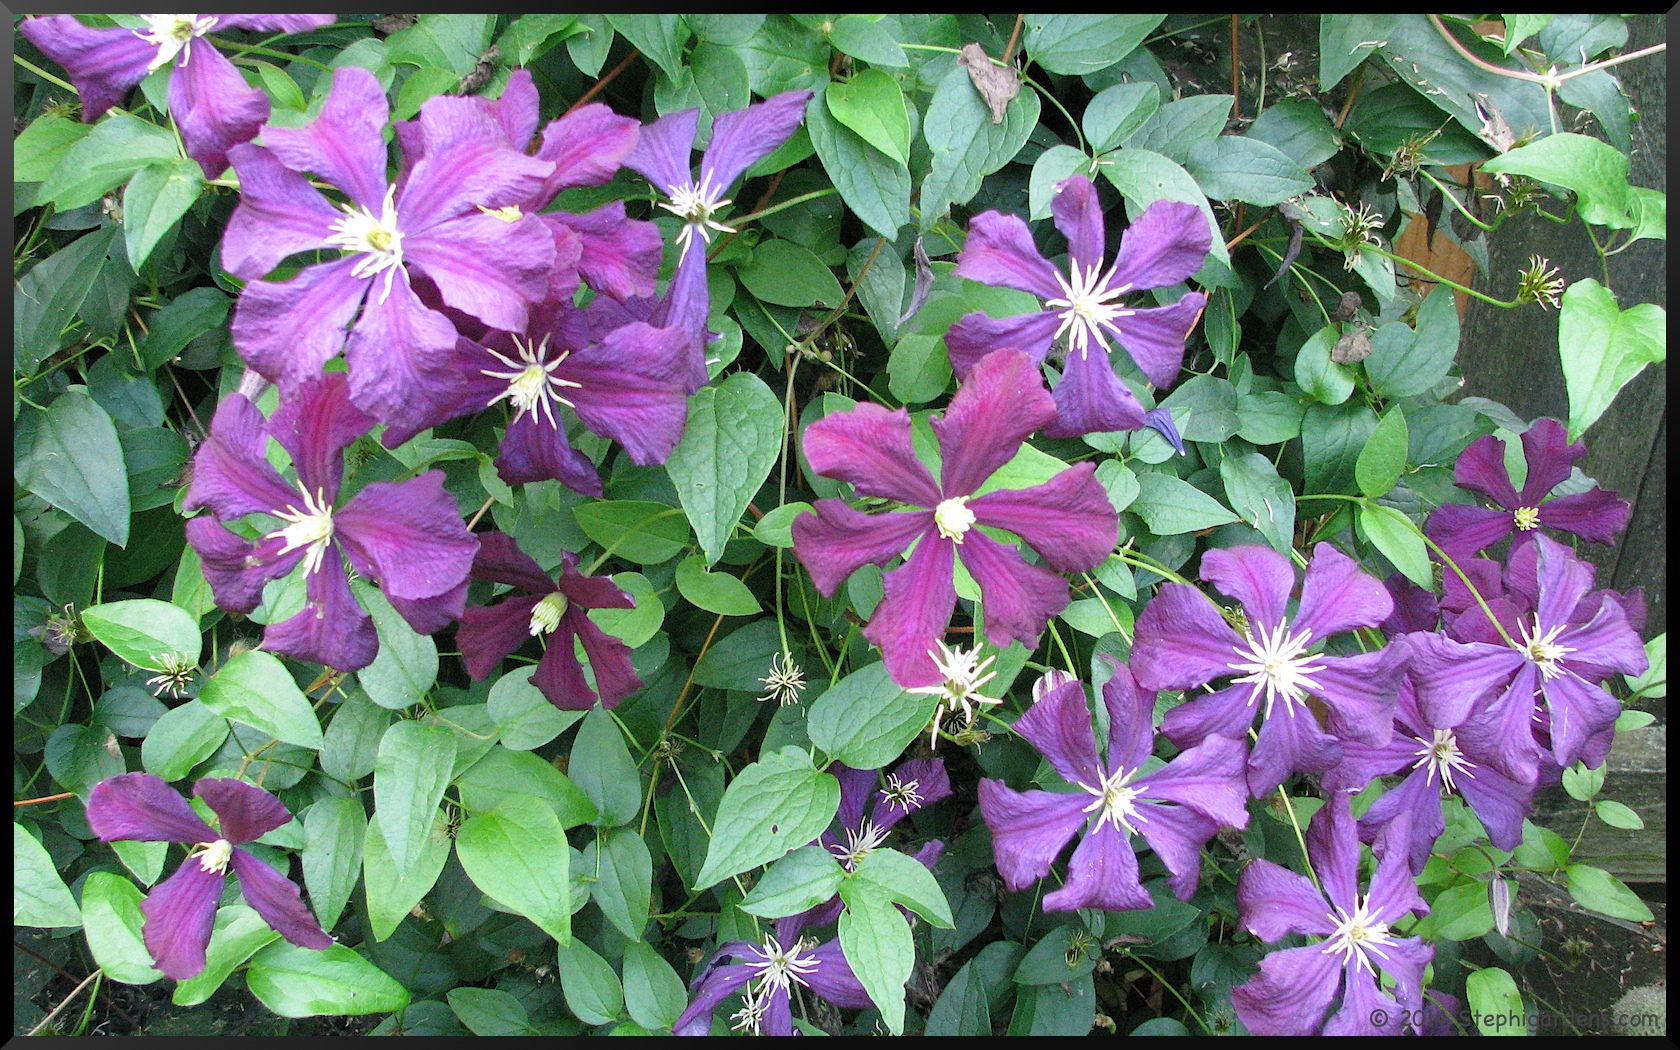
One of my favorite plants in my garden are my clematis. I love how they climb and burst forth in mountains of delightful color.  Every year I worry about if they’ll make it through the winter, but so far so good. One of them I’ve had since we moved into the house almost 20 years ago. It’s moved a couple of times, but it’s no worse for the wear.

Clematis "Jackmanii superba"

I also worry a lot about pruning as well.  I just feel like I’m going to do it wrong and somehow kill it, or permanently wreck it.  So more often than not, I do nothing for a while and then timidly prune some off.  Instead, pruning clematis is necessary to keep it healthy and blooming profusely.

When and how to prune depends on what type it is.  It is also important to prune a young clematis the first 2 years to encourage strong roots to support a strong plant.  While tempting (and commonly done here), clematis should also not be pruned in the fall in colder climates since any warm weather will stimulate growth too early.

There’s lots of great websites describing how to prune a clematis, but simply put:

  • Type A or 1 blooms in early spring and should be pruned lightly to remove dead wood and neaten up the plant after blooming.  Flower buds are set the previous year on old wood.
  • Type B or 2 blooms in late spring or early summer and then sporadically after.  These can be pruned by thinning in very early spring and then again after the bloom.  Or, if really unruly, they can be cut back more severely to about a foot before any new growth begins.
  • Type C  or 3 tends to bloom in early to late summer.  These are the easiest to prune.  Before new growth begins cut the entire plant back to about a foot.

I think I can handle this. A little more care and my clematis will look even more spectacular!

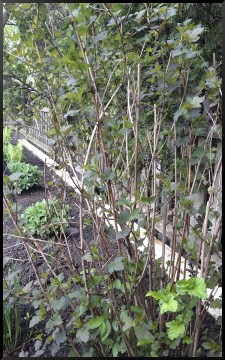
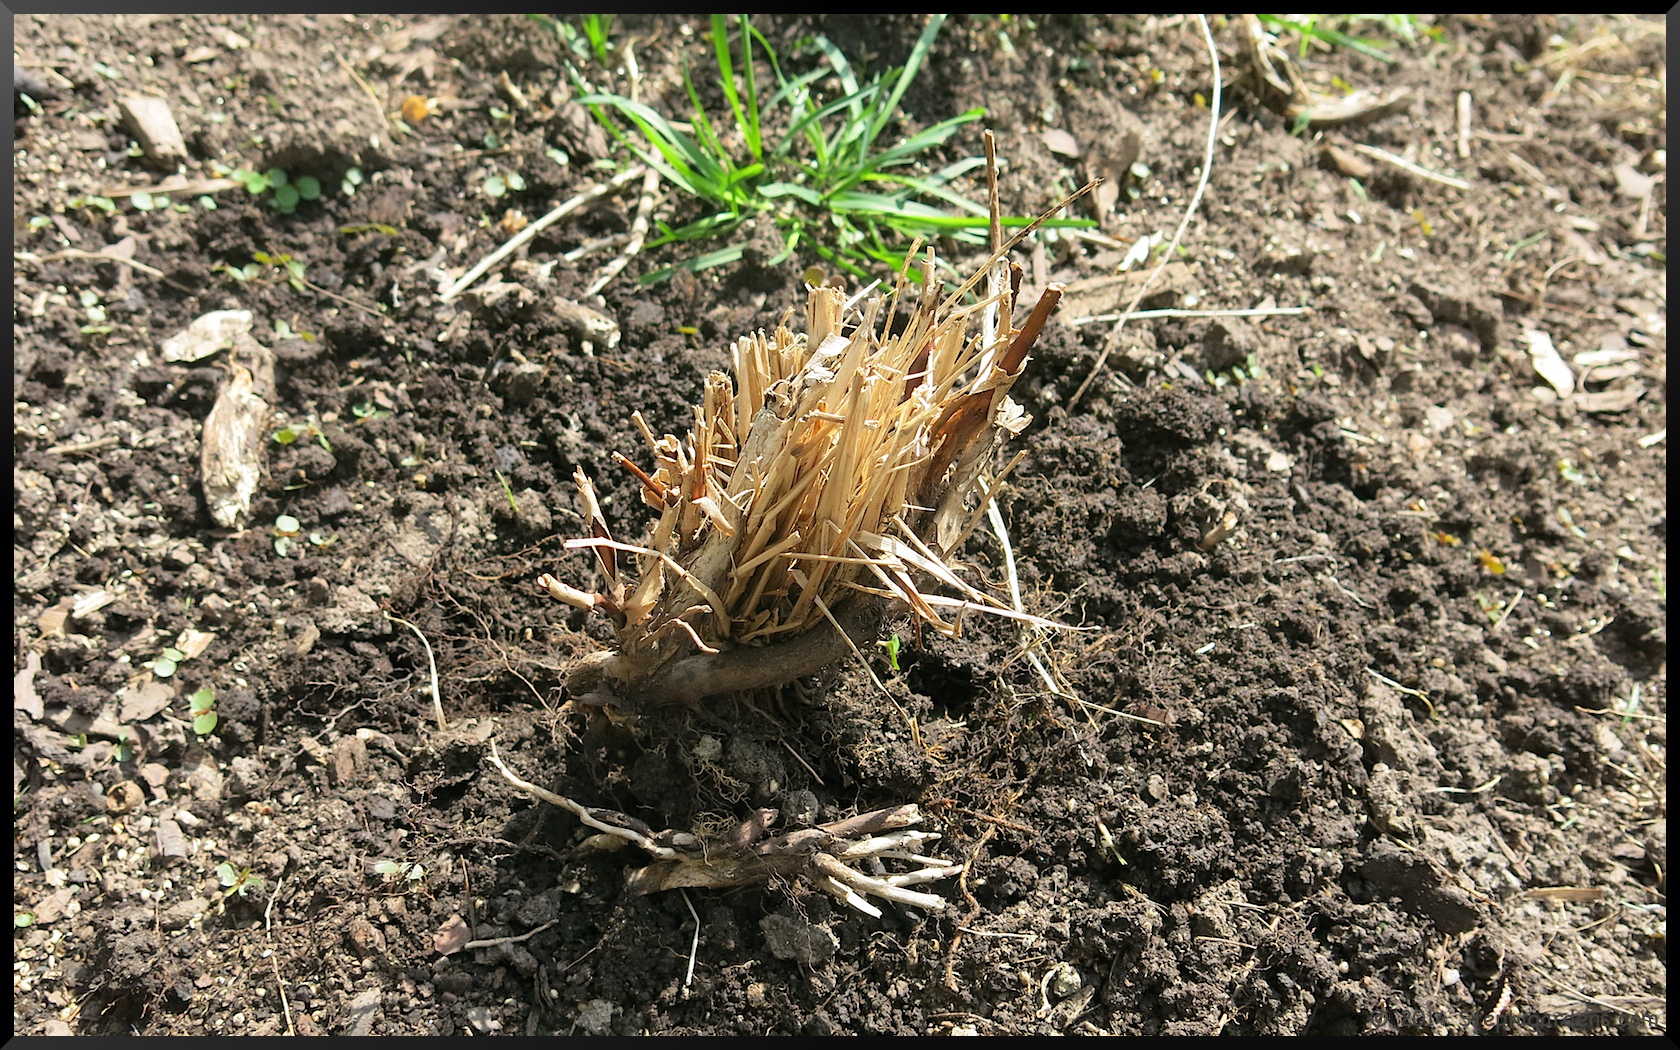
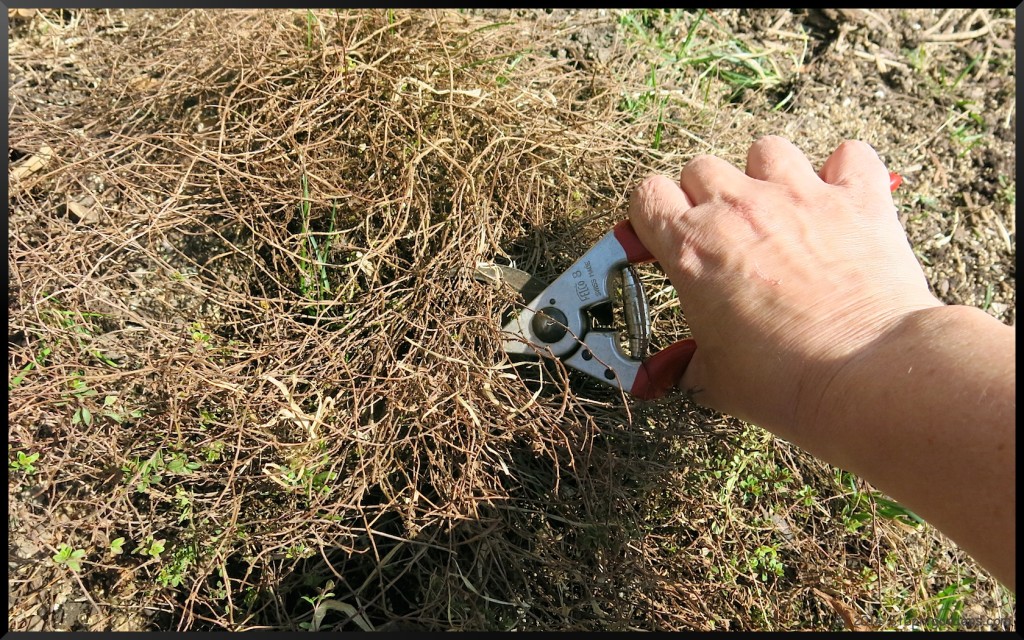
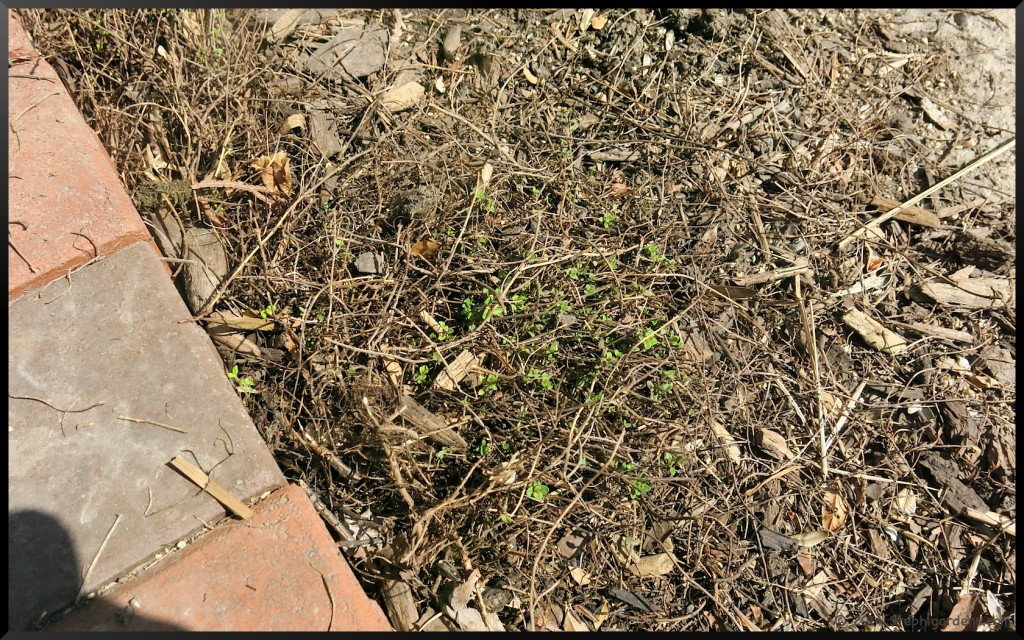
This Clematis “Jackmanii” has been moved a few times and was the slowest to bud this year.  I was worried it was dead, but happily buds began to emerge a couple of weeks ago.

Clematis "Jackmanii superba"

Clematis "Jackmanii superba"


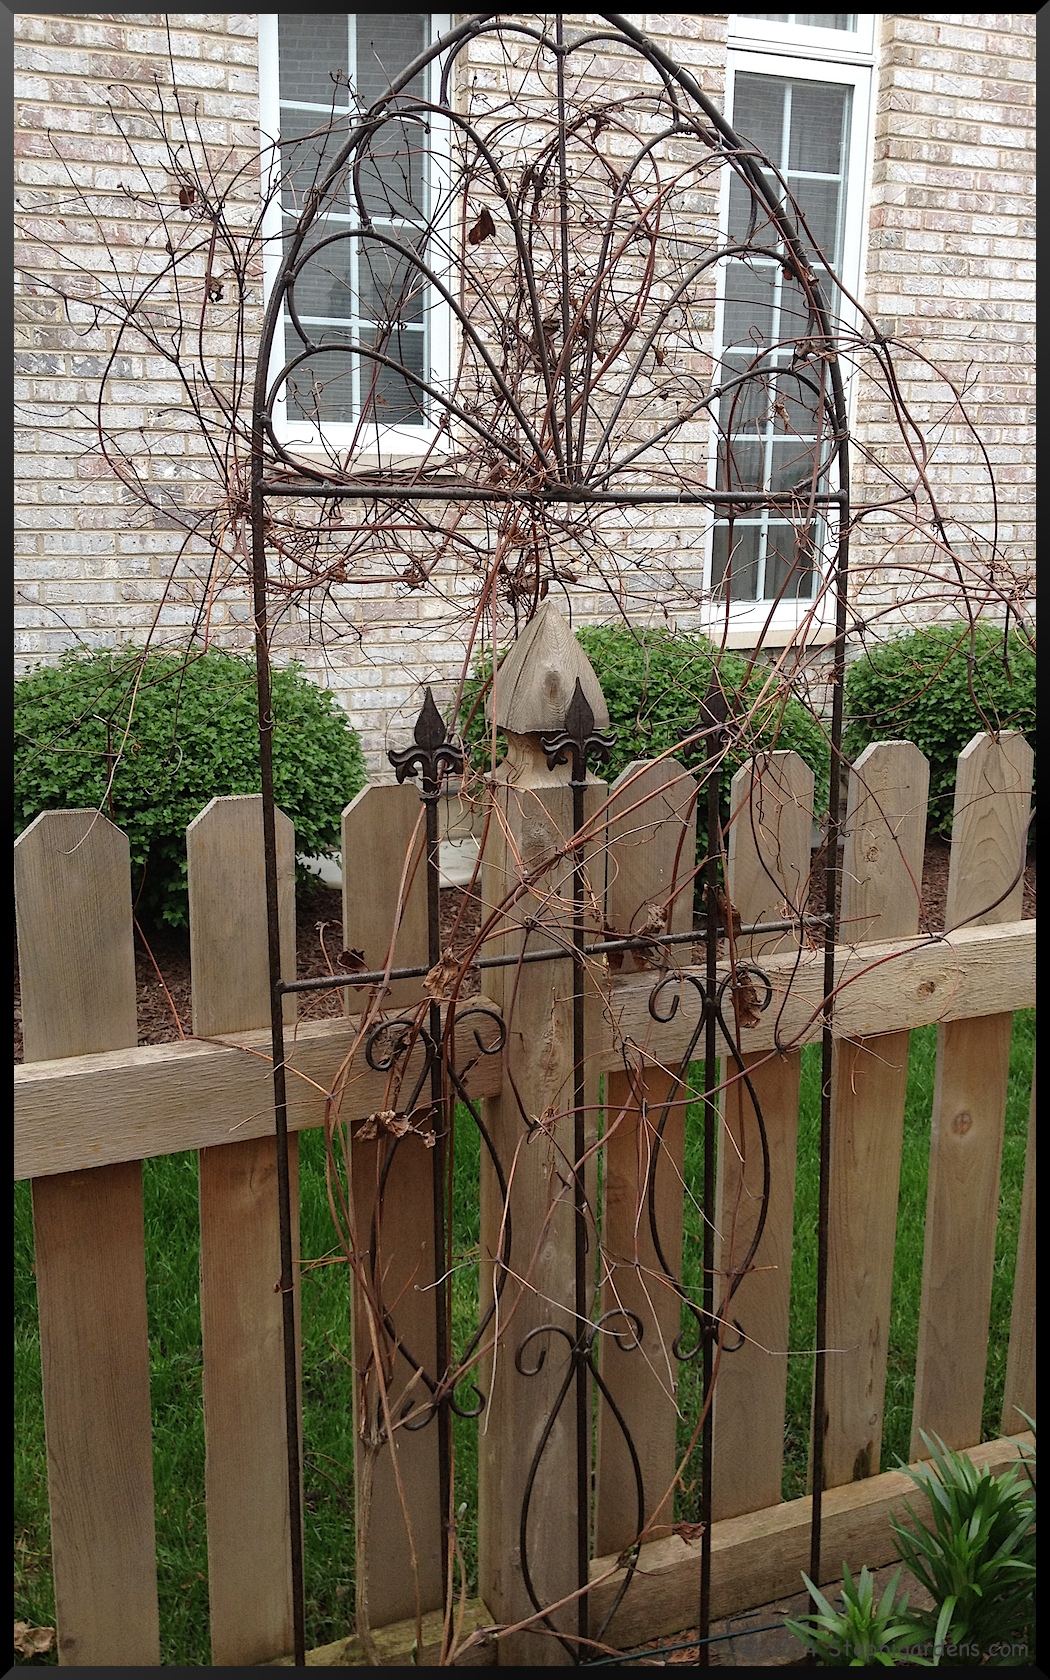
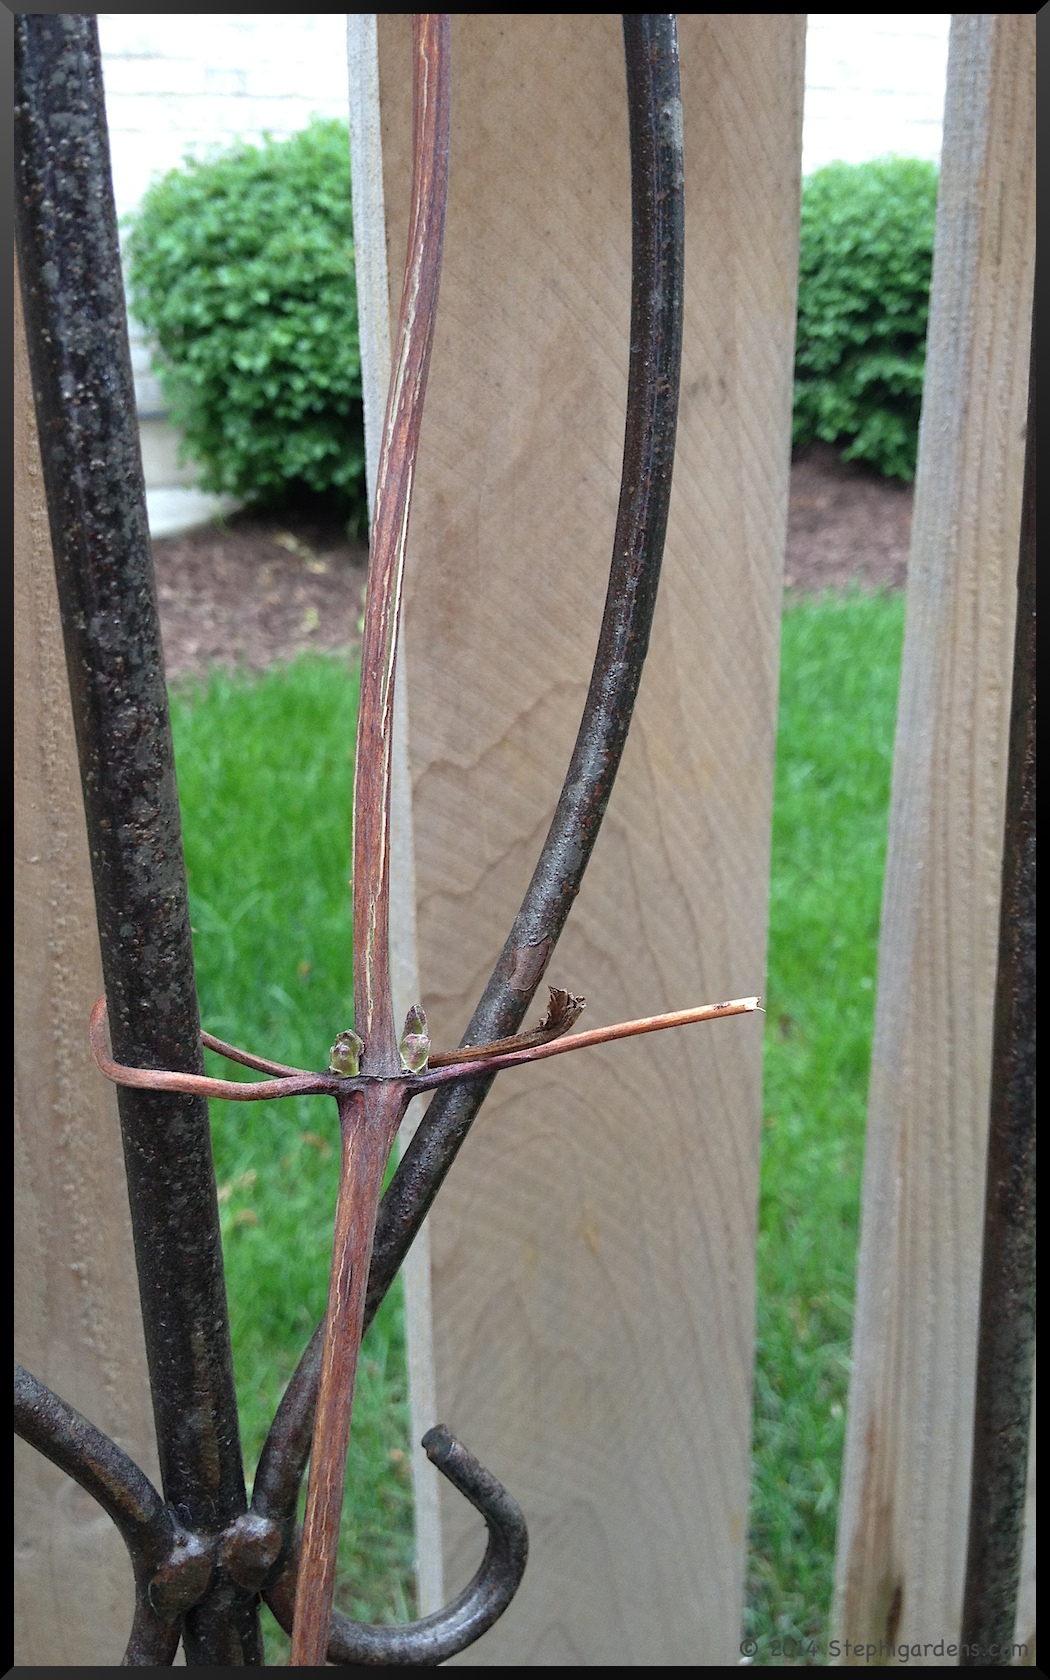
Clematis “Jackmanii” is a Type 3 clematis for pruning.  Last week, once the new growth was established and I new it was alive, I took the opportunity to prune back the tangled mess of dead wood above the new growth.

Clematis "Jackmanii superba"

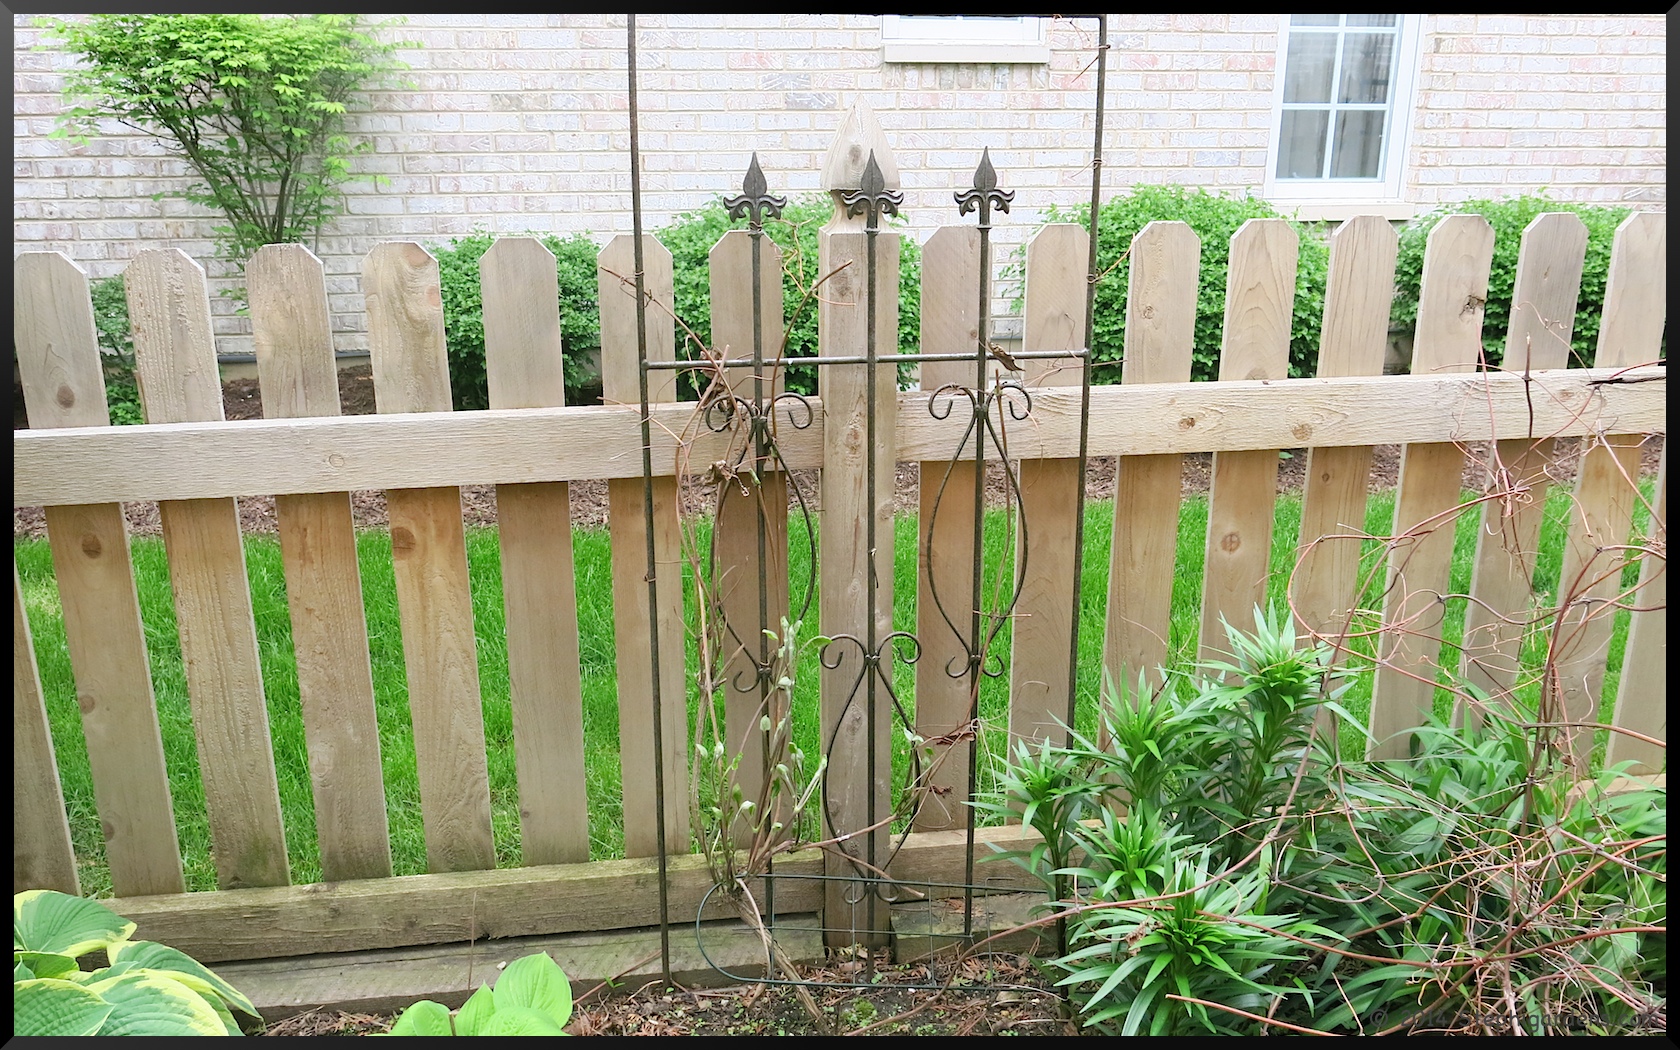
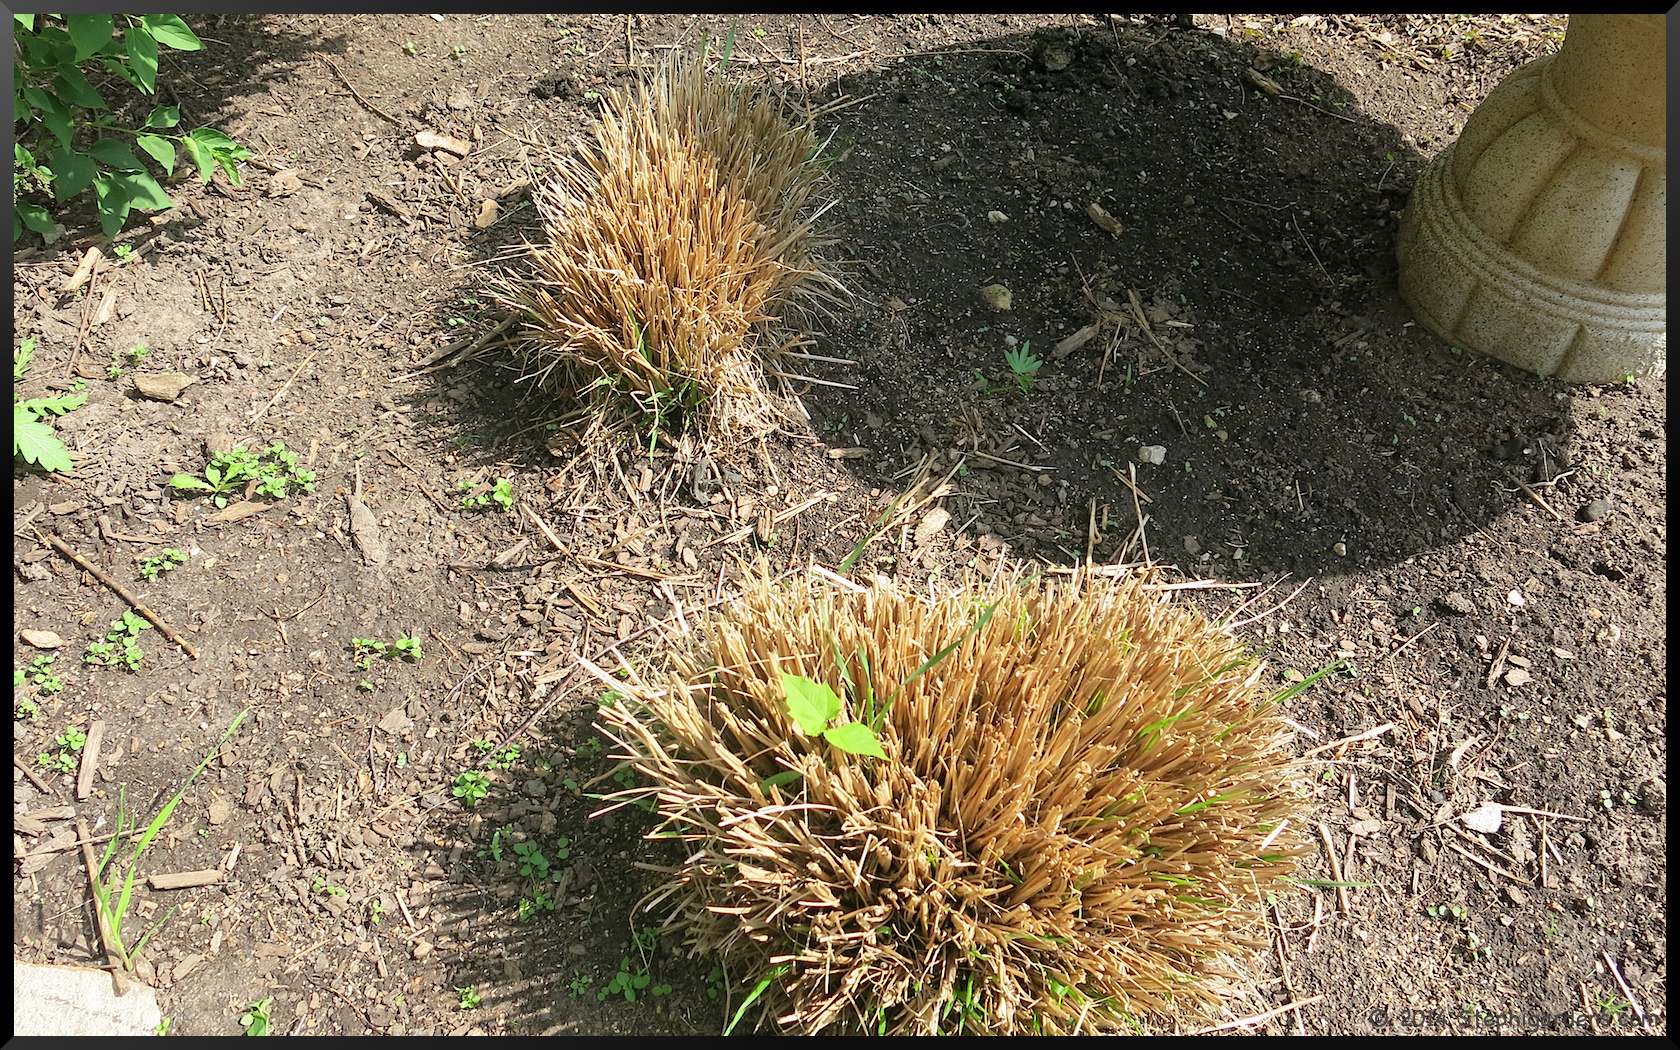
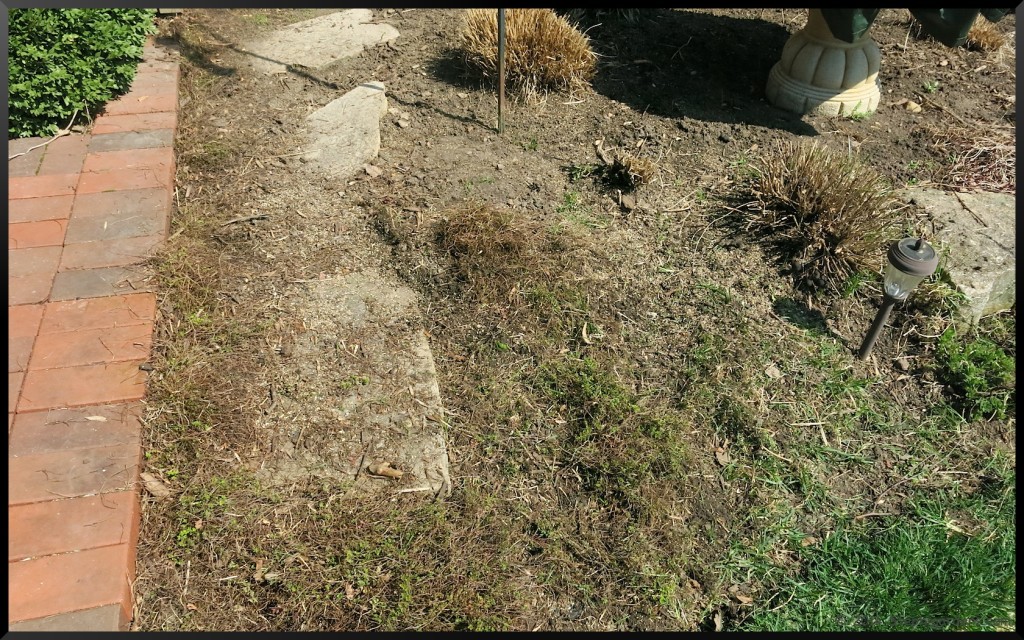
This one is my 20 year old Clematis “Jackmanii”.

Clematis "Jackmanii superba"


It’s been hard pruned periodically (in the fall, whoops) , and keeps coming back bushier and fuller each year.

Clematis "Jackmanii superba"

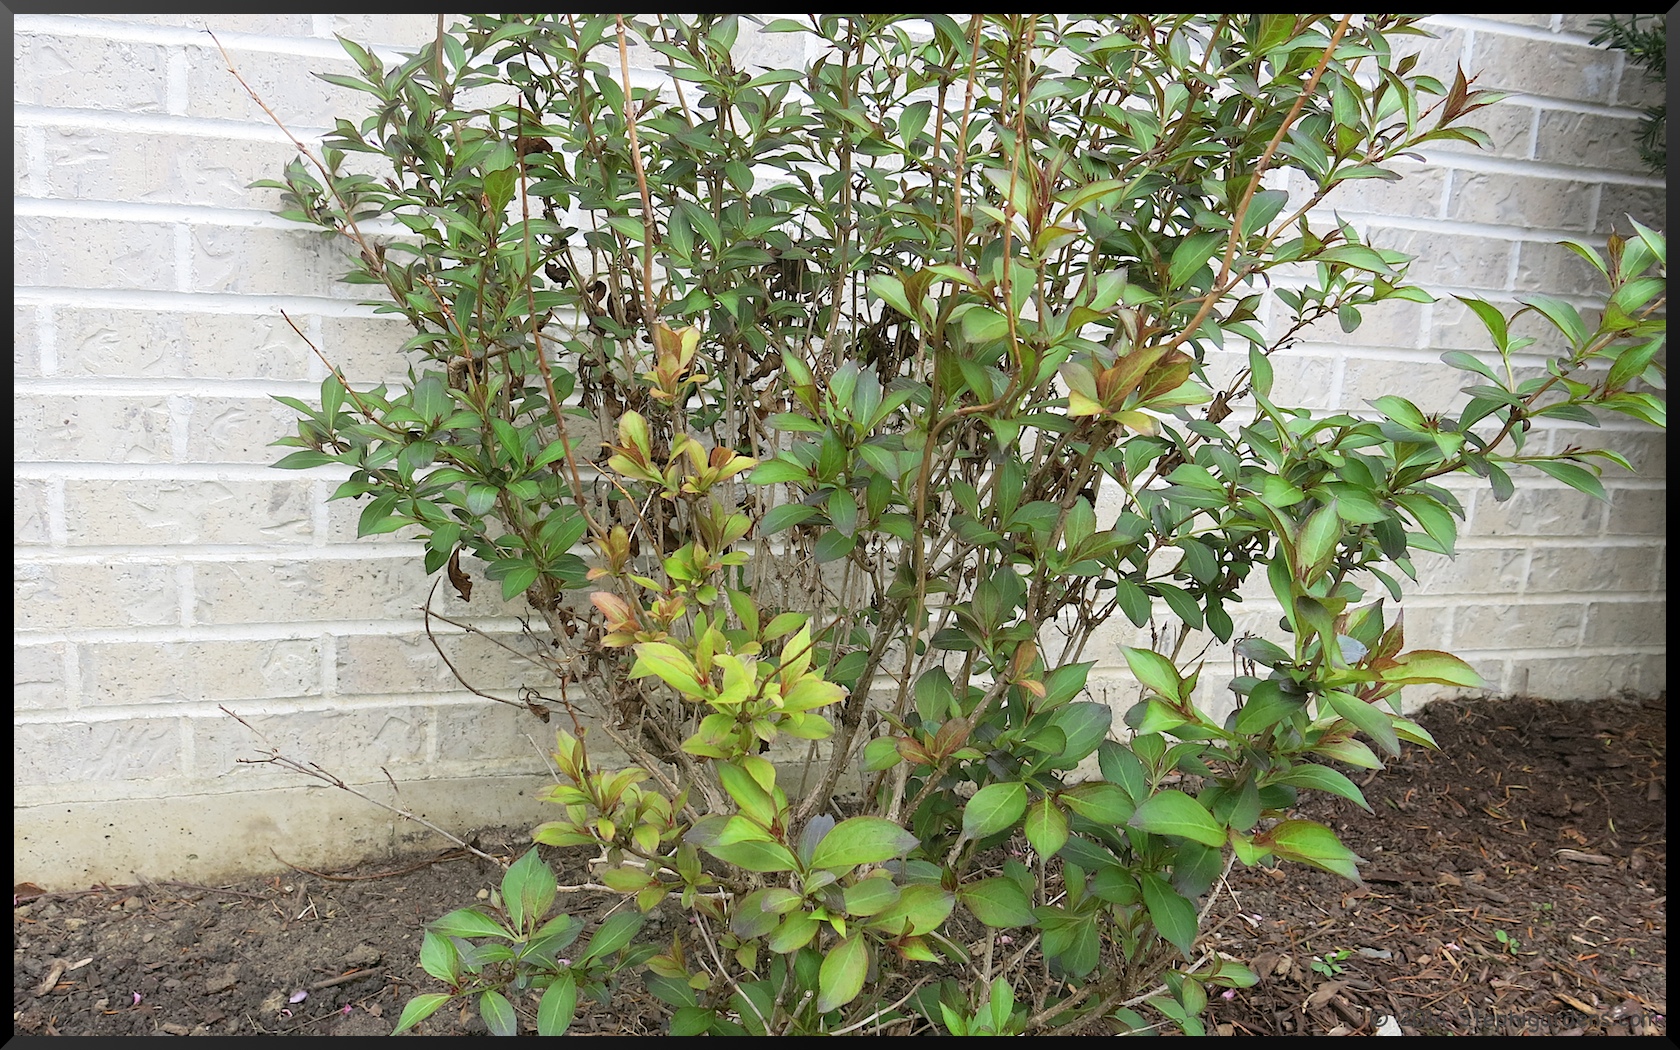
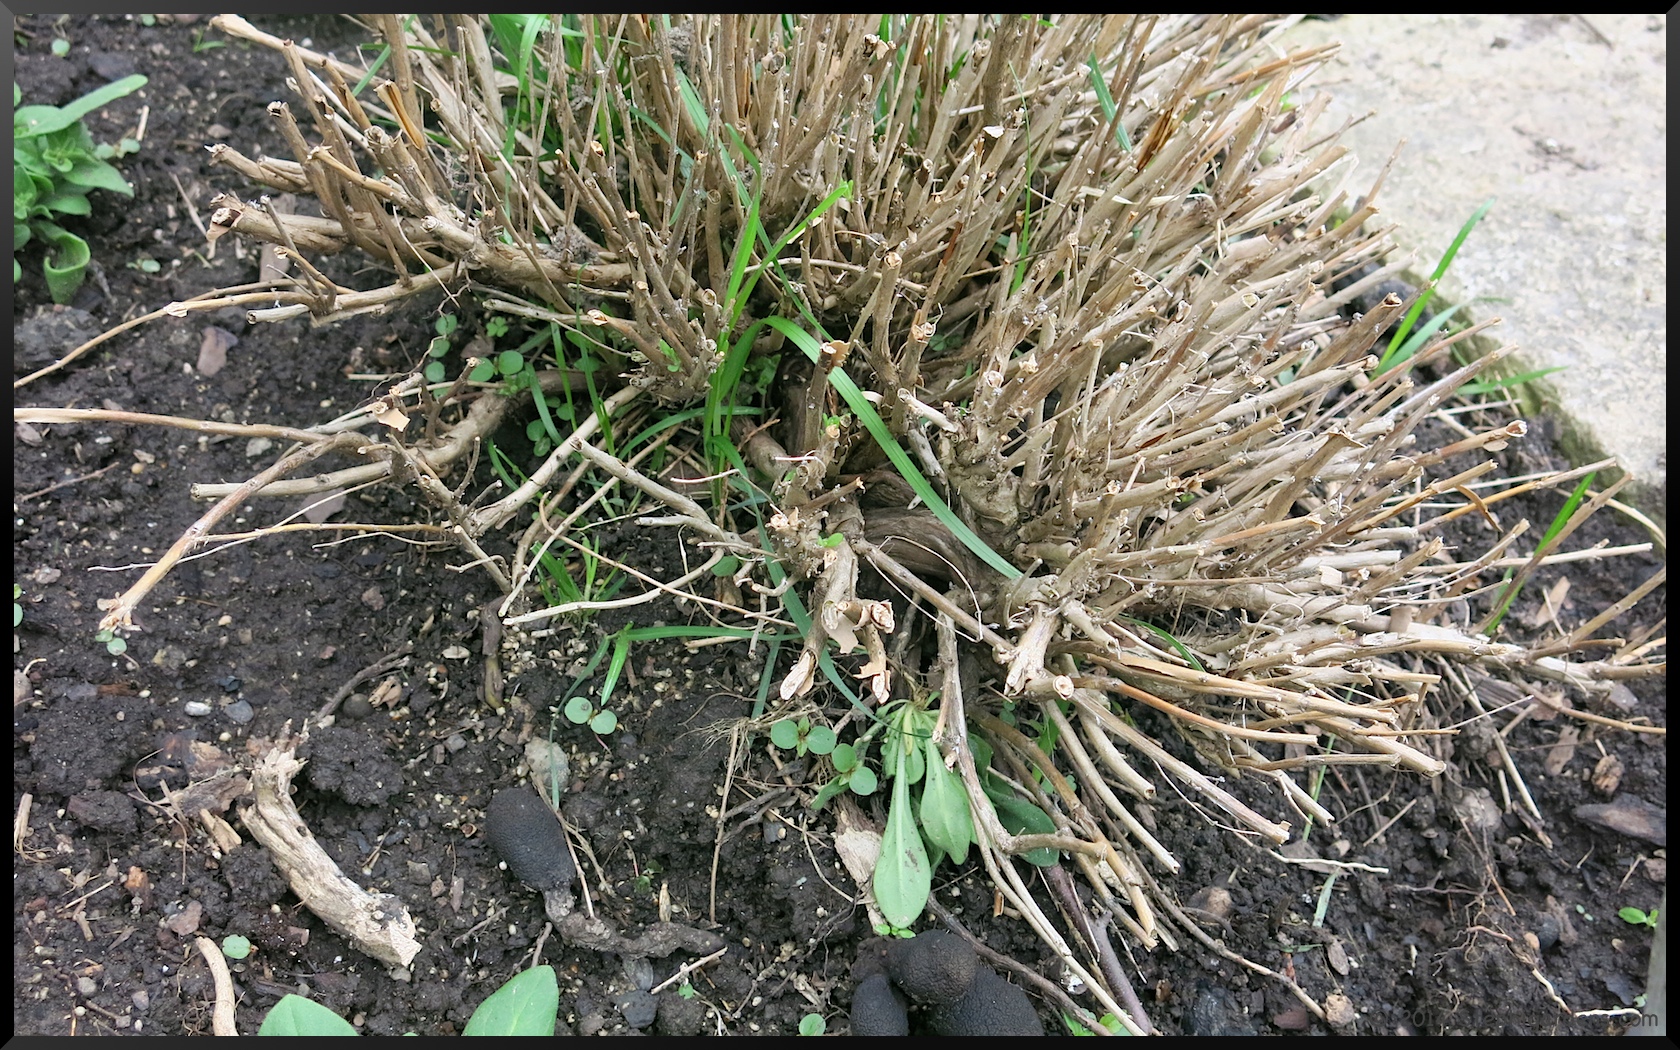
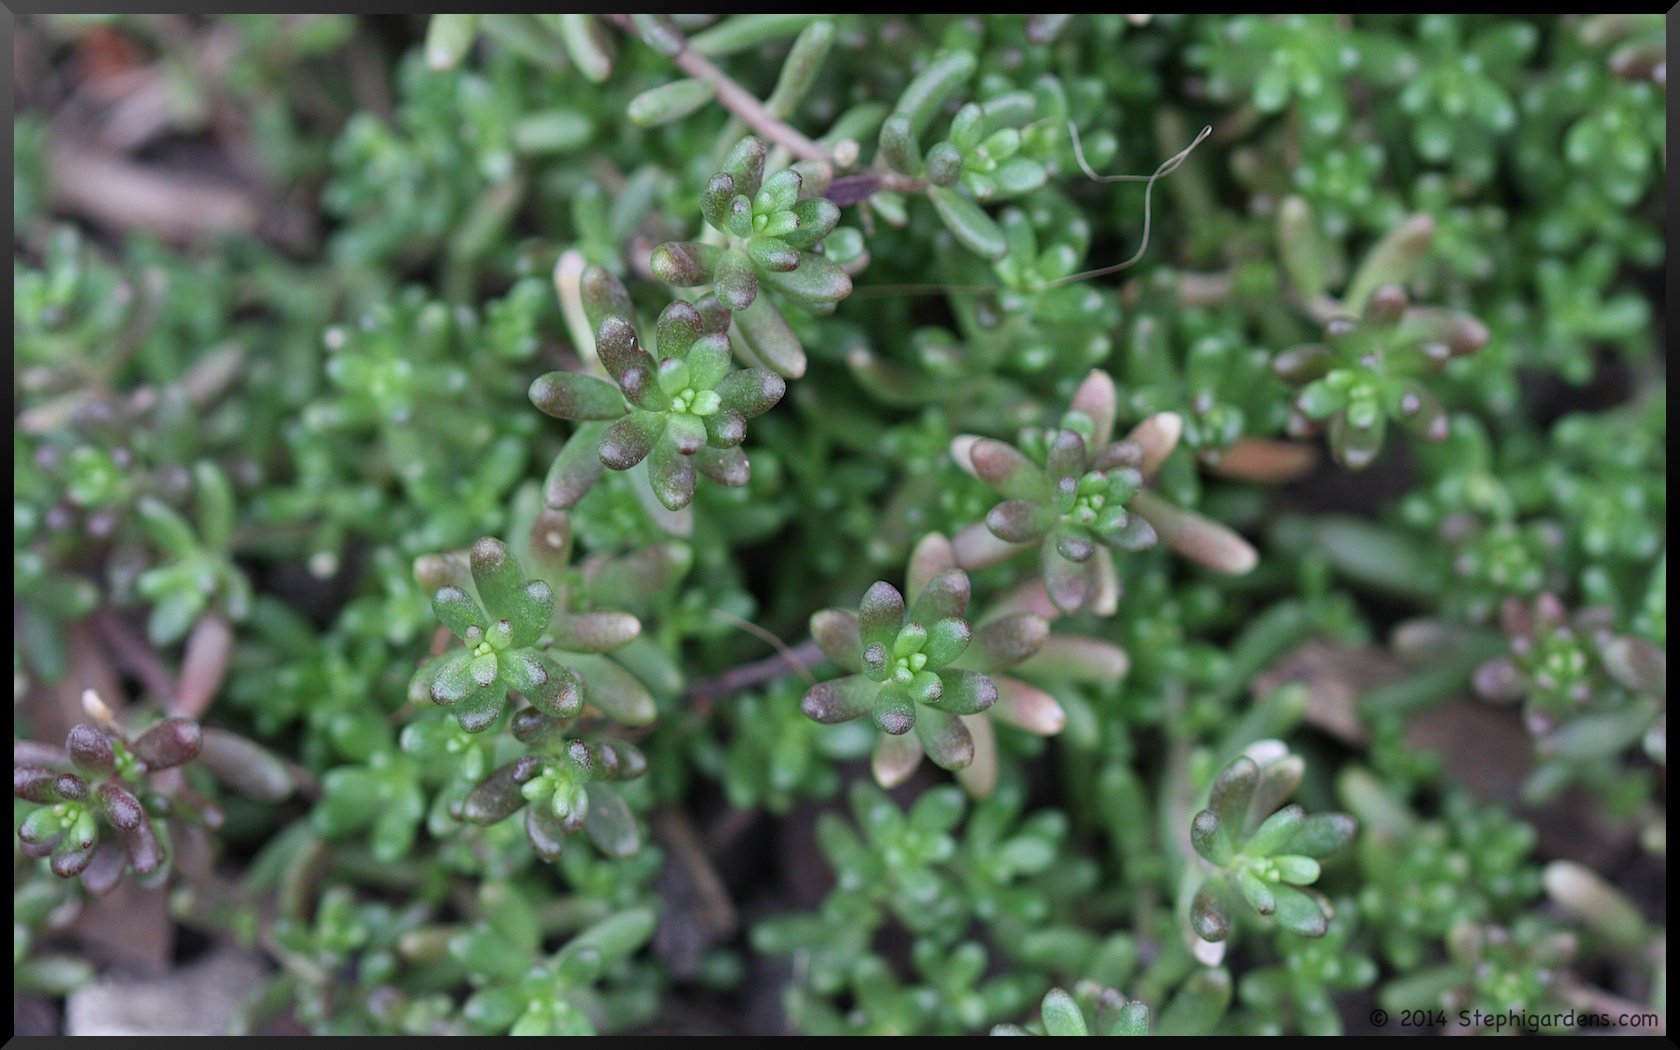
One of my recent clematis plantings is a clematis “Sugar Candy”.

Clematis "Sugar Candy"

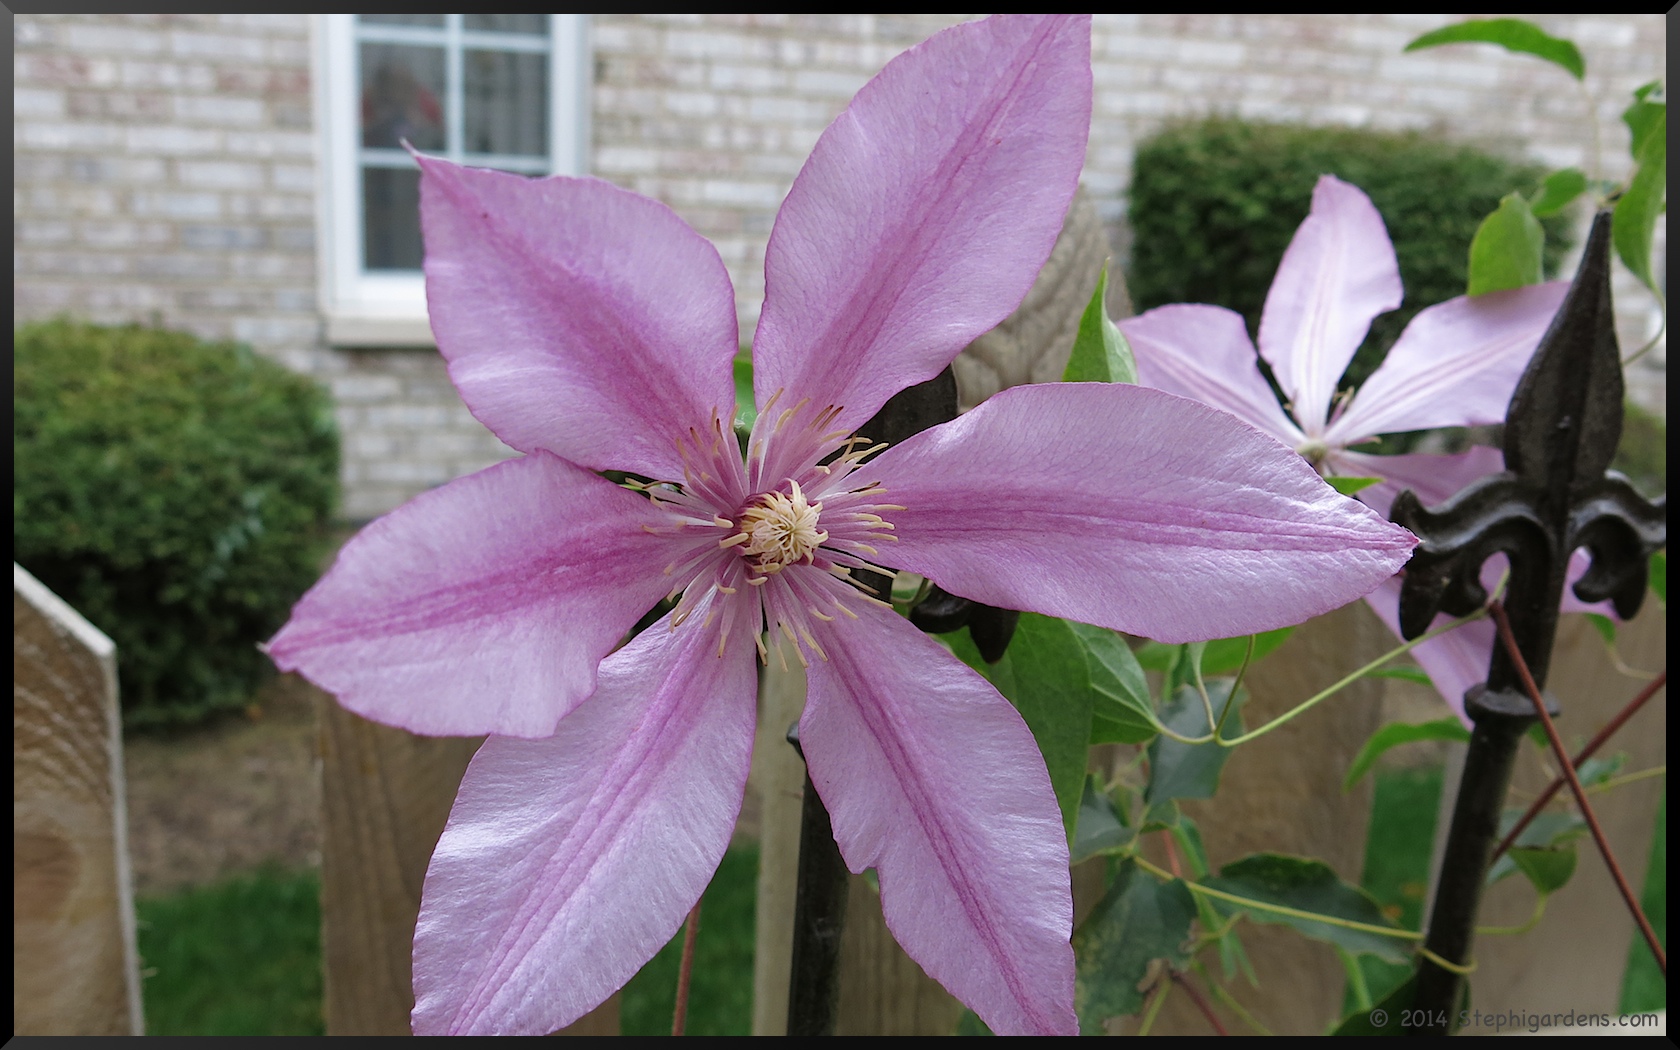
This a type 2 clematis and hasn’t been pruned at all since it was planted.

Clematis "Sugar Candy"


It could probably use some freshening up, so I will give it a bit of a “haircut” this year after it has bloomed, and then again in the early spring next year.

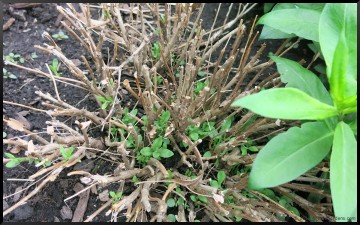
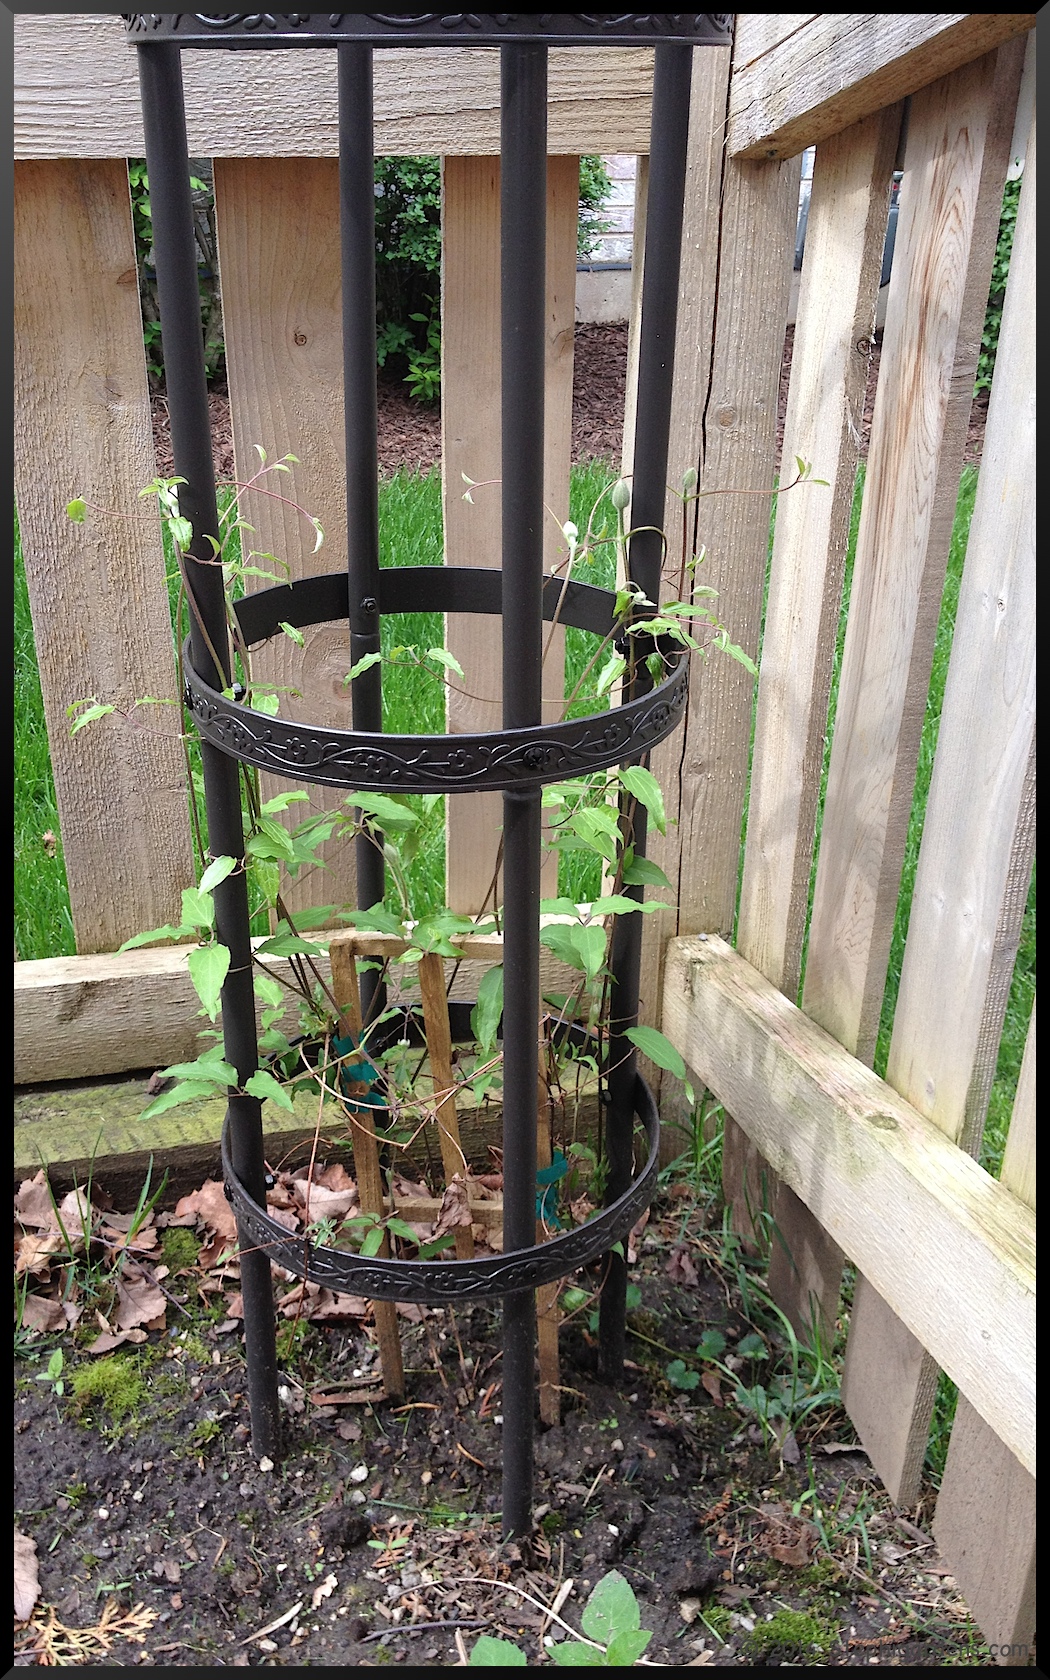
My newest one is unknown.  Somehow in less than 6 months, I have lost the name tag.  It is a clearance plant I got last fall, so I’m glad it came back this spring.  It’s going to be a nice surprise when it blooms and I can try to identify it.  I’l have a better idea as to how to prune it when I figure out what it is.

clematis


Do you have any clematis in your yard?  Are you comfortable pruning it?

Assessing Winter’s Damage

While most of the garden has burst forth finally, quite a few things have been mighty slow, while others have obviously not survived the winter.  From what I’ve been hearing, everyone has suffered some loss in the garden from the long, cold, snowy winter.   In comparison to some, I think I’ve fared pretty well since I didn’t lose any major specimens.  Mostly I’ve had to just be patient as everything slowly unfolds this year.

The trees and shrubs look pretty healthy, except for some winter burn on the yews.  Unfortunately, these dead spots will not recover and will need to be pruned out as soon as new growth can be seen.  Depending on how bad the damage is, it may look odd for a while until the shrub fills in.  Yews are one of the faster growing evergreens, so if I’m lucky it may fill in within one growing season.

Yew

This yew below suffered the most damage.  That’s because it’s placed much too close to the dryer vent, which pumped out damaging warm air onto it all winter.  Not much I can do about that but prune off the dead branches and hope it isn’t too ugly after.

Yew; Winter Burn


Ninebark


Some of the other shrubs, like the Ninebark and Weigela, have a fair amount of dead wood this year.  That’s easy enough to prune out after the new growth has emerged.  Don’t be in too much of a rush to prune, especially this year when things have leafed out so late.  Otherwise, you may be trimming out slow growth, rather than dead wood.


Weigela

Three fountain grasses and a lavender plant also succumbed to the winter.   I watched them for a while and saw no signs of life, except some weeds that were moving in.  In this location, I’ve had trouble with the grasses in prior years, so this is a good time to remove them and try something different

Stephi Gardens

Stephi Gardens

Lavender
Lavender (surrounded by Dead Man’s fingers)


This lavender is barely showing signs of life.  But, it’s better than nothing.

LavenderLavender


Earlier this spring, I thought the potted Hens and Chicks had survived their winter outdoors.  Unfortunately, that wasn’t the case. A couple weeks later, they are pretty much dried up and dead.  The red coloring faked me into thinking it was alive, but it was basically just freeze-dried!  This was the first time I left them in the pot outdoors instead of in the unheated porch.  Next year, back in the porch.  The ones that had been planted around some landscaping rocks also didn’t survive.   They were fairly established, so I’m disappointed they didn’t survive.  The rest of the sedums and succulents are just fine.

Hens and Chicks

How did your plants do this winter?


Coffee Grounds-What to do With Them?

I was getting coffee and picking up my bakery bread order last weekend at the local coffee shop.  Next to the register was this bag of coffee grounds, just inviting me to take it home for the garden.

coffee grounds

While we’re not huge coffee drinkers, we drink enough that there are a few handfuls of grounds headed to the the trash each week.  Between that and the bag of grounds I brought home with me, I thought I should look into using grounds in the garden to see if I can help the environment and my garden at the same time.  It seems that it’s not quite as simple as sprinkling it in the garden to get results.  Of course there’s the anecdotes that it’s the magic potion that turns a so-so garden into a breathtaking place.  But, from a more scientific point of view, that may not always be the case.

Here’s what I’ve learned:

  • Lab tests show that the grounds contain useful amounts of phosphorus and potassium, are a low-level source of nitrogen (about the same as grass clippings) and also contain minor amounts of calcium, magnesium, copper, and other trace minerals, carbohydrates, sugars, some vitamins, and some caffeine.
  • Coffee is acidic, but coffee grounds are closer to neutral so not really that useful for acid loving plants like azaleas
  • They are great in the compost bin, both for their nutrient value and their ability to make it “hot”.  Add them as part of the “green material” not brown .
  • People have reported good results adding it to the soil around hostas, roses, and on their lawns.  Especially when there is an underlying soil issue, like clay or damaged soil.
  • Use as transplant fertilizer for tomatoes, squash and leafy vegetables by placing a handful in the transplant hole.  Seems to give those young transplants a nutritional boost.
  • Worms love coffee grounds (in moderation, of course).  Use them in soil to attract worms to the garden, or in a worm composter.
  • Use to make a liquid feeder.  Mix grounds with a bucketful of water and leave sit for a day or two to make a nice carmel colored tea to use as a liquid fertilizer.
  • Grounds placed around the base of plants are a slug deterrent.  Seems to be an ant repellent as well.

I didn’t read anything about them being harmful to the garden in reasonable amounts, so I think this year the grounds will be sprinkled in some of the older gardens that could use a little perking up.  I’m also planning to use them around my hostas as a slug repellant as they start to do their damage mid-summer.  Maybe someday I’ll get a compost pile going and they’ll be a great addition, but that’s not in the cards right now though.

Do you use your coffee grounds in the garden?

Visiting the Morton Arboretum Annual Plant Sale

Morton Arboretum Plant Sale

For me, the yearly Morton Arboretum Arbor Day Plant Sale is like sending a kid into a candy store. So many wonderful plants to pick from, some special ones that can be pre-ordered by members, and others that everyone can just go and select.  Many of my best plants have come from there.

Morton Arboretum Plant Sale

Back in early February, still in the throws of winter, comes the flyer detailing all the pre-purchase offerings.   That’s when I wish my yard was bigger so I could buy every tree, shrub and perennial in the booklet.  But, no, every year I buy less and less, since I have less and less room to plant.  I guess that’s a good thing, just not as much fun 🙁

On pick up day, coinciding with Illinois’ Arbor Day (the Arboretum’s signature holiday),  the Arboretum also has a huge tent full of other plants that come highly recommended that can be bought both by members and non-members.

Morton Arboretum Plant Sale


Morton Arboretum Plant Sale

I stopped there first, since this part is first come, first served and they often run out of varieties. What is tops on my list to find: a Purple Beautyberry Bush!  Ever since I saw them last year in the Arboretum parking lot (see Purple Beautyberry Bush post), I’ve been planning to look for them this spring.

Beautyberry Bush

Then I shopped for a bit more, finding some interesting perennials (Little Vision in Pink Astilbe,  Hosta Independence, Early Sunrise Tickseed), vegetables (tomatoes and peppers), herbs (basil, parsley, sage, mint), strawberries, and… Creeping Thyme.

Creeping Thyme


If you read my recent post on the problems I was having with my Creeping Thyme, I saw these and decided to add a few plants to try and help fill in the space a little quicker as the older plants recover from their inattention. It’s not exactly the same as what is there, but I think the varieties will look good together.

Then I went over to pick up my order,  which contained Peek-a-Blue Russian Sage, a Flutterby Petite Tutti Fruitti Pink Butterfly Bush, Jeana Garden Phlox, and a Primal Scream Daylily.

Peek-a-Blue Russian Sage, Flutterby Petite Tutti Fruitti Pink Butterfly Bush, Jeana Garden Phlox, Primal Scream Daylily, Little Vision in Pink Astilbe, Hosta Independence, Early Sunrise Tickseed


Morton Arboretum Plant Sale


The shrubs I can plant right away (or at least as soon as it stops raining) and the other perennials and annuals I’ll wait for a couple of weeks. Mother’s Day weekend usually is the safe, no more freeze danger mark. Until then, the perennials will hang out outside in a shady spot and the rest I’ve moved into the screen room for a little more protection from the cold weather we’ve been having. Now I just need to remember to water them!

Do you have any local plant sales in your area?

Creeping Thyme Problems

When we first redid the landscape along the back of the house, we included a small stone walkway to get to the spigot.  It was a full sun location, and needed to take some light foot traffic.  We settled on Creeping Thyme.

Creeping Thyme

I thought it was no maintenance, but over the years it become more ingrown with grass and full of woody stems.  These plants look NOTHING like it’s supposed to.  I’ll put this in the truly embarrassing category.

Creeping Thyme

The only way I know of to really keep the grass out is to keep a clean cut edge with the lawn and pull it as soon as you see it sprouting.  You need to get right down to the roots, otherwise you’ve just “cut” the grass.  That means pulling back the thyme and getting under it to get the whole grass shoot. Rather tedious, but easier to do early rather then later.

The woody stem issue is something easier to deal with.  It simply requires some attention each spring.  After the first year, the plants can be lightly pruned back, about 1/3 max.  This keep the plants rejuvenated and full.  Be careful to cut above the new growth, or it will not regrow.  Cutting is also better than trying to pull out the dead, woody parts.  The plants have fairly shallow roots and you just end up ripping everything out.

Before:

Creeping Thyme

After:

Creeping Thyme

This is what it looks like now.

Creeping Thyme

I have a feeling this is going to be a multi-year process.  We’ll see how it looks in a couple of weeks.  If still looking peaked after a few weeks, I may need to add some fresh plants and chalk it up to a learning experience.  If it does seem healthy, I may be able to divide the plants and make new clumps.  You can also do this if the plant has become too woody in the center (oldest growth) and you want the outer, younger growth to grow unimpeded.

Overall, I think is still the best plant for the location, it just takes a little bit of care and attention.  No matter how it looks, it smells wonderful to work with and walk on!

What is your experience with Creeping Thyme?

Update: Check out what the creeping thyme looked a year later in this more recent blog post–August, Oops, September Garden Update 

Another Update: Still looking great but needs the infiltrating grass needs some attention —Creeping Thyme Update

Spring Sedums

This winter was a particularly harsh one, so as new growth is starting I’m excited to see what has survived. Over the last few years, I’ve planted a number of sedums in hot dry areas that other plants have not fared well in. I also have almost too many Sedum “Autumn Joy” around the yard. Happily, many of them seem to have survived and are already greening up the garden.

Sedum takesimense “Gold Carpet”
IMG_8192
Sedum album “Coral Carpet”
Sedum album 'Coral Carpet'
Sedum spurium ‘Blaze’
Sedum spurium 'Blaze'


SEDUM spurium 'Blaze'

Sedum “Autumn Joy”
I have clumps of Sedum “Autumn Joy” all around my yard that started from only a couple of plants. In my soil conditions, they are fast growers and easy to divide in only a few years.  These are one of those plants that I’ve found that “less is more” when developing a landscape plan. They will fill in the space fairly quickly so don’t over plant.  They are also one of the earlier plants to begin leafing out, despite them being a fall flowering plant.

Sedum "Autumn Joy"


Sedum "Autumn Joy"


Sedum "Autumn Joy"

 Hens and Chicks
I don’t usually leave the potted Hens and Chicks out over the winter, but this was one of those winters that snuck up on me and I never got around to putting them on the porch.  It seems that they mostly survived and don’t look much worse than normal.  I did expect the center of this one to be dead since it had flowered so beautifully last summer.  That marks the end of its life cycle.  Depending on what the pot looks like in a couple of weeks, I’ll pull out all the dead parts and try to plant the chicks in the empty spots.  Otherwise, I’ll pull it apart and plant the remaining plants in the garden.

Hens and Chicks


Hens and Chicks

I’m still looking for the Hens and Chicks that are in the garden to appear.  They really don’t die back, so the fact that they are “missing” suggests maybe they didn’t survive the winter.  Maybe they’ll surprise me.

How did your succulents do over the winter?

Photos by Steve

Starting My Seeds Indoors

This weekend I finally had time to get my seeds and seed starting materials out to get them started indoors.  I usually try and plant vegetables like cucumbers and summer squash that I have trouble finding in stores,  but I buy my tomatoes and pepper plants from a local nursery who has a great selection.

Seed starting trays

I hauled out all the seed starter kits I had (see Starting Seeds Indoors), plus I bought some new trays to expand what I can grow.  I also bought a great new mini greenhouse to set all the trays on and set it up on the porch.  I’m hoping this will work better then the tray tables in front of a bedroom window!

mini greenhouse

mini greenhouse

I first started with my APS-24 systems (see Starting Seeds Indoors for more thorough instructions)  I like this size for starting vegetables and larger flowers.  Be sure to thoroughly wet the capillary mat and pre-moisten the sterile germinating mix used to fill the holes.

IMG_2901
IMG_2902
APS Seed Starter Tray

Then add the seeds according to directions as to how many per grouping and how deep (you’ll thin them later).  Be sure to label them so you know what you’ve planted!

APS Seed Starter Tray

Since I have my new shelf and have space for more trays, I added to my collection of seed starting trays.  I bought a couple of different kinds to try, a 72 cell Ultimate Growing System from Burpee to replace my missing APS one, and some smaller Jiffy 12 cell kits.

Burpee seed tray

Jiffy seed starters

Both of these use soil pellets that you add water to and they expand.   Like the instructions say, warm water does work better.  After setting up all three kinds of soil cells, I think I prefer the old fashioned germinating mix that I pack myself.  I found the pellets a bit difficult to get to rise evenly and needed to still fluff the mix in the Burpee kit.

Burpee Seed Starter kit

I’ll see what I think after everything gets going as to which system I prefer for ease of use, and which holds up better for use year after year.  For anyone who noticed the chunk missing from the styrofoam APS system, that was my fault.  I’m not sure why I decided it what a good idea to pick up the full tray with one hand to move it.  That missing piece would be where my thumb was.  Otherwise, I’ve had these for years without any problems.  Best to move all these trays with two hands!

Most of the germination instructions say plant inside 4-6 weeks prior to the last frost date.  I’m about 3 weeks prior, although I usually wait a couple more weeks until mid-May before putting them in the ground.  They should be fine starting this week. Here’s what I planted:

24 cell size:
Cucumber, Marketmore Organic (Botanical Interests)
Summer Squash, Baby Round (Botanical Interests)
Summer Squash, Cubes of Butter (Botanical Interests)
Summer Squash, Patty Pan Scallop Blend (Botanical Interests)
Zucchini, Burpee Hybrid (Burpee)
Marigold, Boy O’ Boy (Burpee)

72 cell size:
Cosmos, Sonata Mix (Burpee)
Marigold, French Favorite (Botanical Interests)

Jiffy pop-ups:
Zinnia Cut and Come Again (Botanical Interests)
Zinnia Fireball Blend (Botanical Interests)

Here’s the finished project.  All ready for the sun to shine on it and get everything growing.
mini greenhouse

Seeds are in the House

After spending quite a bit of time pouring over seed catalogs, I finally sent in my seed orders. I had lots of new seed catalogs come to the house, and some more companies I just visited on-line, making the choices this year really tough.

Seed catalogs

Ultimately, I went with some Burpee stand by’s and the rest from Botanical Interests.  I ordered an assortment of vegetables and flowers.  Some of the vegetables I’ve grown before (summer squash, zucchini, lettuce) and others are new to my garden (pattypan squash, beets and cabbage).

seeds

I’ve outgrown the raised bed on the side of the house, plus we’ll have new construction next door so I’m not sure what the sun situation for that bed will even be come next year.  So we spent a great deal of time watching the sun pattern in the yard last year (full sun is a problem in my yard) and mulling over where we could tolerate more vegetable beds.  We finally settled on a new location off the back of the patio for 2 new raised beds.  I’ve promised to keep them under control and somehow “pretty” them up.  You can imagine them out there under the snow.

snow

I bought new raised bed frames last fall from Plow and Hearth, so I am ready to go after a trip to the lumber store.  I’ll let you know how I like the brackets.

raised beds

Are you ready to start planting?