Thanksgiving 2020, Covid Style

Thanksgiving is right around the corner and it’s not going to be what any of us imagined. But that’s ok and what we need to do right now. We’ll make it up for it next year!

To be honest though, for a variety of reasons our Thanksgivings have always been small, ranging from 3-9 people each year. So this isn’t really that different, at least number-wise. Every year friends would ask who’s cooking this year, I always say me. The whole meal. And you know what, it’s been awesome. But I do love to cook so maybe I’m biased. We’ve created family Thanksgiving traditions that’ll live on through my kids and made this one of our favorite days of the year. So don’t be nervous, you can do it!!!

This year, there’ll just be three of us. Our other two kids, our moms and the rest of our family all live out of state. I’m hoping they can find a way to enjoy the day, each in their own away. But it’s definitely hard when you’re alone.

Standard Disclosure: This post contains affiliate links. I may receive a commission from purchases you make through the links in this post

What’s some of our traditions?

One of the things about not having guests is that you get to settle in, be comfortable, and go at your own pace. You are in completely in charge of the day’s schedule. Be creative–sleep in, watch that football game and eat at 5, stay in pajamas until noon, eat on tv trays, create an intimate setting at the dining room table. Make it your kind of day. Here’s the highlights of our Thanksgiving this year.

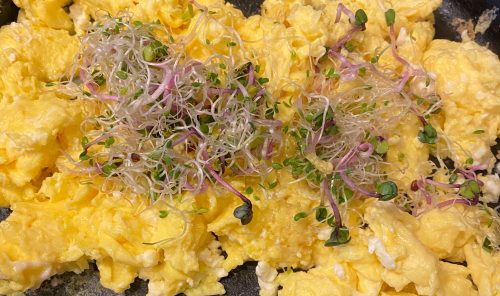
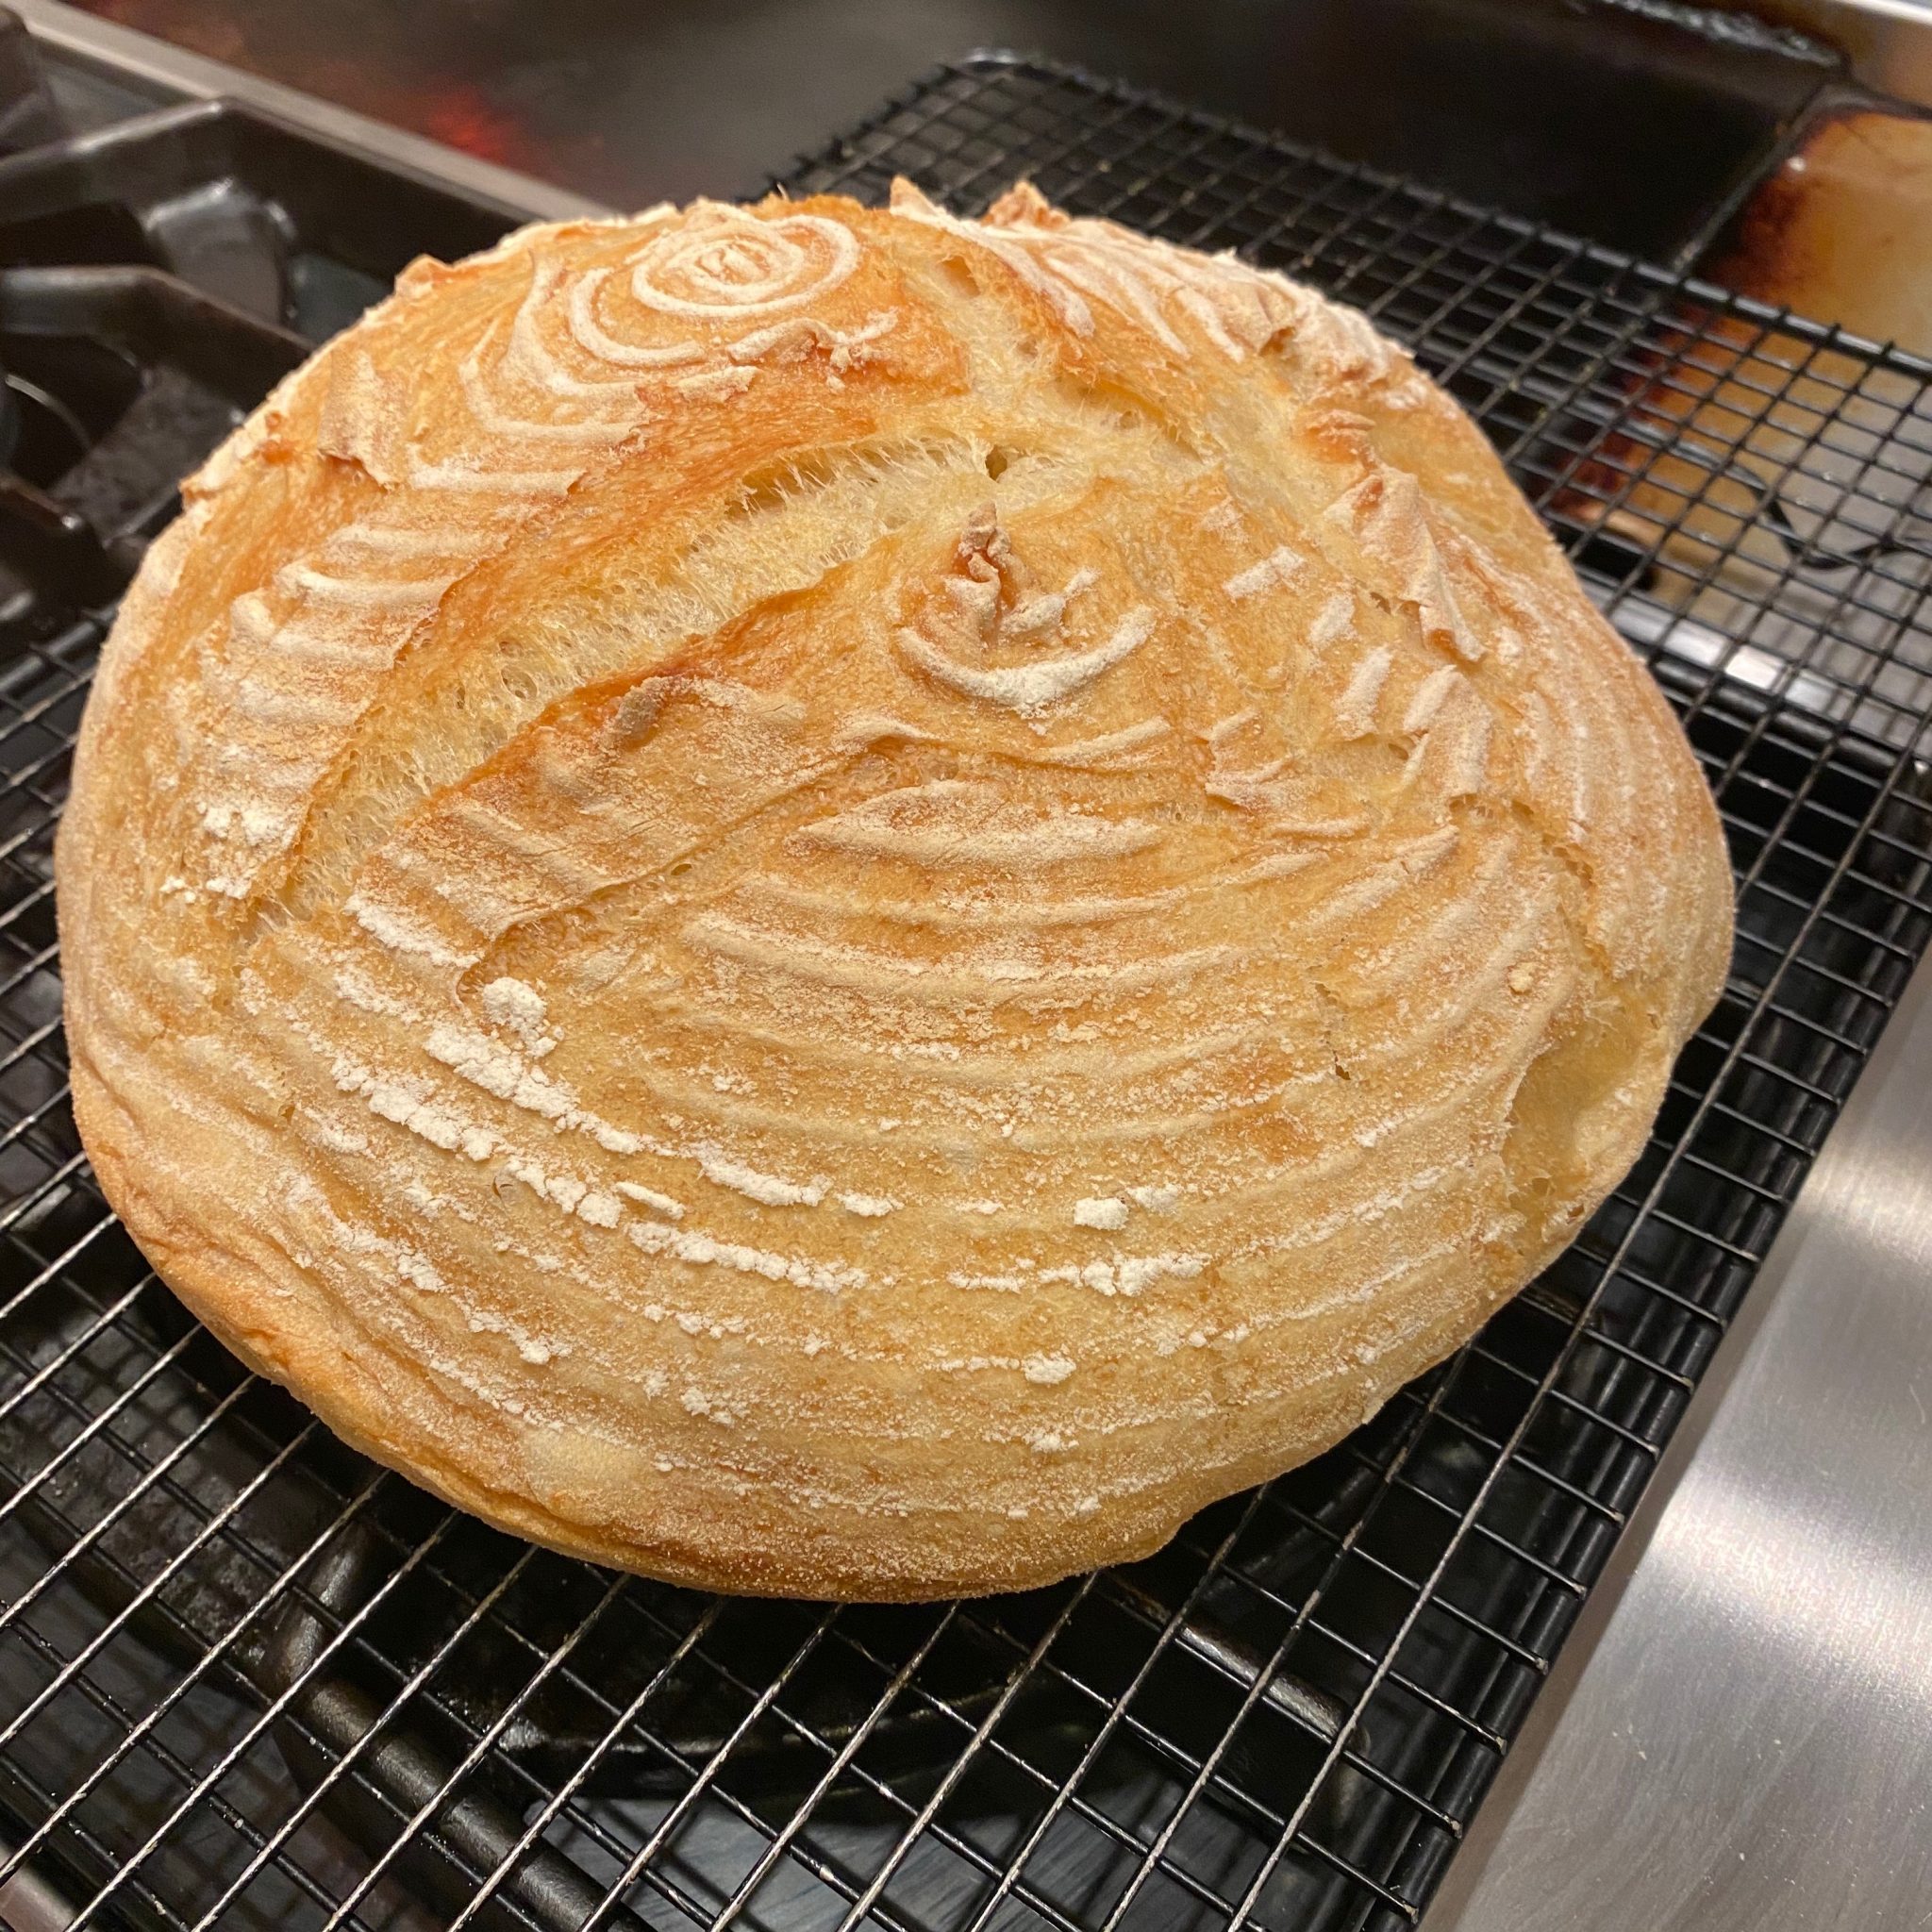
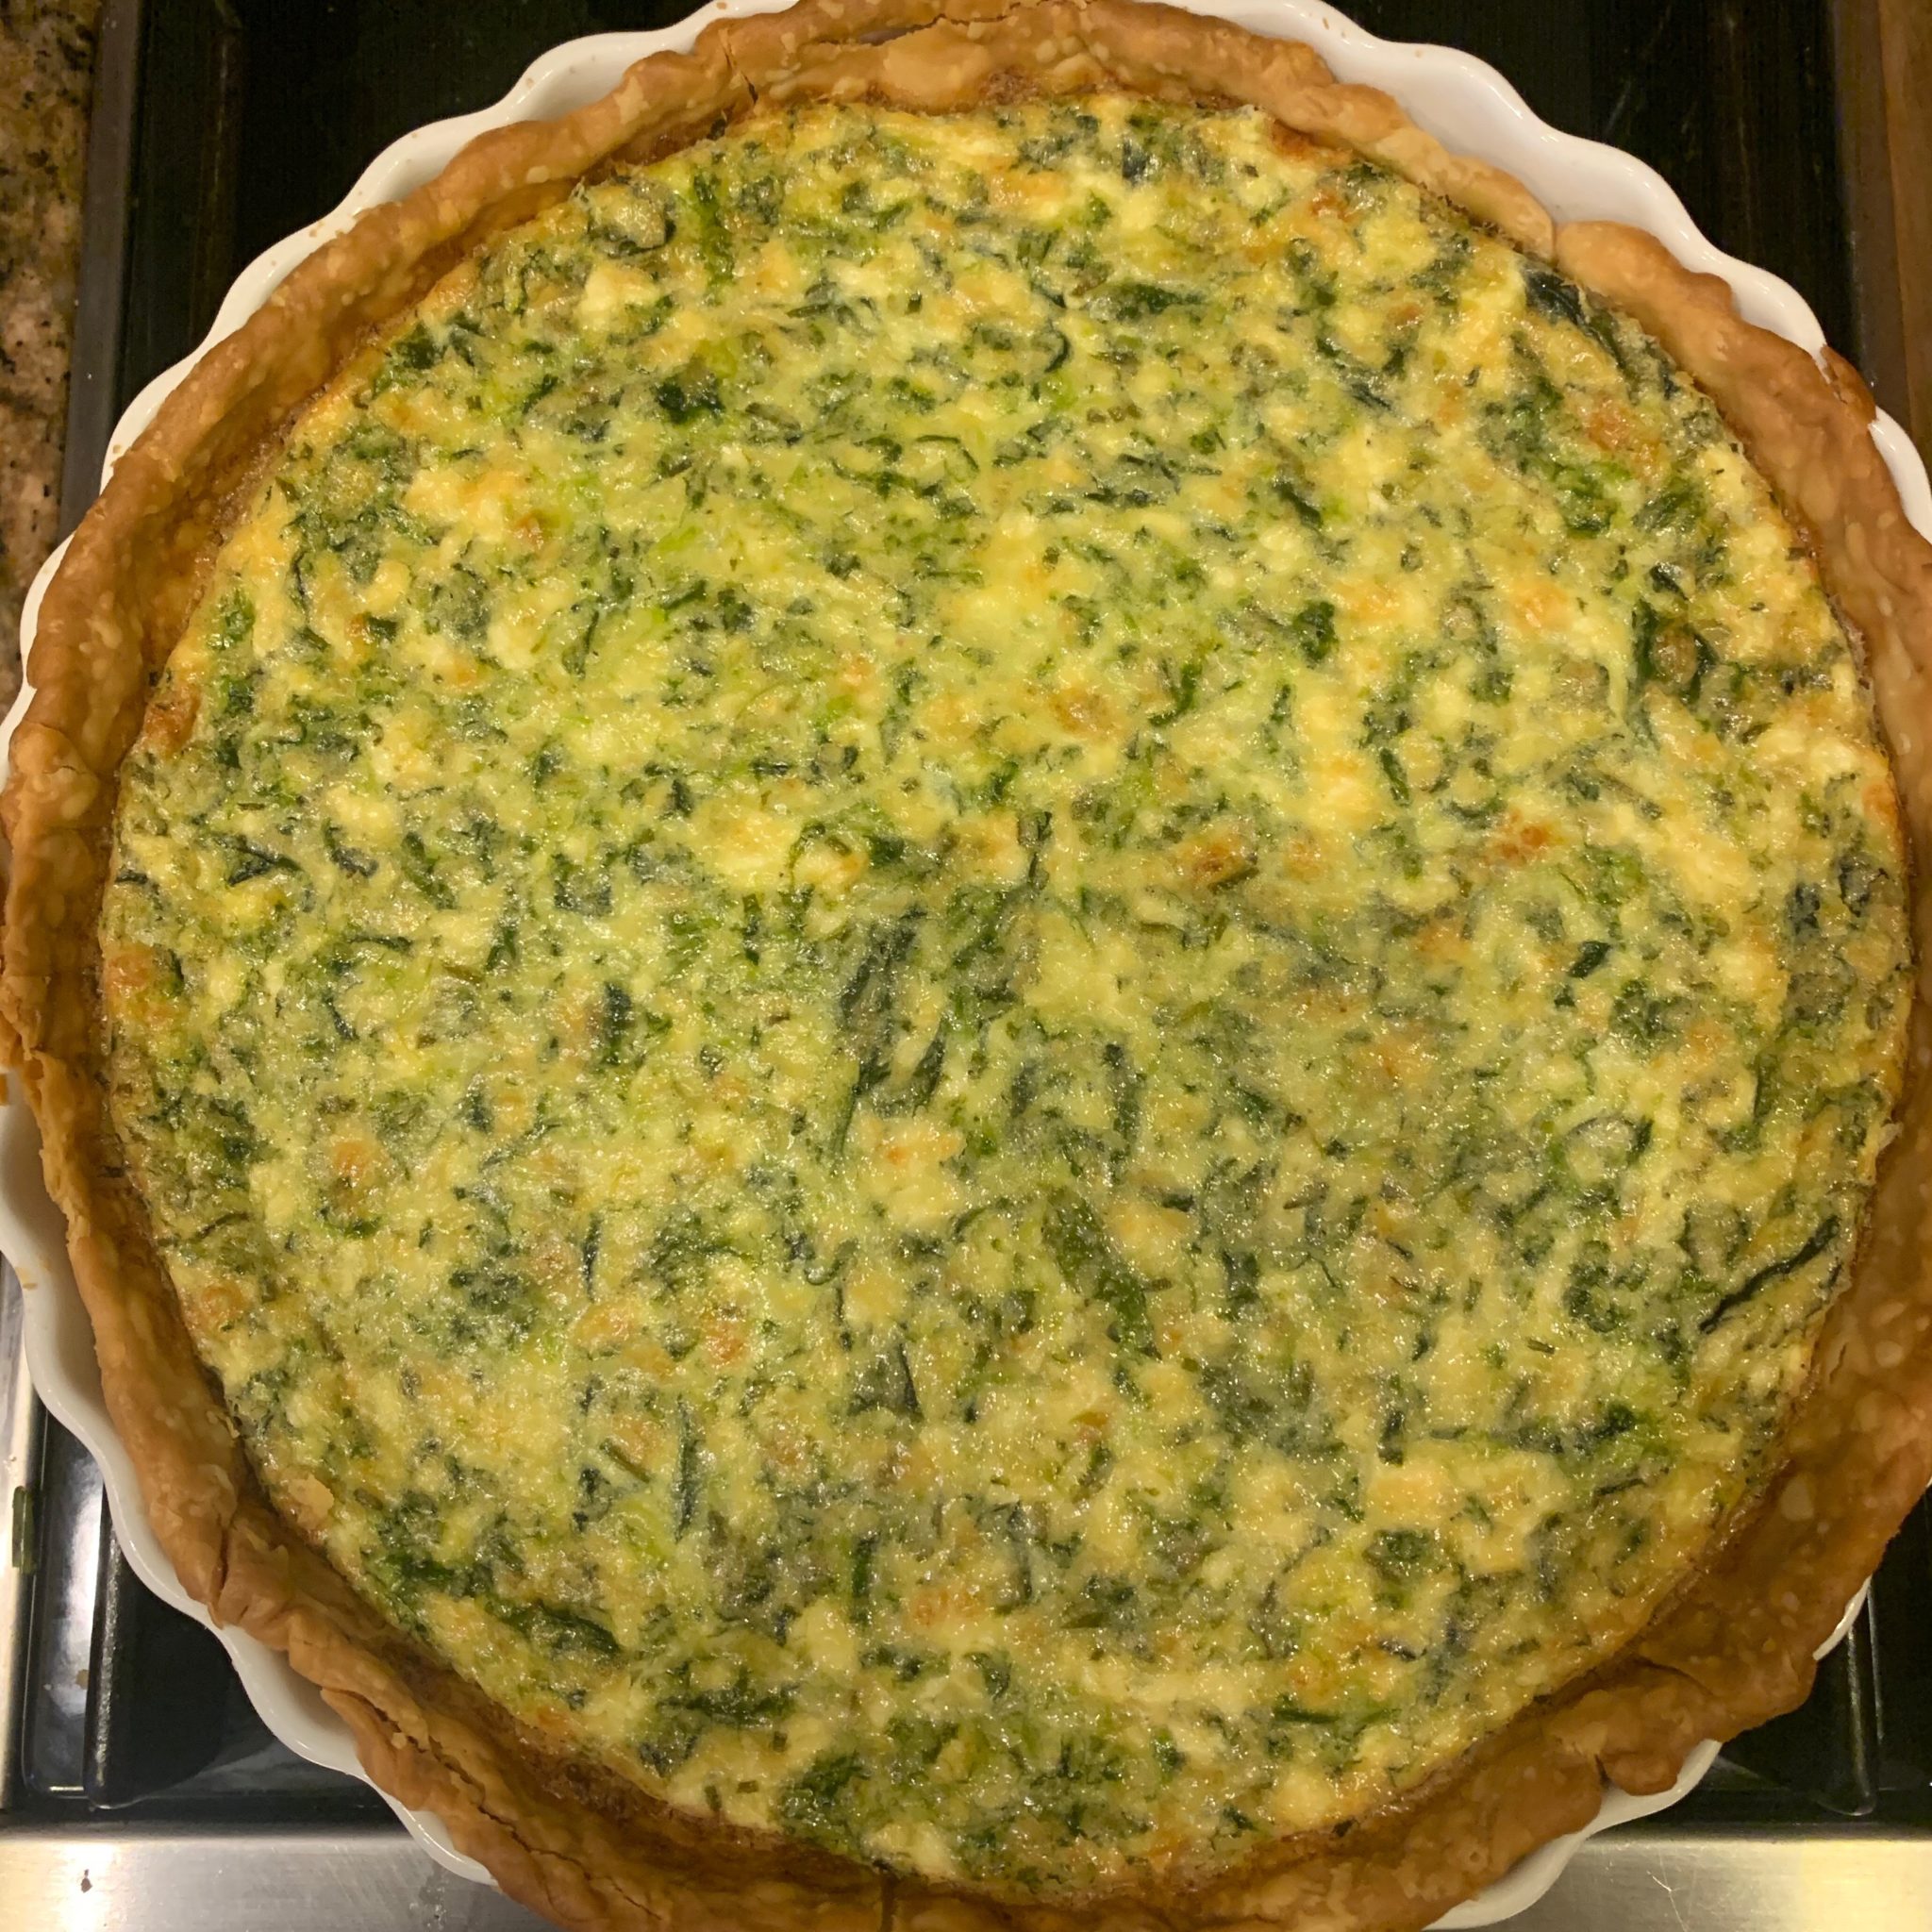
  • We’ll start the day with brunch centered around a delicious Kale, Chive and Goat Cheese quiche (jump to recipe). This year, I’ll have homemade sourdough banana bread and Waseda Farms Bacon on the menu as well.
  • In recent years, I’ve planned a signature holiday cocktail. One of the benefits of having adult children 😉. This year is going to be a Calvados Apple Cider Cocktail (jump to recipe).
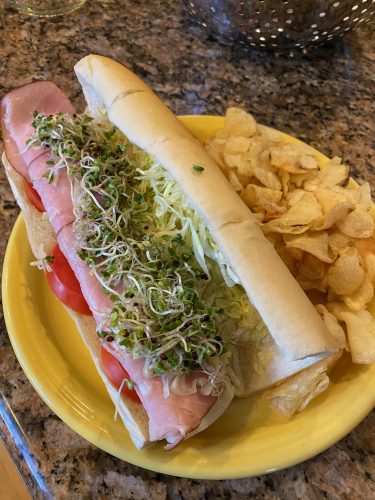
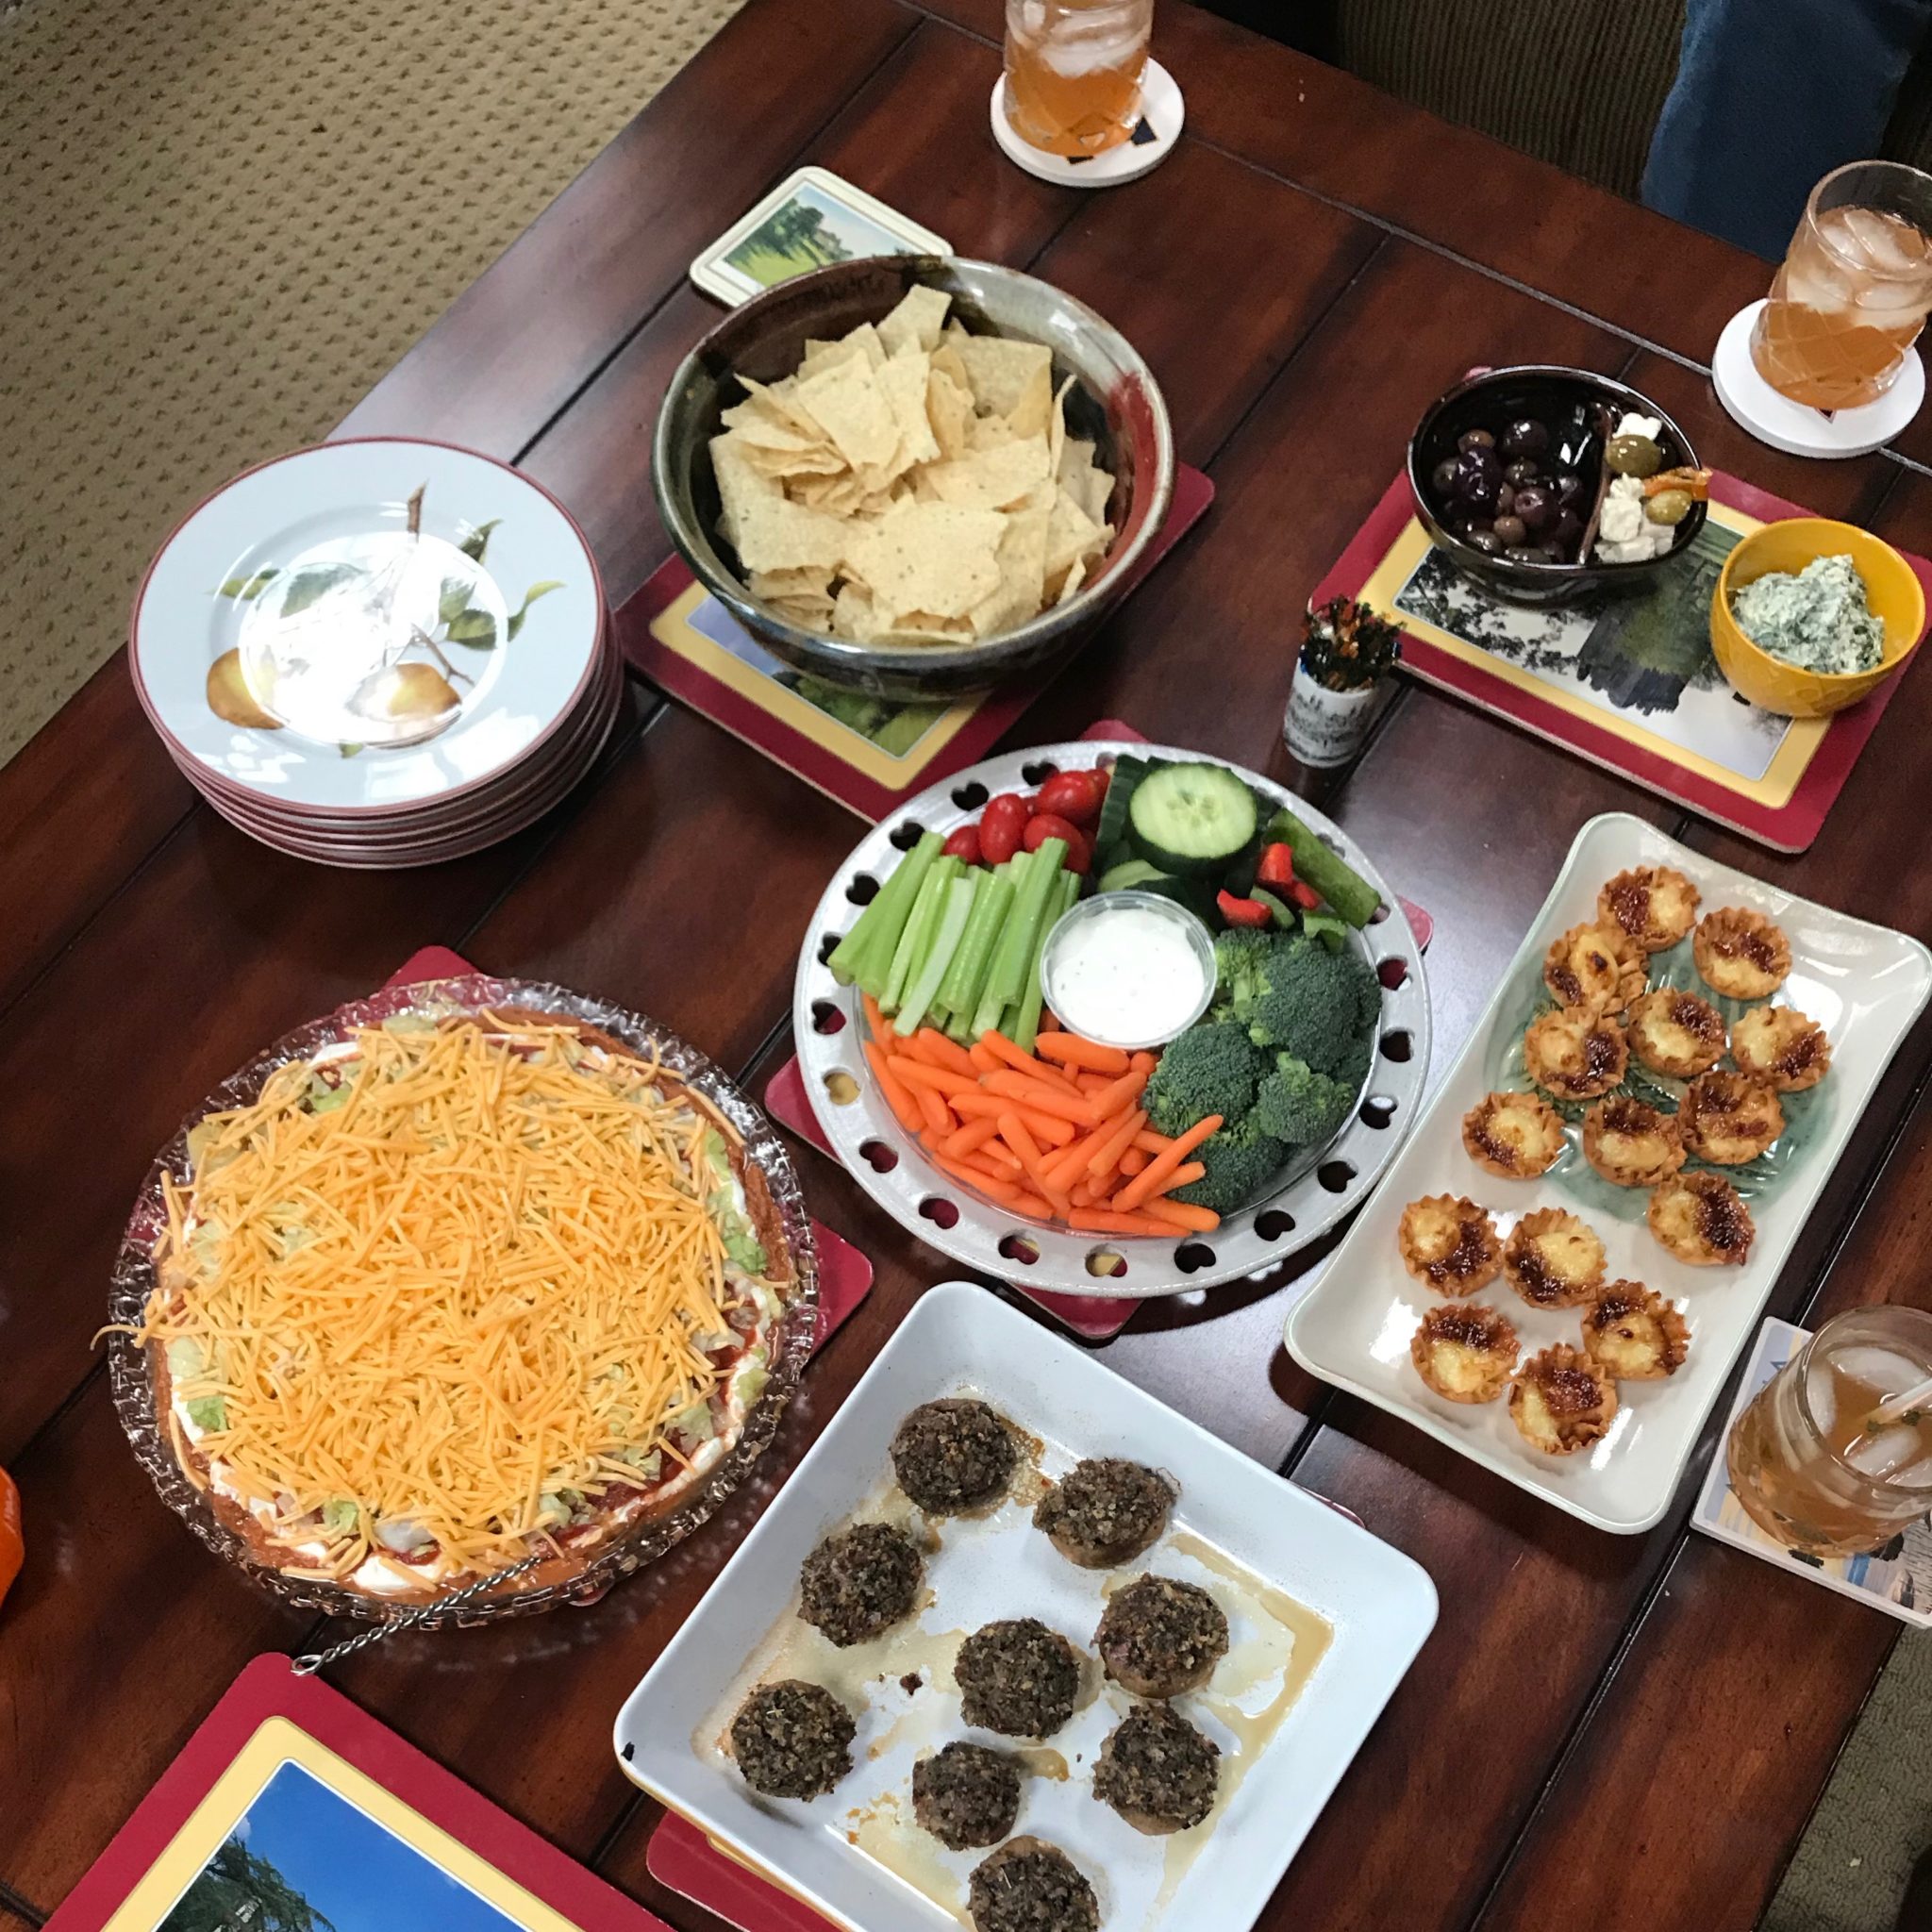
  • During the early football game, we’ll have some tasty, light snacks to munch on while the turkey is cooking.
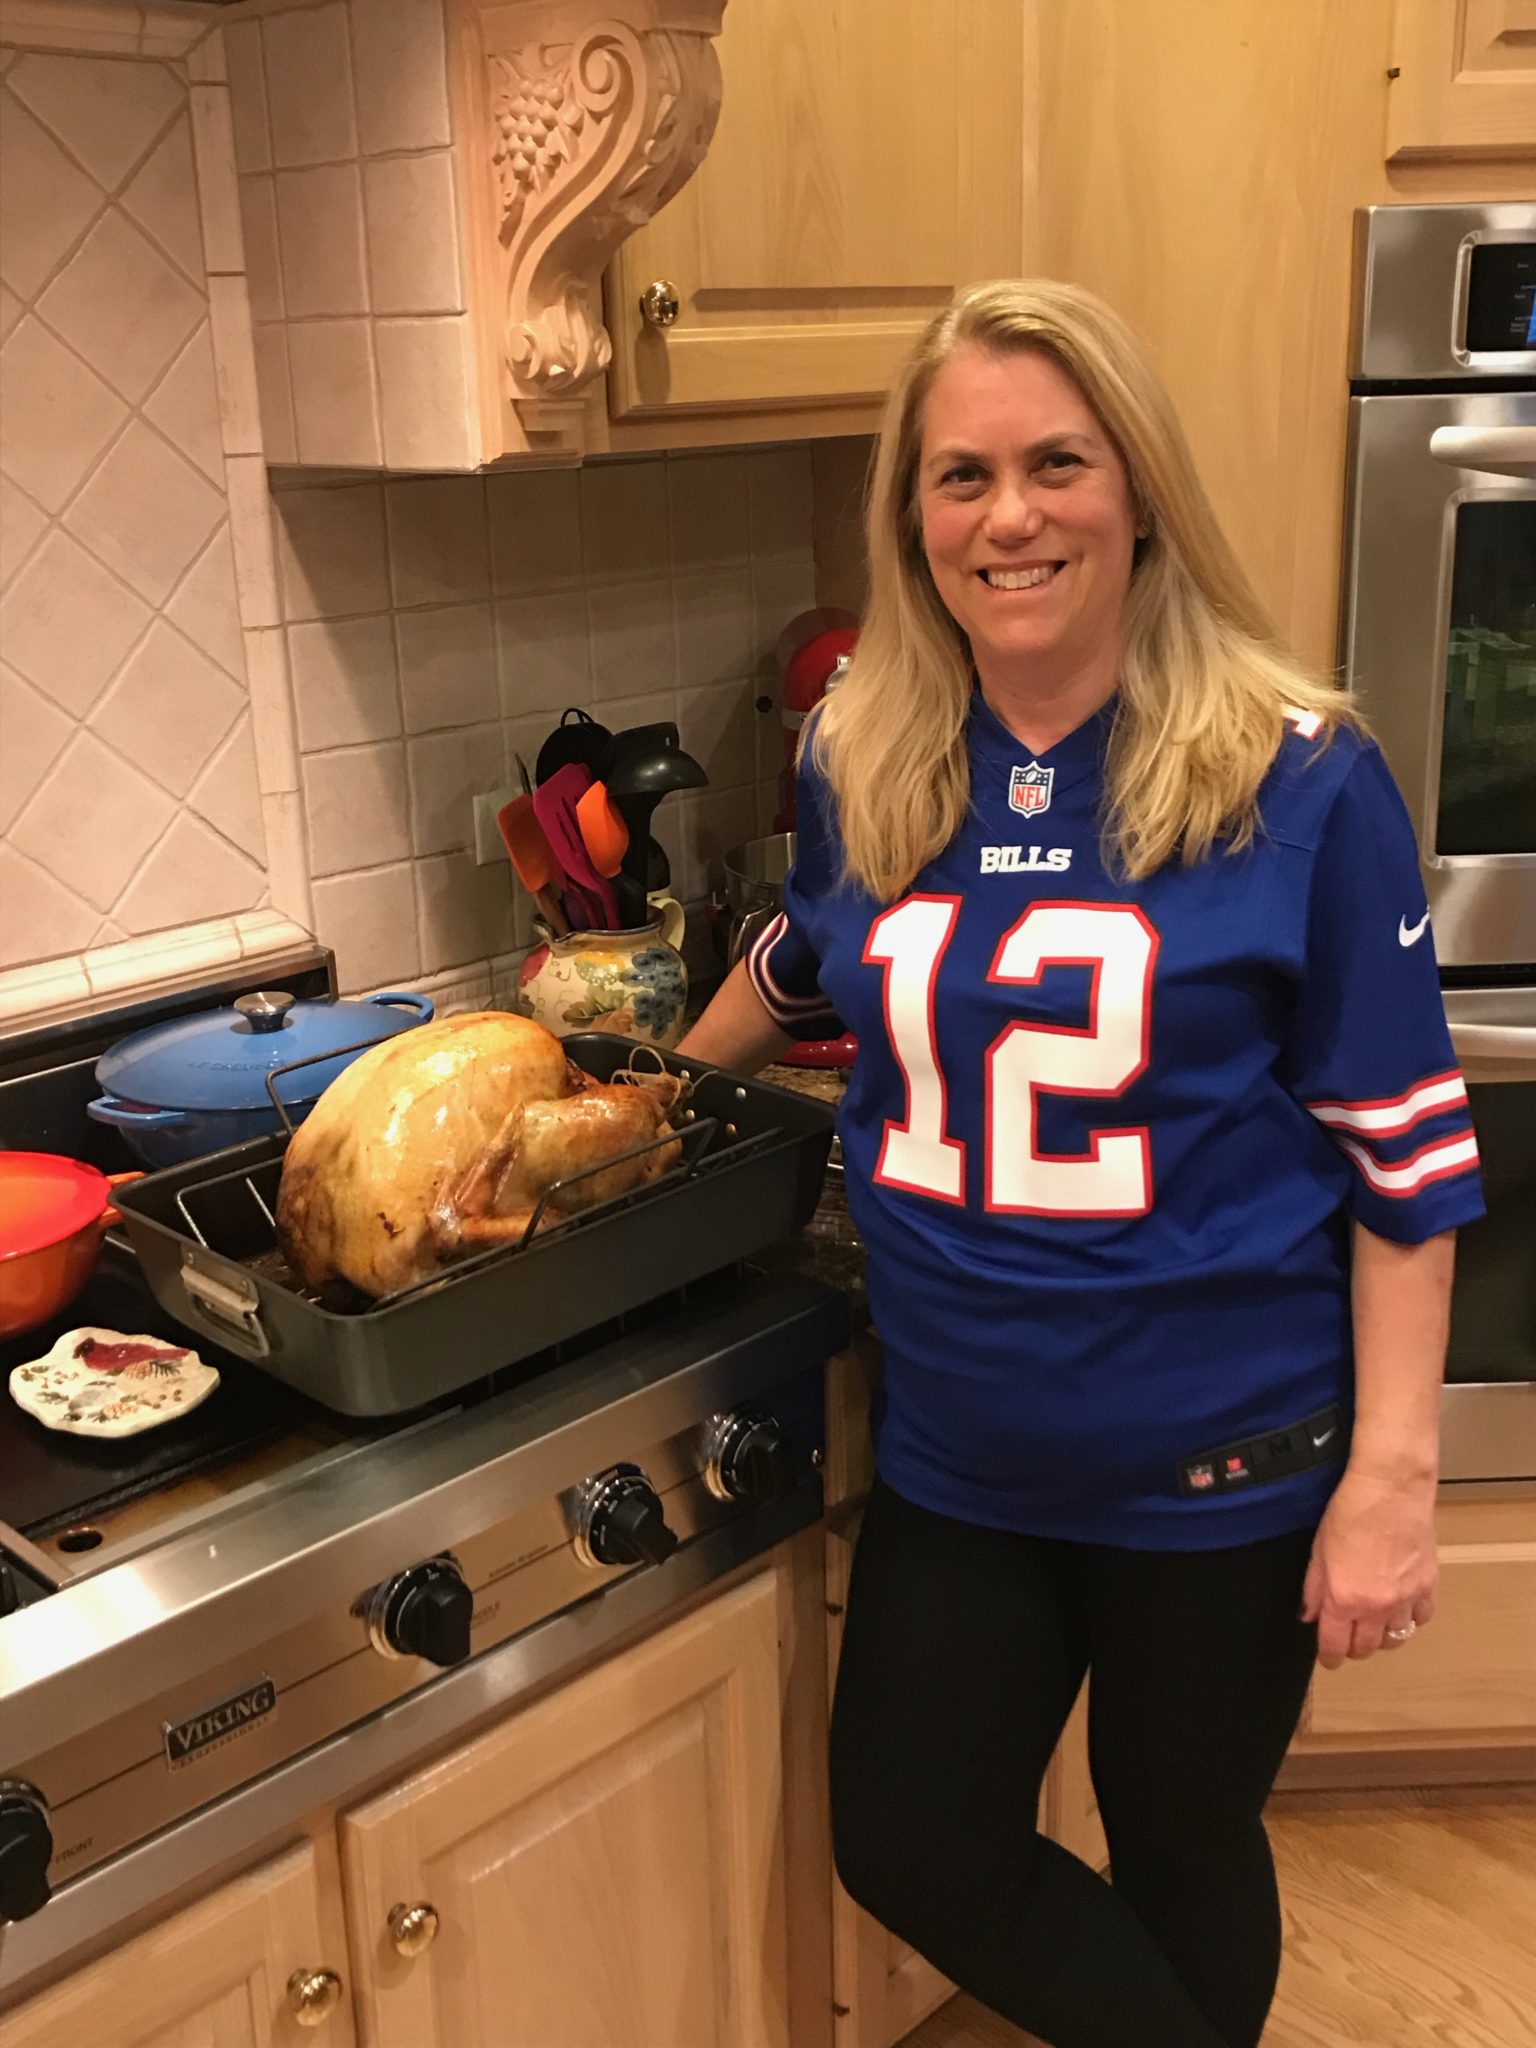
  • Then late afternoon, we’ll enjoy a delicious Thanksgiving spread. Turkey, gravy, stuffing, mashed potatoes, vegetable, rolls, cranberry sauce, and apple and pumpkin pie are on the menu. I usually make a 14-16 lb turkey no matter the number so I can get enough stuffing in the bird and guarantee leftovers. The leftovers never go to waste that’s for sure!
  • At the table, we started a new tradition a few years ago after my dad passed away suddenly. We light a candle to remind us of these who can’t be with us this year, for whatever reason. It’s a special moment when we light the Love candle, and even more so this year with so many in our family spread far and wide.

What’s going to be new this year?

  • We’ll be a little smaller than normal.
  • Shopping has been a little different. As the covid rates have gone up in recent weeks, I am making full use of curbside pickup and can personally vouch for Whole Foods, Target, Williams Sonoma (my source for chestnuts for the stuffing), and in our area, Jewel and Mariano’s grocery stores. I submit my order online and pick it up later in the day. They’ve really worked out the kinks since earlier in the spring
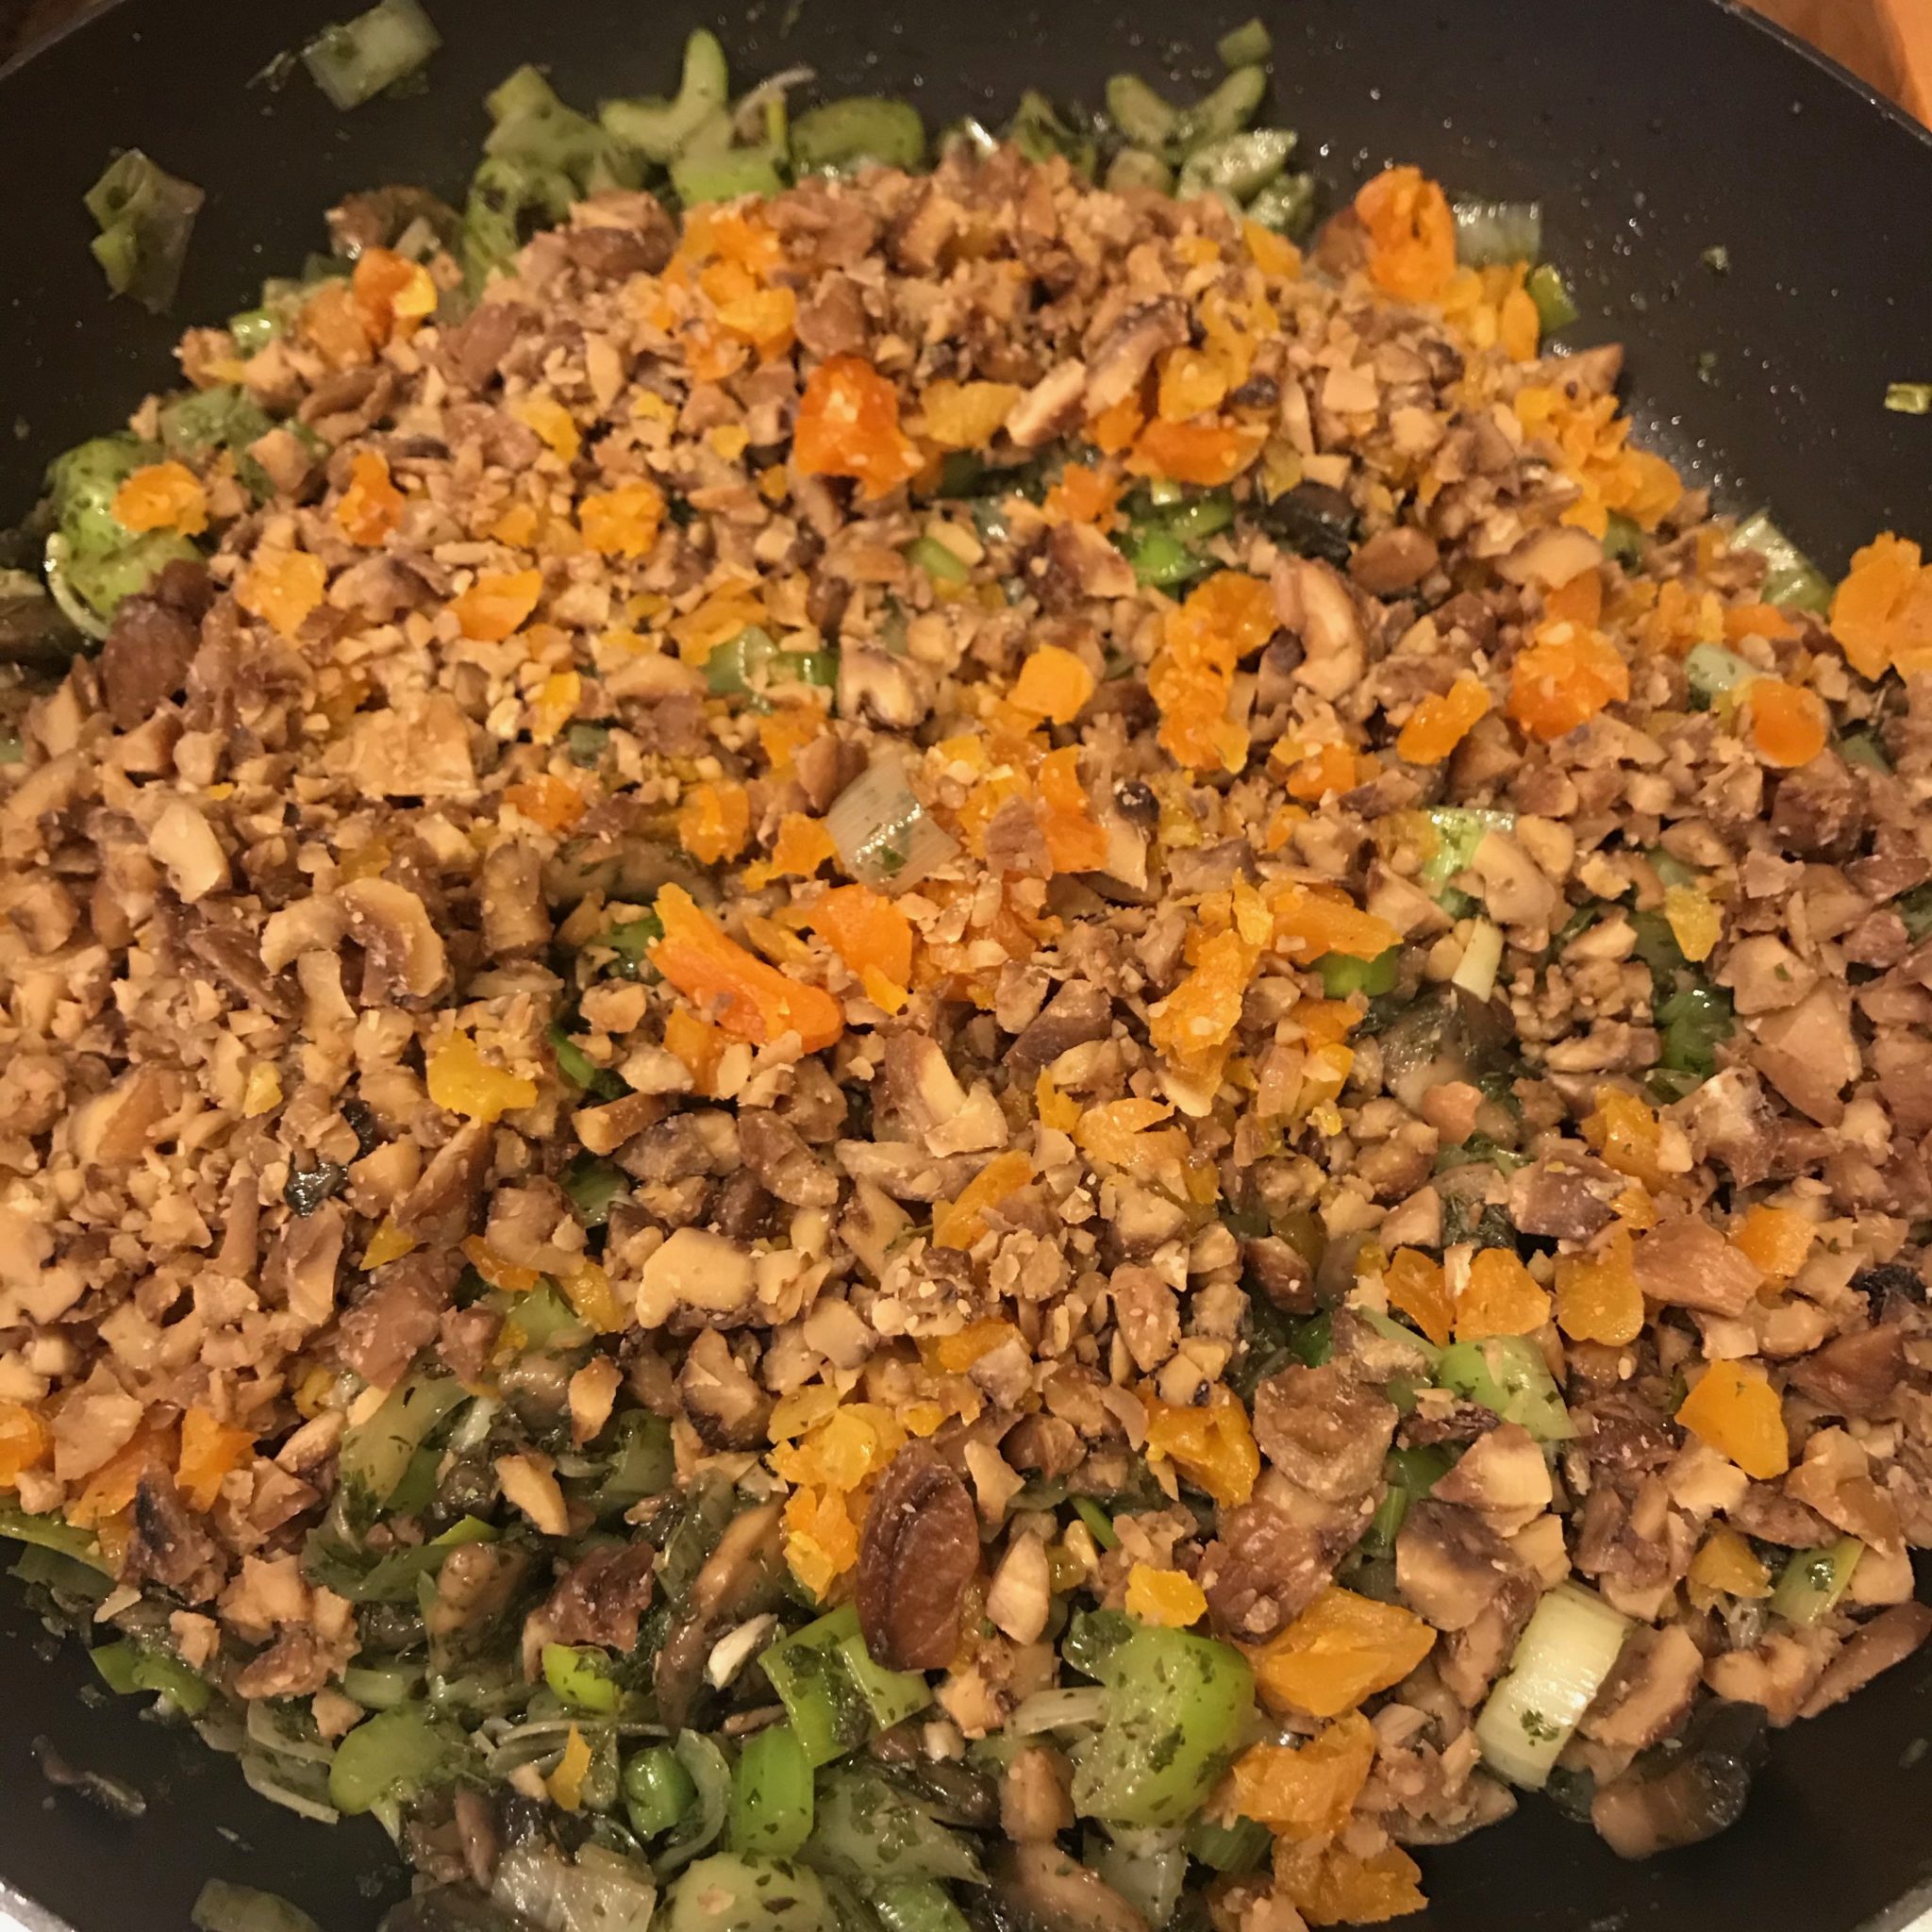
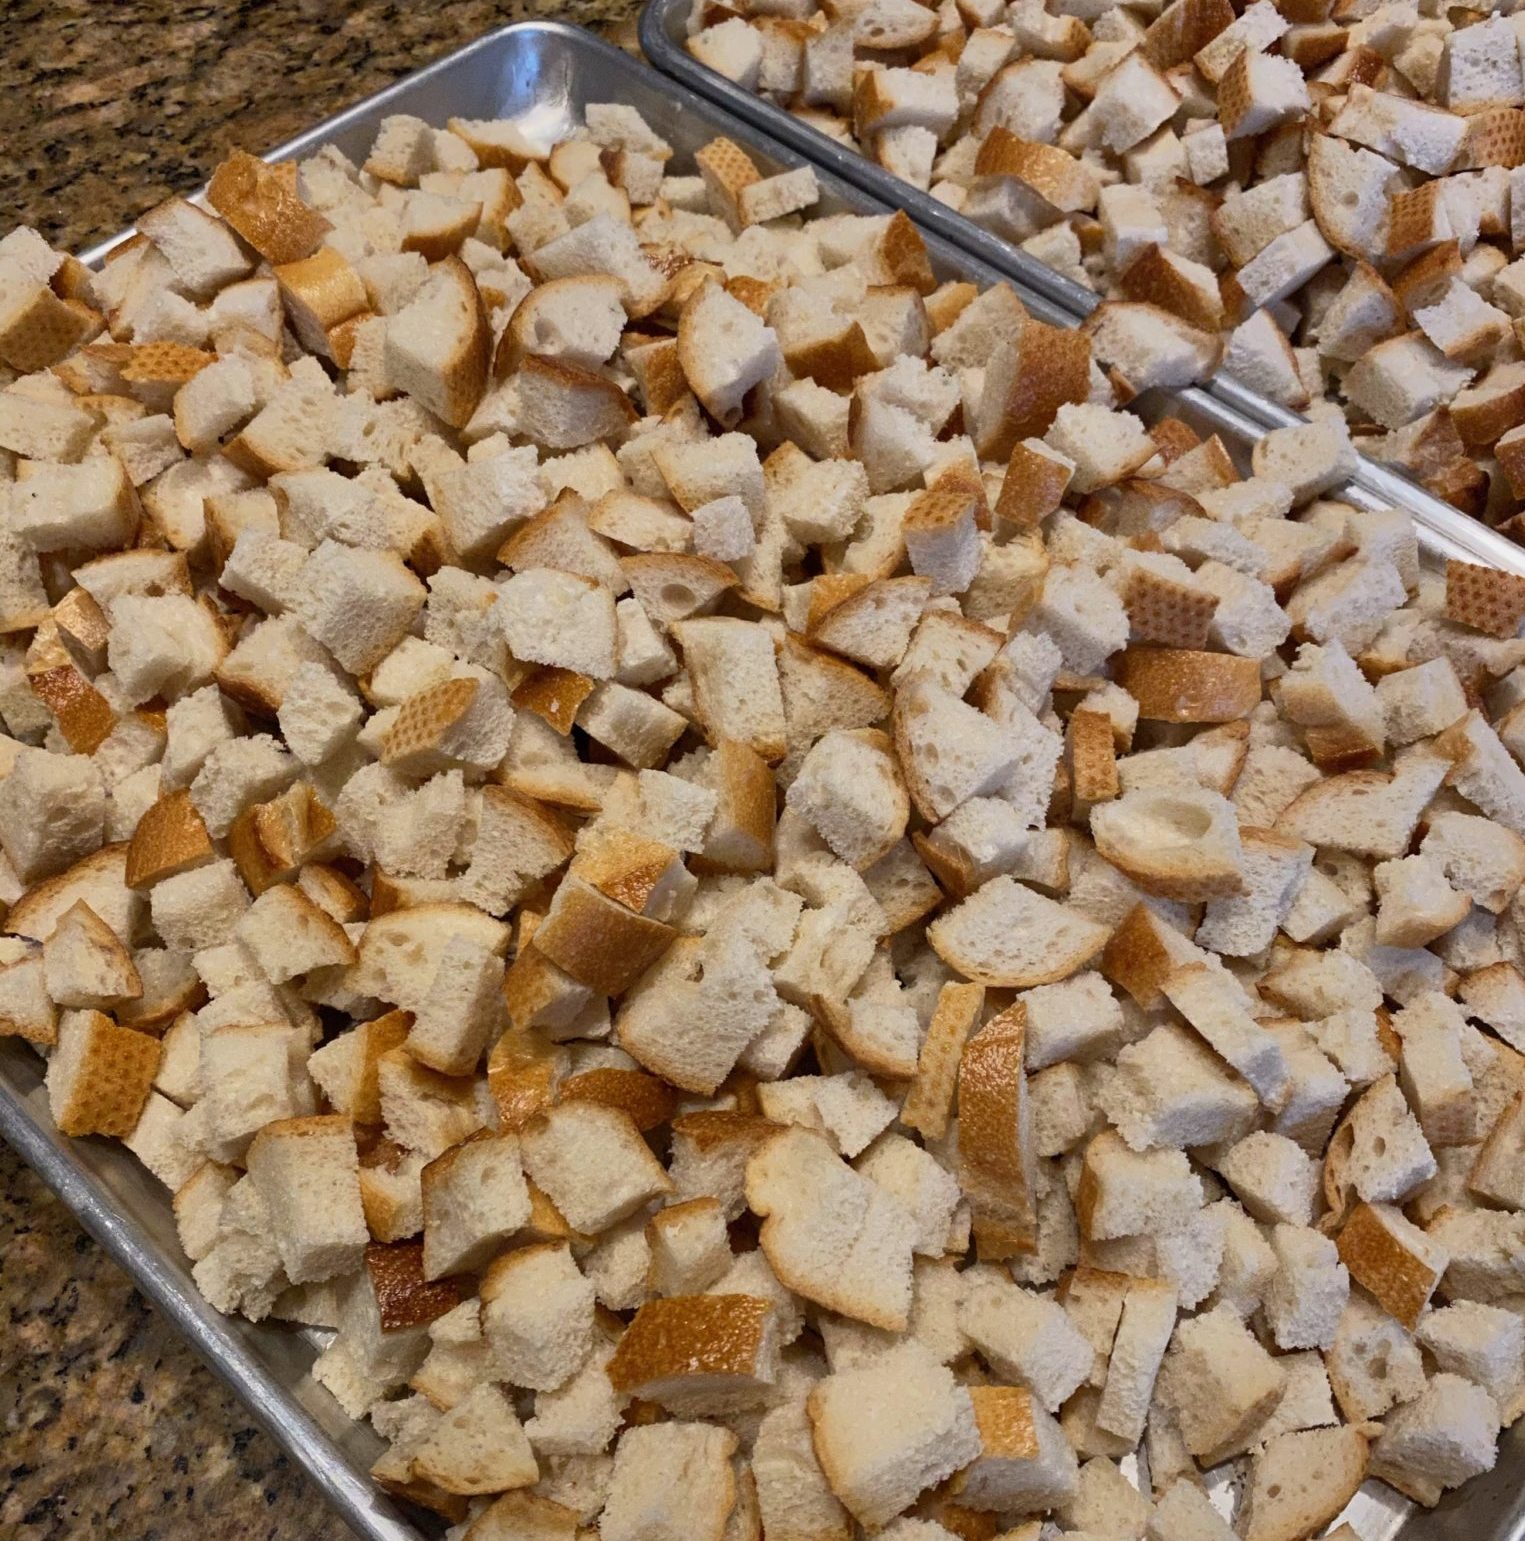
  • A group of my friends have put together a contact free, Thanksgiving Share-a-Dish. We all have picked one of our Thanksgiving favorites and will deliver a portion to everyone else’s homes on Wednesday. While for me making the whole meal is nothing new, I can see how this year’s meal prep could be daunting and unexciting when you’re used to guests bringing a dish to share. I’m super excited to try some of my friend’s favorites that have never made it onto my menu. You can only cook so much food for 3-5 people to eat. What am I sharing? My Leek, Apricot and Chestnut Stuffing (jump to recipe).
  • We’ll be spending time with family this year throughout the day through video streaming. Hopefully the internet doesn’t crash, but it’ll be nice for everyone to be able to spend some time together watching football, having snacks, or even joining us at the table.
  • I’m also planning to set up some fun games to play with family of all ages across all the miles. I’m thinking of Bingo, Trivia and a football pool.

Wishing you and yours a wonderful Thanksgiving however you are celebrating this year,
Stephi

Recipes mentioned above

Kale, Chive and Goat Cheese Recipe

[mv_create key=”2″ type=”recipe” title=”Kale, Chive and Goat Cheese Quiche” thumbnail=”http://stephigardens.com/wp-content/uploads/2020/11/IMG_9967-2-1-scaled.jpeg”]

Leek, Apricot and Chestnut Stuffing

[mv_create key=”1″ type=”recipe” title=”Leek, Apricot and Chestnut Stuffing” thumbnail=”http://stephigardens.com/wp-content/uploads/2020/11/IMG_9255-3-scaled.jpeg”]

Calvados Apple Cider Cocktail

[mv_create key=”3″ type=”recipe” title=”Calvados Apple Cider Cocktail” thumbnail=”http://stephigardens.com/wp-content/uploads/2020/11/IMG_6880-scaled.jpeg”]

I Love Raspberry Season! (and yes, you need to prune them)

About five years ago, I planted two varieties of raspberries, Heritage and Caroline, both everbearing types from Burpee. (My Raspberry and Strawberry Plants are Here!)

Standard Disclosure: This post contains affiliate links. I may receive a commission from purchases you make through the links in this post

Not knowing how they spread, I now have some combo of them both, or even possibly just one that was hardier. Who knows? In any case, they have finally matured and have been producing an abundance of delicious raspberries.

I’ve been very nervous to prune the plants for fear of killing them. Unfortunately that’s been known to happen to anyone who has grown raspberries, especially in northern gardens. But they’ve become quite unruly, and there’s a lot of dead canes.

Everbearing varieties produce fruit once in early fall on the tips of the one-year-old canes (primocanes) and the following summer on the lower part of the now second year canes (floricanes). I need to prune out the second year floricanes either after they produce fruit in late summer, or in March or early April. These plants are done and will produce no more fruit. New canes grow every year, so any healthy raspberry planting has a combination of both one- and two-year-old canes.

Sounds easy enough, but I’m always nervous pruning new plants.

Here’s a before picture. Truly a tangled mess of thorny canes.

In order to do the job, I need the right tools:

  • Garden pruners, I love my Felco F8 pruners,
  • A good pair of garden gloves. I started with my regular garden gloves and then went and got a good pair of thick work gloves. Too many thorns!

First I started by taking out any dead, broken, or diseased canes, as well as any canes that sprout up outside the row footprint.

Raspberries grow best in a 2-3 ft row, so prune away the suckers to keep them in their space.

Then look for anything that seems to have brown, peeling scaly bark and cut those to the ground.

Now how to decide from what is left what is a floricane and what is a primocane?

Floricanes will be brown or grayish in color, harder and more brittle in texture, and may have fruit remnants low on the canes. The floricanes should be pruned to the ground and removed. No need to leave any stubs, they are done.

Primocanes will look fresher and possibly green. The primocanes may also have remnants of fruit at their tips. Primocanes can either be left alone, or trimmed. I trimmed mine by pruning off the top 1/4 or so, to bring their height back to a manageable size. I also trimmed off any fruiting remains to clean them up.

Done! What a difference!

Now that we are in fall, and the fall harvest is huge, I can really see the “fruits of my labor” (sorry, couldn’t resist)

Time for some raspberry jam!!!

Some other raspberry tips:

For new raspberry plants, prune back the canes to 4 to 5 feet tall in late winter during the first couple of years after planting. This will ensure that the bush gets plenty of light, which is essential for fruit production and creating a healthy bush. It’s not recommended to cut all canes back to the ground in northern gardens with short growing seasons and early fall frosts. There’s just not enough time for the plants to put energy into both growing healthy canes and fruit.

Need to tie back your raspberry canes? I’ve found strips of torn sheets to work better than garden twine. After a short time, the twine breaks from rubbing against the thorns and needs to be replaced frequently.

One-crop summer-bearing type of raspberries can be pruned right after the summer harvest. Cut to the ground any canes that have fruited. These kinds of raspberries produce fruit on the second year canes, so once fruited they are done.

Spring 2020: Garden Roundup-Veggies

I’ve had a lot of time during this pandemic to plan and tend to this year’s garden. I can’t say I’ve minded this part, I’ve actually really enjoyed the time to get back to basics in the garden.

Like usual, I started a number of vegetables in the house from seeds and shopped for the rest at the local nursery (shout out to Vern Goers Greenhouse that was thankfully open, with appropriate restrictions of course).

We had a bad cold snap in early May, so I kept everything nice and cozy under grow-lights in the house and in the mini greenhouse on the porch.

I am so looking forward to a summer of fresh vegetables straight from the garden.

What did I grow this year from seeds in the house?

What seeds am I starting outside?

What plants did I buy?

  • Redarling Brussel Sprouts
  • Sun Gold Tomato
  • Early Girl Bush Tomato
  • Juliet Tomato
  • Sweet Million Cherry Tomato
  • San Marzano Tomato
  • California Wonder Sweet Pepper
  • North Star Sweet Pepper
  • Habanero Peppers
  • Kohlrabi

Here’s some of the seedlings I grew in the house, all ready to plant. Some I planted in one of the raised beds, others in my new fabric root bags.

What did I try new this year?

Tatsoi! I didn’t even know this was a thing until it popped up on an Instagram post by Baker Creek Heirloom Seeds. We’ve had to change up our diet a bit to eliminate high oxalate foods like rhubarb, spinach and swiss chard because of kidney stones. 🥺 So out of the garden they went. Instead, I am growing an abundance of kale (which I’m not a huge fan of but learning to like it), lettuce, microgreens, sprouts, brussel sprouts and this new tatsoi green.

According to Baker Creek Heirloom Seeds, “Tatsoi is nicknamed Vitamin Green, and rightfully so. This gourmet green is known as one of the richest sources of vitamin C and it is replete with other incredible vitamins, minerals, and health-promoting compounds! It’s super sweet and easy to love, with a mild and refreshing flavor. The low-growing rosettes are comprised of tiny, glossy spoon-shaped leaves that boast crisp and juicy mouth-feel.” As a bonus for us, it’s related to cabbage/mustard, so low in oxalates! I can’t wait to try it out.

What else is new?

Lots more fabric grow bags! I couldn’t really expand my gardens very easily, so went in a different direction. I bought a variety of sized bags from A.M. Leonard and GeoPot and a LOT of potting soil/compost/peat. Watch for a future post on this adventure. I have so much more garden space, I’m making another trip to the nursery!

One more thing…

My herb garden has always been on the north side of the house. right outside the side door. Very convenient. The herbs grew “fine”, but they really could have used more sun. I finally decided to move them since I had the time to think where they should go.

They are a little further away near the grill, but still convenient. Definitely will get a lot more sun. On either side are the coleus pots I plant every year. They add some pretty interest to the area and attract pollinators. I started then from seeds inside this year instead of buying them. Much less expensive and easier under the circumstances. But I think I should have started them earlier. They’re a little small right now, but with some sun and heat, they’ll take off.

How is your vegetable garden this year?

It’s Going to Be Cold Tonight!

May freeze warning, what to do??

It’s almost Mother’s Day and if you’re somewhere in the Midwest, mid-Atlantic or Northeast, you’re in for an unpleasant weather event the next couple of days. Brrr. Have we not dealt with enough this spring?

Hopefully, you’ve learned from past mistakes and haven’t planted those wonderful tender annuals and vegetables that all the garden centers already have out for purchase.

It’s always a good idea to know your growing zone, both your plant hardiness zone, based on the lowest expected winter temperatures, and your first and last frost dates. The spring frost date is what we are dealing with now. In my suburban Chicago location, based on Dave’s Garden’s info:

  • Almost certainly, you will receive frost from October 20 through April 17.
  • You are almost guaranteed that you will not get frost from May 24 through September 26.
  • Your frost-free growing season is around 155 days.

Right now we are in that in between time from mid April-Late May. I’ve learned that none of my seedlings leave the house for hardening off until close to Mother’s Day, about the middle of the in-between time.

If it does get too cold, plants that are outside and waiting to be planted can spend time in the winterized three-season porch. For the most tender plants they can go in the mini-greenhouse on the porch, or even in the house, if they need even more protection.

But what about all the perennials already leafing out and shrubs budding? Most spring plants will be ok. But if temperatures are predicted to be below 32ºF your more tender plants like geraniums, begonias, impatiens, peppers, and tomatoes need protecting!  A moderate freeze in the mid 20’s can be devastating to even more of your plants.

In my yard, I’m most worried about the hostas and early perennials that are pretty leafed out already, and flowering shrubs like the azaleas that haven’t flowered yet.

The magnolias and redbud are already in flower or done, so not so worried about them. But many others around the yard are just now coming into bloom.

If you know that the plants are likely to be damaged by an overnight frost, you need to cover them with a sheet, blanket, a frost blanket or even an overturned bucket.

garden frost
This is my mom Peggy’s yard in Northern Michigan when she got hit with a late freeze a few years ago.

By tenting the sheets or frost blanket over the garden, it creates a warm air pocket around the plants from the warmed soil. If it’s thought to be colder than a light frost, you can add a layer of plastic over the blanket to trap even more warm air (but never put plastic right on the plants).  Be sure to remove the coverings first thing in the morning before condensation starts to form on the inside.  If still cold enough, the moisture could freeze on the plants and cause additional harm.  An actual hard freeze (below 28 º) requires even more elaborate weather protection, or you may just need to sigh and start over.

Plants like hostas will survive the frost or freeze, but will cause frost “cracks” or even cause portions of the leaves turn white and wilt. Damaged leaves will not come back, so trim them off and new leaves will continue to fill in throughout the summer. If a lot of the plant is damaged, the plant should survive, it’ll just be smaller than normal.

Most perennial flowers can take a light frost with temps between 32-35º degrees. A hard freeze with temps of 28º or lower will most likely kill the flowers, but not the plants. If you have beautiful spring flowers in your garden and you hear a hard freeze below 28º is in the forecast, maybe it’s time to bring spring inside by cutting those flowers and making a beautiful spring bouquet..

Two more thoughts for tonight:

Garlic and Shallots–Garlic and shallots will be fine at these temperatures. The leaves may turn a little yellow, but the growing bulbs will be fine.

Rhubarb–Rhubarb will be fine, but you can cover if desired. Some of the stems and leaves may get frozen and turn mushy as they thaw. Just cut those unwanted leaves and/or stems away. First year, no more harvesting or cutting, second year and later, be gentle in your harvest this year if a lot of the plant was damaged.

Wishing you all good luck tonight 🤞🤞. What are you doing to protect your plants?

Photo credits: Stephi Gardens, Photos by Peggy and Photos by Steve

Sprouts!!

When I was a teenager, growing sprouts was all the rage. Then came an e. coli problem and they went away. My mom mentioned to me a few weeks back that she was growing sprouts (mostly for her chickens but that’s another story). I was a bit concerned based on my memories, but soon realized that growing sprouts was now safe and easier than ever to do.

It also couldn’t have been better timing with our Stay at Home situation right now. What’s better than some fresh sprouts on your salad, sandwich, or even scrambled eggs? A healthy, nutritious, tasty addition to almost everything!

I’ve been growing mine in mason jars with mesh lids. Here’s how:

Supplies:

And of course sprouting seeds!.

It’s extremely important that you use specifically labeled seeds for sprouting to prevent an e. coli infection. They’ll be listed as “sprouts”, “sprouting seeds” or “for sprouting”. They should also have a clear description of how the seeds have been tested for dangerous food-borne pathogens. I’ve bought my seeds from Botanical Interests and they have a clear safety explanation. They also mention that the seeds can be further disinfected if you desire. I haven’t done this, but it is an option.

Now you are ready…

Growing Your Sprouts:

  • In the wide mouth mason jar, place 1-2 tablespoons of seeds and cover with 4 inches of warm (not hot) water. Screw on the mesh screen and stainless lid.
  • Let sit overnight.
  • Drain the water through the mesh screen, rinse by adding more water, then drain again. Give it a good shaking to break apart the sprouts to rinse thoroughly
  • Place the jar, mesh screen down, on the sprouting stand in indirect sunlight. I put the stand in a cleaned plastic to go container to catch the water that drips.
  • Repeat the rinsing and draining 2x per day until sprouts are the size you want, which can take three-seven days depending on the seeds and what size sprouts you like.
  • Harvest your sprouts when they have two small leaves. Sometimes I’ll put them in a sunnier location for a day to green them up right before harvesting

Harvesting and storing your sprouts:

When sprouts are ready, you can eat them as is, or rinse them to remove any unsprouted seeds and hulls. To remove these crunchy bits, I first fill the opened jar with water and pour off any seeds and hulls that float up.

Then I use a mini colander to rinse the seeds and let the seeds and hulls rinse through.

I recommend using either a kitchen mesh strainer or the mesh jar insert to catch any seeds that may go down the drain. In a pinch a paper towel will work too.

Why not let them go down the drain? These seeds in the sink are bringing back memories of our hamster days. My daughter would clean the cage in her bathroom sink and eventually we had seedlings growing on the drain! I do not want that to happen again. So use a screen to be safe.

I let the sprouts dry for a while in the colander, clean kitchen towel, or on a produce drying towel.

I’ve had the most success storing them in the refrigerator in small Rubbermaid FreshWorks Produce Saver Containers. You want some air circulation to keep them fresh. I’ve had them stay fresh up to a week. If not looking fresh before a week, obviously toss them and make some more.

What are my favorites?

From Botanical Interests I’m loving all their sprout seeds. I just started a batch of China Rose Radish to add some zestiness to my favorite foods. The Sandwich and Salad blends are good all around mixes, and the broccoli sprouts actually smell like broccoli!

How do I use my sprouts? Adding to a salads is always easy and a great way to extend your lettuce right now when we can’t ship as often. They can also add great flavor to sandwiches, scrambled eggs (with feta cheese, yum), or whatever you want to add a little boost to.

Note: To stay safe, please remember to only use seeds marked for sprouts!

Milkweed for the Monarchs

In my last post, “Poster Child of Pollinators: Monarch Butterflies” I introduced you to the beautiful monarch butterflies that are a vital part of the ecosystem.

They are necessary for the reproduction of almost all flowering plants and for the pollination of about one-third of our food plants. But pollinators, including monarchs, are also in danger from many fronts. What can we do?

One easy way to help is to be sure your garden includes a wide variety of pollinator friendly plants that flower throughout the season.

In my northern zone 5b garden, some of my favorite perennials and shrubs are bee balm, phlox, coreopsis, coneflower, hostas, astilbe, lavender, allium,sedum, spireas, and viburnums.

Some annuals and herbs that are especially attractive are petunias, snapdragons, milkweed, dill, fennel, zinnias, cosmos, and lantana.

Try also whenever possible to plant native species and limit your use of pesticides and herbicides.

Monarch butterflies are unique in that for part of their life cycle they require milkweed. The monarch larval phase, better known as the caterpillar, eats only milkweed, so any disruption of milkweeds will affect monarch numbers.

You can buy milkweed seeds from a variety of sources. One of my favorites is Botanical Interests. Be sure to pick a species that is native to your area and follow the instructions. Milkweed can be a little tricky to grow and the seeds require stratification to germinate. Stratification is a scientific term for exposing the seeds to a period of damp, cold temperatures, like what happens in nature over the winter. This is followed by warming the seeds up to germinate. Botanical Interests has a great Milkweed Sow and Grow guide to help explain how to do this. You still have time, but you need to order seeds soon. You can also often find plants at some local nurseries a bit later in the spring. Or you can collect your own in the fall!

At our place in Door County, WI, I begin collecting the browning milkweed pods in the late fall and store them in a basket in the very cold, damp garage for the winter. This mimics the stratification process in nature.

In late spring, once the snow has melted, I open all the pods and separate the seeds from the white fluff as best as I can.

You can separate the seeds from the fluff by putting it all in a paper bag with some pennies and shake it up. Or just disperse the seeds with the fluff. Just be careful, the first year I did that I ended up seeding the gravel driveway with a lot of milkweed ☺️

With a mixture of seeds and fluff/seeds I am ready to put on my Mother Nature hat and spread the seeds in the field and roadside areas on our property and then wait.

I’ve greatly increased the number of milkweed plants on our property this way and made it much more attractive to the monarchs and other pollinators!

Poster Child of Pollinators: Monarch Butterflies

From the time I started this post to finally getting back to finish it, a lot has happened. Who would have imagined where we are today, outside of a fictional story. I hope this post is finding you safe and well in this time of uncharted territory. We are doing ok. As are many families, we are dealing with the logistics of the new normal. We worry about our kids living around the country (including NYC) and their heath and job security, our moms and family scattered around the country, and a remote learning situation for the one still in grad school. It is stressful, but we are managing. Hopefully you and your family are too.

Thankfully since going out isn’t an option for the foreseeable future, I do like to cook and am using this as an opportunity to see what treasures my freezer holds.

In the next couple of weeks, I’m planning on posting about what we’re doing to keep busy, and how I’m getting the garden ready for spring. Spring sure can’t come fast enough for sure.  And please Stay Home, it’s really important.

On to something more cheerful! Who doesn’t love a butterfly? From the first of the season, to the summer caterpillars, to the late summer ones flitting on zinnias, they just bring a smile to my face.

But, while they entertain us with their beauty, they also serve a vital function in nature. Along with bees, wasps, moths, flies, beetles and even birds and bats, they are necessary for the reproduction of almost all flowering plants and for the pollination of about one-third of our food plants.

Monarchs may not be the most efficient pollinator species, but they are generally considered the poster child for all pollinators. They are amazing, inspiring creatures that are able bring people together to protect pollinators. Creating habitat for monarchs, including milkweed and nectar sources, aids in their survival and benefits many other important pollinator species. 

Monarchs live mainly in prairies, meadows, grasslands and along roadsides in North America. Most monarchs will live only a few weeks, but a second wave emerges in late summer and early fall. These fall butterflies live for eight or nine months and accomplish an amazing, lengthy migration to California and Central Mexico. There they spend the winter before coming back up north in the spring. 

Monarchs, like other butterflies and moths, undergo complete metamorphosis, meaning that they have an egg, larva (caterpillar), pupa (chrysalis), and adult stage. Milkweed plants play a crucial role in the life cycle of monarchs. 

Monarch life cycle
Photo credit: Monarch Joint Venture

Adult monarchs will feed a variety of plants. But female monarchs will only lay eggs on milkweed, which makes sense since the caterpillars will only eat milkweed leaves. Milkweed plants are the the sole food source for the growing caterpillar and it eats almost constantly for about two weeks.

When full grown, the caterpillar will crawl away from the milkweed to a safe location where it forms a silk pad and hangs upside down in a J shape. It sheds its skin one last time to expose the bright green chrysalis. In 8 to 15 days, an adult monarch emerges.

Monarchs and other pollinators are under threats to their survival, and their loss could negatively impact our agricultural food sources and natural plant ecosystems.

  • There’s been a loss of habitat, specifically loss of milkweed in their summer breeding locations and their general habitat in their over-wintering locations.
  • Climate changes can impacting migratory routes and habitat conditions.
  • Insecticides and herbicides have caused widespread loss of butterflies and milkweed leading to steep declines in their numbers.
  • Especially toxic is the neonicotinoids, which are widely used on farms and urban landscapes. While these insecticides are thought to be minimally harmful to humans and other mammals is minimal, they are extremely toxic to arthropods, including butterflies and bees.

So how can we help? Butterfly gardens, full of attractive flowers and milkweed can make a huge difference.

In my next post, look for how I plant wild milkweed to create habitat for the monarchs.

In the meantime, here’s me with some fun butterfly murals at the University of Michigan and the Hands On Art Center in Door Co , WI ! I need to keep my eyes open for more.

Thanks to my mom Peggy, for her great photos of the monarchs. Haven’t used her pictures in a while, but they are always so much better than mine ❤️❤️ 🦋

23rd Annual Great Backyard Bird Count

It’s that time of year again! The 23rd Annual Great Backyard Bird Count (GBBC) is this weekend, Friday, February 14, through Monday, February 19, 2020.

During this weekend, volunteers from around the world count the birds they see for at least 15 minutes, on one or more days of the count and then enter their checklists at birdcount.org. It can be as simple as looking out your window, or going out to your favorite birding spot and report on what you see.

White-breasted nuthatch at my new Squirrel Buster Peanut + feeder from Brome. Filled with shelled peanuts it’s a great feeder for attracting nuthatches and woodpeckers.

Why does this matter?

There was a recent study in the journal Science last fall that described the decline in the overall number of North American birds by 29% since 1970. Birds also face a number of issues that certainly could affect their future numbers. Citizen science projects like the GBBC give scientists at the Cornell Lab of Ornithology and the National Audubon Society valuable information on where the birds are, how their numbers might be changing overall or regionally, and how they may be adjusting to new habitats. You can learn more about the GBBC at https://gbbc.birdcount.org.

Wondering what the #1 reported bird is in the U.S.?

Most years it’s been the Northern Cardinal, a favorite at my feeders. I have this Squirrel Buster Standard Squirrel-proof Bird Feeder from Brome with perches perfect for cardinals right outside the kitchen window. I fill it with striped sunflower seeds which have a thicker shell than black-oiled sunflower seeds. House sparrows and house finches can’t really eat them, but are just fine for the cardinals. Makes dishwashing much more entertaining watching these beautiful birds.

What did I report this morning in my 15 min of watching my feeders in the backyard?

  • 1 Northern Cardinal (female)
  • 1 White-breasted nuthatch
  • 3 Black-capped chickadees
  • 2 Juncoes
  • 6 House sparrows
  • 4 House finches
  • 1 Downy woodpecker
  • 1 squirrel – no, I didn’t really report it, but it was there eating the crumbs off the ground so I’ll count it.

Too bad there wasn’t anything unusual today, but happy to have anything in addition to the ever present and obnoxious house sparrows and house finches.

Need help identifying what you see? Check out these mobile apps, these online resources, or order my favorite bird book for beginner to intermediate birders, Birds of North America: A Guide to Field Identification.

Interested in what everyone else is seeing? On the GBBC website you can explore real-time maps and charts that show what others are reporting.  Be sure to check out the Explore a Region tool to see what everyone else is seeing in your area. Want to have your own checklist specific to your area? Check this tool out.

I did my part!

You can get your own certificate, just follow this link.

Want to help count birds all year round? You can keep counting throughout the year with eBird, which uses the same system as the Great Backyard Bird Count to collect, store, and display data any time, all the time. I love this tool to see what birds others are seeing (and where) when I’m out and about.

Happy Birding! Hope you see something interesting, but even if you don’t, know you’ve made a difference for science. Let me know what you saw this weekend!

BTW, these Brome feeders really do keep out the squirrels! This guy tried a few times and has since given up.

Rear Garden Refresh

Along the back fence line we had three big spruces that afforded us privacy from the rear neighbors. But age, disease, weather and water were not their friend. After one fell down and the second came perilously close to falling down, we ended taking them out April. My previous posts, “Another Tree Toppled” and “Spruce Down“, tell the whole sad story.

They had been on the decline for a while, but it was still a big loss to have them come down.

But it gave me a chance to rethink what we’d like to have there. Because of the wetness of the swale area and widespread spruce Cytospora canker, it was not an option to replant more spruce. Arborvitae make a great privacy hedge, would also not do well in that location so I had to go in a different direction.

One of my complaints about many of the shrubs we have is that they have to be pruned yearly to be appropriate for the space.

Here was a chance to create a hedge of shrubs that could be allowed to grow naturally. It’d eventually be dense enough to provide privacy in the summer and a distraction in the winter.

What to plant? I knew I needed Zone 5 hardiness and the growing conditions weren’t ideal for many shrubs, so I settled on viburnums as the main plantings. There’s a large selection of varieties, each with different flowering patterns, fall colors and sizes. I then included a couple of hydrangeas to add some floral interest in the front.

Interesting fact about planting Viburnum dentatums, like I planned, is that they are not self pollinating. They need to have a different cultivar planted nearby with a similar flowering time to have adequate pollination and berry production. I didn’t know this before researching this new bed, and it explains why my other viburnums never really seemed to set many berries.

We planted:

(2) Chicago Lustre® Arrowwood Viburnum (Viburnum dentatum ‘Synnestvedt’) These large viburnums will grow 10′ to 12′ in height with an 8′ to 10′ spread, has glossy foliage, produces creamy white flowers in mid- to late June and are highly attractive to birds for food and shelter. The fall berries are dark metallic blue and the leaves turn a mild purple-red. This viburnum is one of the Chicagoland Grows® varieties

(2) Blue Muffin™ Arrowwood Viburnum (Viburnum dentatum ‘Christom’) This viburnum is a more compact variety,  growing 5 to 7 feet high and 6 to 8 feet wide. It has medium green foliage, showy white flowers in mid-late June and turns orange to red in the fall. The abundant berries are a showy bright blue and a favorite of birds.

(3) Vanilla Strawberry Panicle Hydrangea (Hydrangeapaniculata ‘Renhy’ Vanilla Strawberry) This hydrangea grows 6 to 8 ft high and 4-5 ft wide and flowers as beautifully as the name sounds. The large flowery panicles (7” by 5”) develop in mid-summer, beginning white and finally maturing late summer to pinkish-red. The strawberry red flower color typically lasts for 3-4 weeks prior to flowers turning brown in the fall.

And what a beautiful show! Especially when the flowers match the sky.

In addition to the new plantings, there was an existing Bottlebrush Buckeye and Sargent Crab, which I decided were nice enough specimens to keep. The bottlebrush buckeye is a wide-spreading plant, growing 8 to 12 feet high and 12 to 15 feet wide. It blooms in early July, producing interesting long fluffy white flower clusters. This plant had already been moved once because it wasn’t in an appropriate space for it, so I hope it’s happier in this new location.

The Sargent Crab is a 6 to 10 foot dwarf crabapple. In spring, pink buds open to a profusion of fragrant, white flower clusters. This tree has also been moved a couple of times and settled into this location about 10 years ago. It’s been a very hardy specimen, and the berries seem to attract Cedar Waxwings to my backyard. That makes it a keeper!

I purposefully didn’t overdo the number of shrubs I planted.

In the past, I’ve been advised to plant too many plants that look great in a year or two, only to have to remove them a few years later because of overcrowding. Very wasteful. So this time I’ll be patient and have a healthy shrub border in a few years. In the meantime, I’ll enjoy the interesting colors and textures and fill in the spaces with some annuals.

I may have also added a few interesting daylilies even though I swore I was done buying any more. But how could I have passed up planting a VT Spirit Daylily (Hemerocallis VT Spirit), to celebrate one of my boys graduating this year??? Go Hokies 😉

Have you had a chance you redo an entire garden? How did it turn out?

Happy New Year 2020: A Look Back To 2019

Happy New Year’s from my house to yours!

2019 was in “interesting” year at my house.

The Good

It had lots of excitement, like being picked as one of Burpee Home Gardens 2019 Gardeners of the Year!

I tried a bunch of new plants in the garden.

We took some wonderful vacations.

But, most exciting was proudly watching my twin boys graduate from college–Go Hokies and Go Blue!!

I’ll be playing catch up writing about all these experiences this winter as the garden goes into hibernation for a few months!

The Bad

But all things don’t always go smoothly and aren’t all great. I kept up with the blog as best as I could this year, but as I mentioned earlier, I was diagnosed with stage 1 breast cancer in March. That took much longer to deal with than I expected, but I am looking forward to putting this behind me. I feel really lucky that it was caught early, but I still had to endure a lumpectomy, radiation, physical therapy and now hormone therapy (but no chemo, phew). I also feel really lucky to have had my family and so many friends, near and far, around me. All your help, positive messages and meals were invaluable!

I did panic a bit over how I was going to be the July BHG 2019 Gardener of the Month and undergo cancer treatment. But in reality, that push to keep me in the garden proved to be so helpful. Keeping active despite everything else going on really helped keep me distracted and maintain a positive outlook. That peacefulness and excitement I feel working outside in the garden, gave my mind and body some time to heal from the demands of treatment. Maybe things weren’t ideal this year (or less ideal than usual), but with help from my husband and my very trusted landscaper who listened carefully to all my instructions, I was able to keep up with the gardens and enjoy bloom and harvest time.

There’s a lot of evidence that working in a garden, or just enjoying nature, works wonders for the healing process. I have to agree.

We also sadly said goodbye to our Daisy in October at the very old age of 16. She’s been with us since the boys were in 1st grade, so her absence is greatly felt. Miss you, pretty girl ❤️❤️

So after all that, here’s hoping that 2020 will be a wonderful, healthy and happy one for all of us ❤️❤️

Looking forward to getting back to writing!

One more thing–Here’s my PSA–get your yearly mammograms, they save lives! Also, check out the National Air Quality Assessment map to see if unbeknownst to you, you’re sitting under a toxic cloud from nearby industry. My community fought back and we got the ethylene oxide spewing Sterigenics closed! Visit Stop Sterigenics for more information.